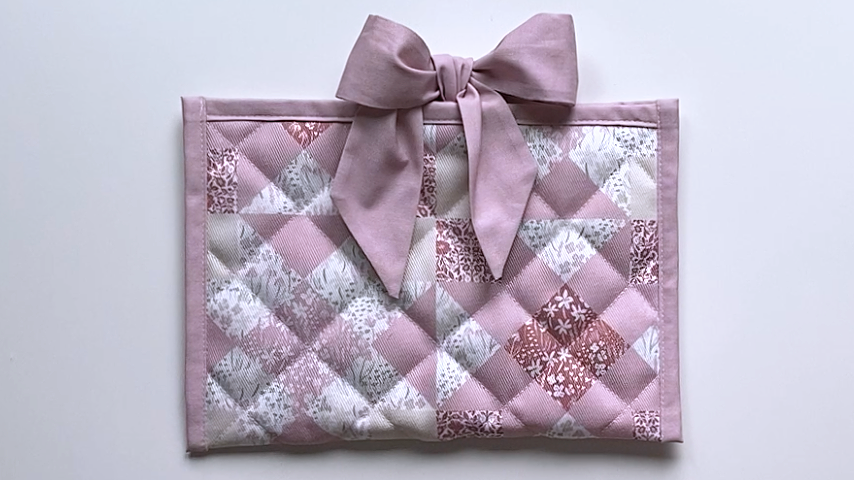
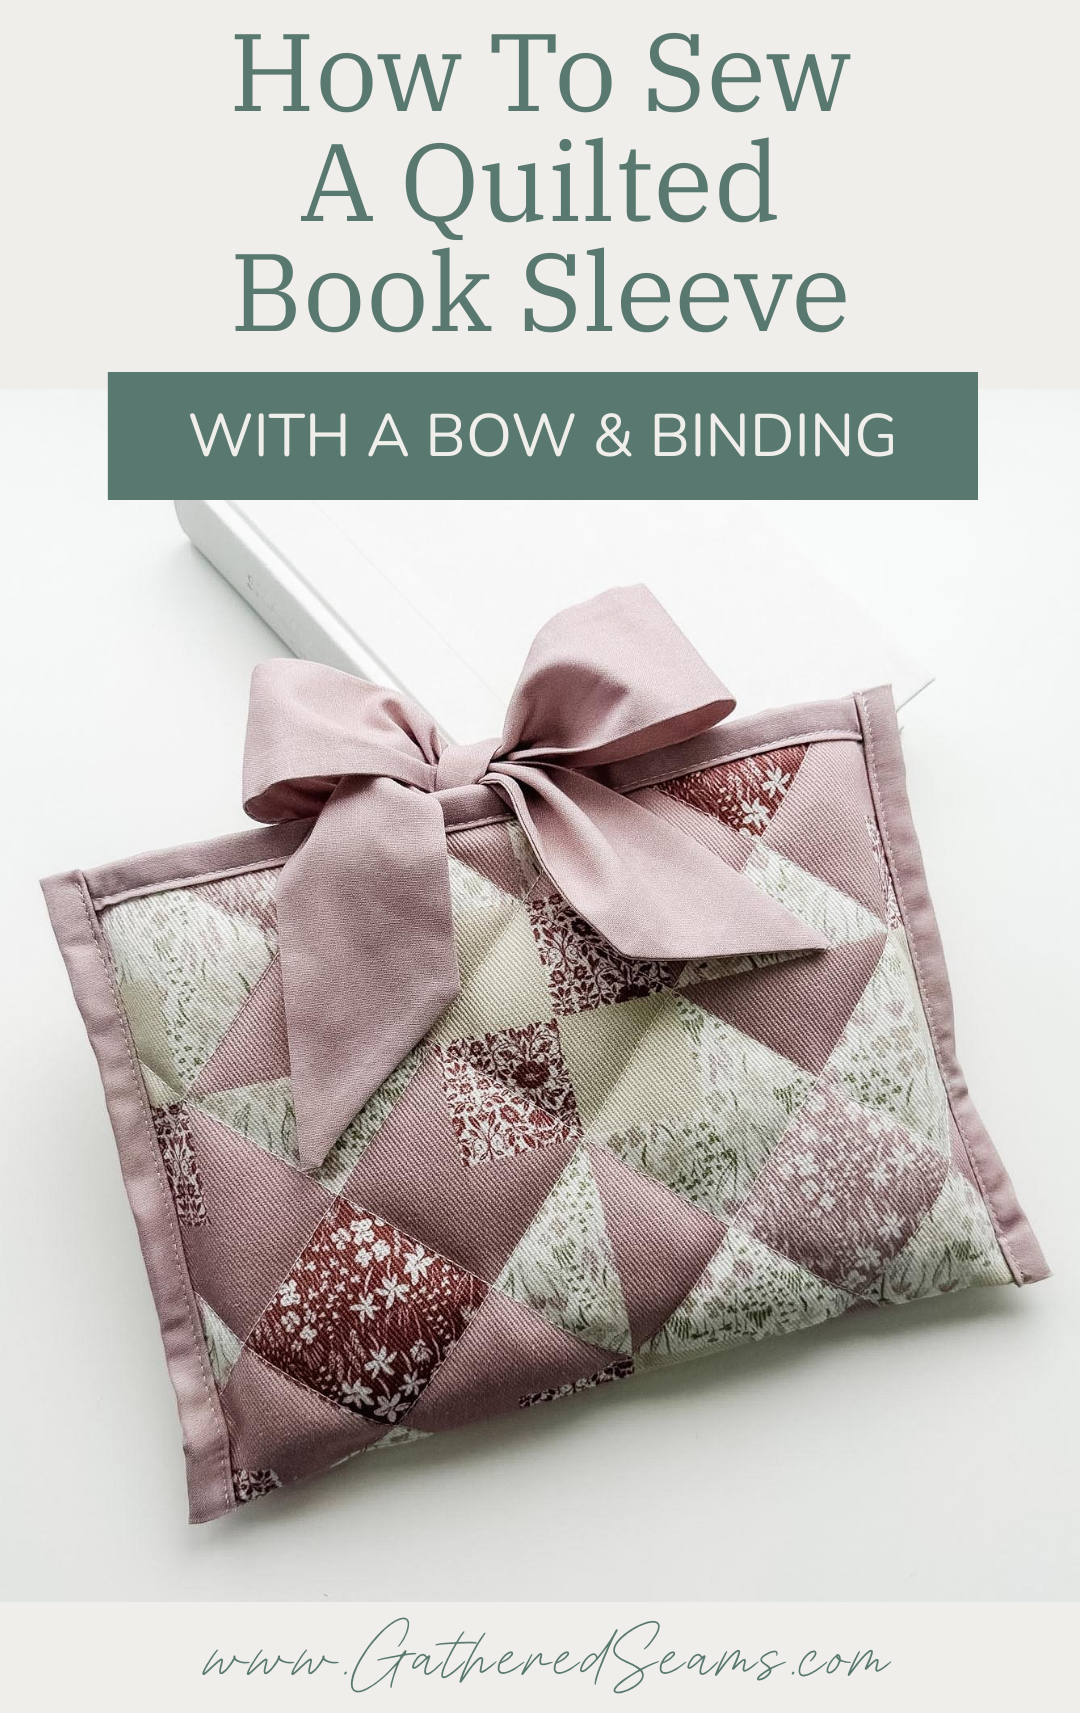
How To Sew A Quilted Book Sleeve w/ Binding
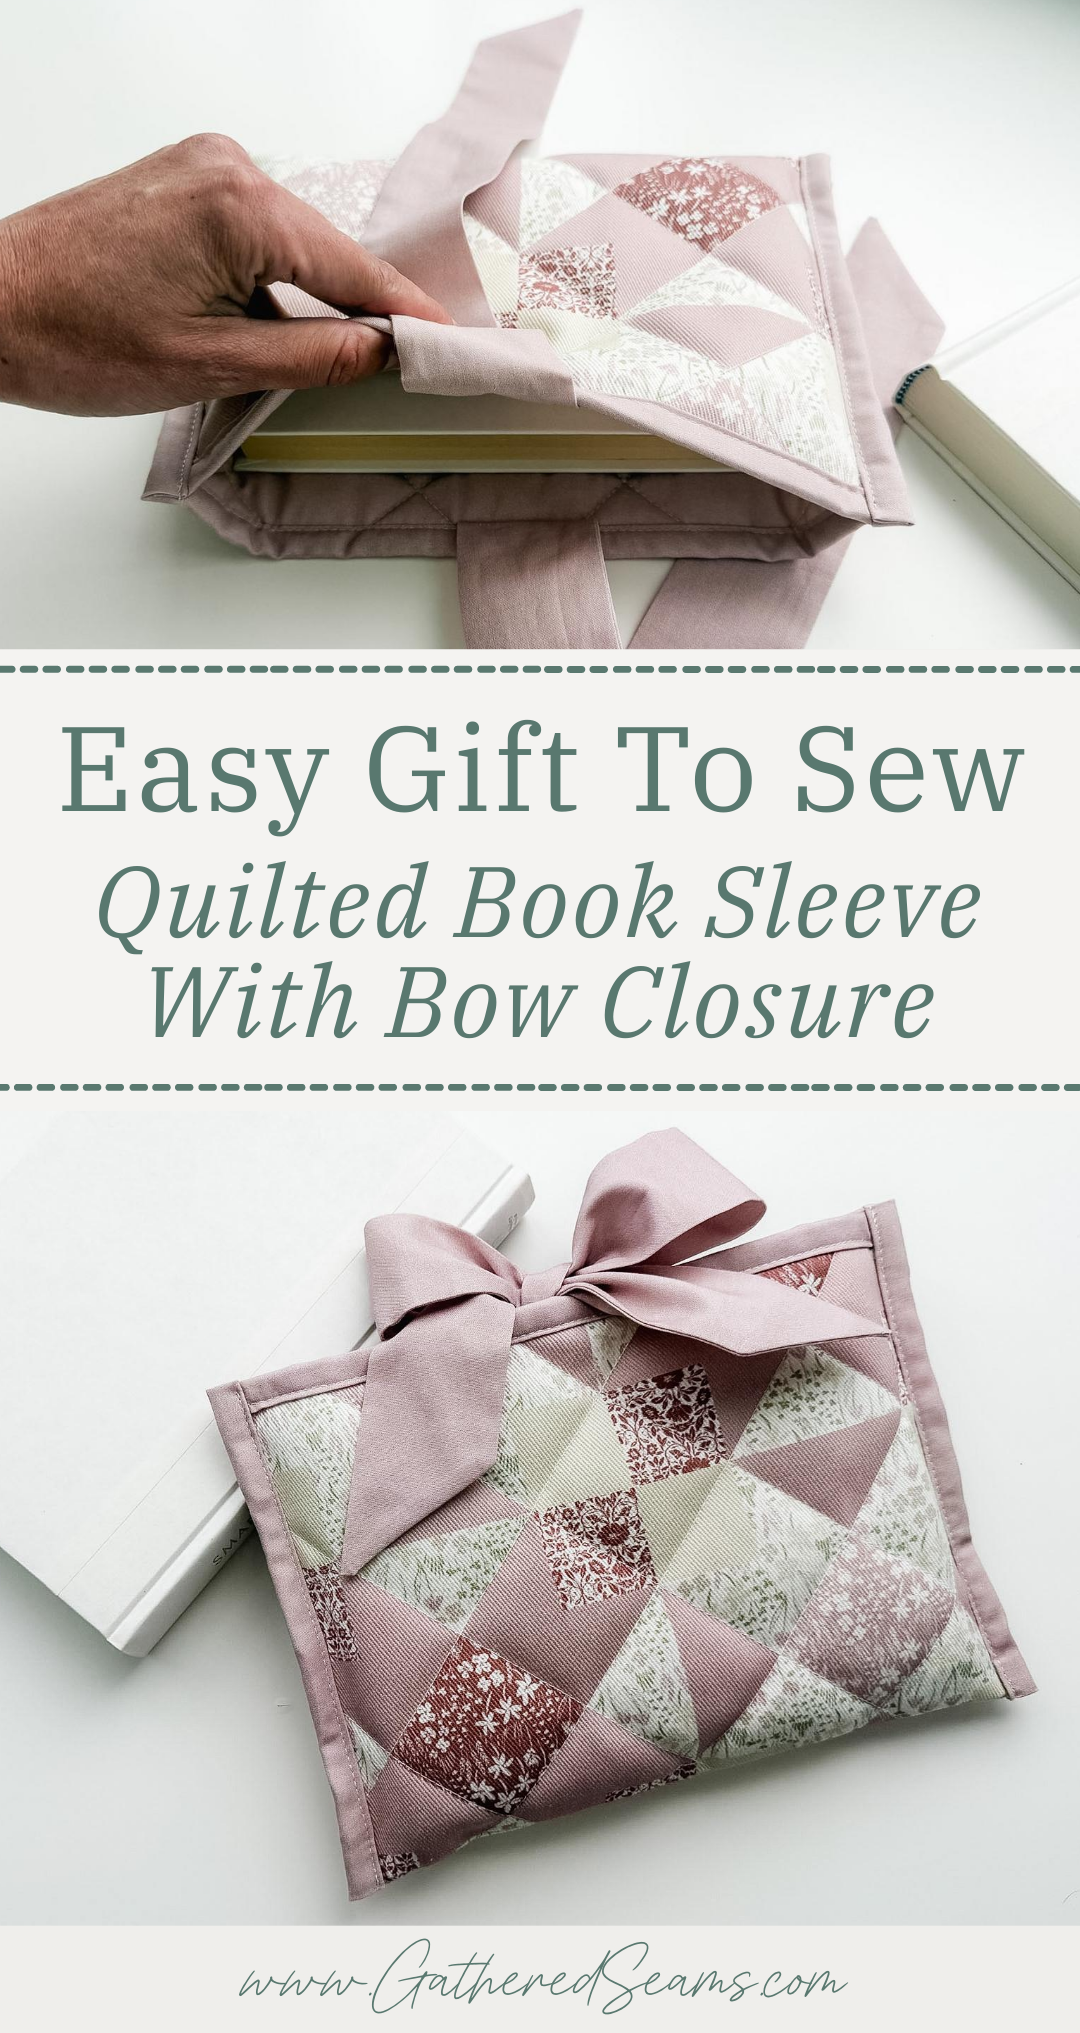
A quilted book sleeve will protect your favorite books from getting damaged when they’re in a bigger bag with other items. If you like your books in pristine condition, no bent corners or torn pages, and you like to have a book in your bag at all times, this is a great sewing project for you.
The quilting gives it a cozy feel while the bow adds a feminine touch.
If you don’t love the bow closure, you could add a snap at the top of the opening, or an elastic loop on one side and a button on the other (for the elastic to loop around).
The finished interior size is 10″ x 7.5″.
It fits snuggly around my book that is about 6″ wide 9″ tall and 1″ thick.
It would be simple to add an inch or two to the width and height of these pattern pieces so your book sleeve fits bigger books.
This simple sewing project would make a thoughtful gift for a book lover.
Other items to add to the gift
If you’re sewing this quilted book sleeve as a gift, here are a few other items you could add to bulk up the gift.
To sew:
- Bookmark
- Reading glasses case
- Laptop sleeve
- Pencil case
- Tote bag
- Notebook cover
- Relaxation items (to cuddle up with while reading)
- Hot water bottle cover
- Rice heating pad
- Slippers
To buy:
- Your favorite book
- Tea/coffee/mug (to enjoy while reading)
- Cozy blanket for reading
- Candle to burn while reading
Materials
As an Amazon Associate, I earn from qualifying purchases (see full disclosure here).
- Outer material (I used a dogwood denim in a “cheater quilt” pattern, found here)
- Lining & bow material (I used a quilting cotton, found here)
- Batting (I used one layer of this one)
- 1/2” double-fold binding or bias tape (2” wide when unfolded) – here’s how to make your own: How To Make Bias Tape
- Thread
Tools
- Sewing machine
- Walking foot (highly recommended if you’re sewing quilting stitches. This is the universal one I purchased for my Baby Lock, which is a different machine than what’s shown in the photos)
- Hera marker/point turner (for marking quilting lines and pushing out corners)(this is the one I use)
- Ruler
- Clips
- Temporary fabric marker (these are the ones I use)
- Scissors
- Iron
Steps to sew a quilted book sleeve with a bow (& binding)
Step 1
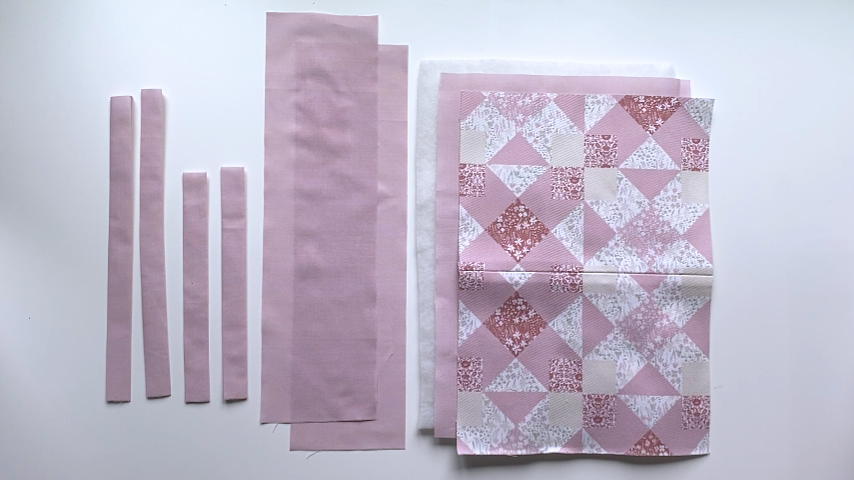
Cut out your:
- Outer fabric
- Lining fabric
- Batting
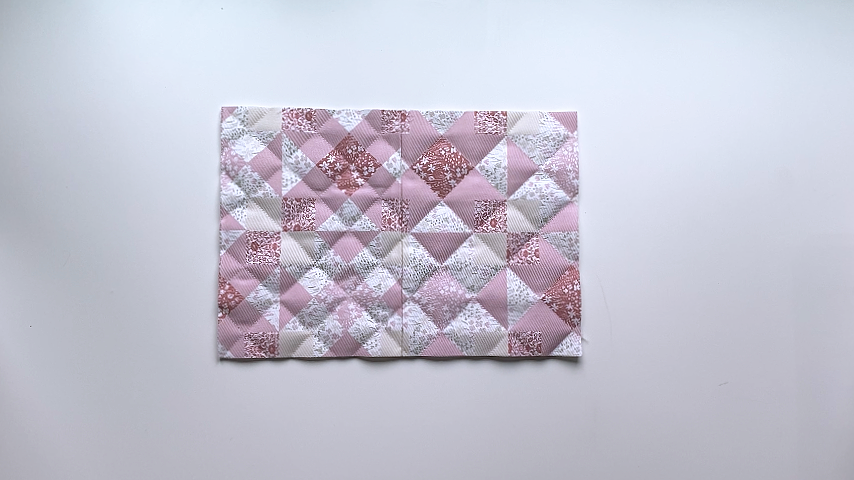
If you plan to add quilting stitches, cut each piece to about 16-1/2″ x 11-1/2″, then cut it to 16″ x 11″ once you complete the quilting stitches (layers will shift when you add quilting stitches).
If you’re not adding quilting stitches, cut your outer fabric, lining, and batting to 16″ x 11″.
*Please be sure to adjust the size of your fabric and batting to suit the size of book you tend to carry. You must account for the depth/thickness of a book, as well as the padding and seam allowances. As mentioned, the book sleeve I created using these dimensions ended up snuggly fitting a book that is 6″(w) x 9″(t) x 1″(d).
You will also need to cut:
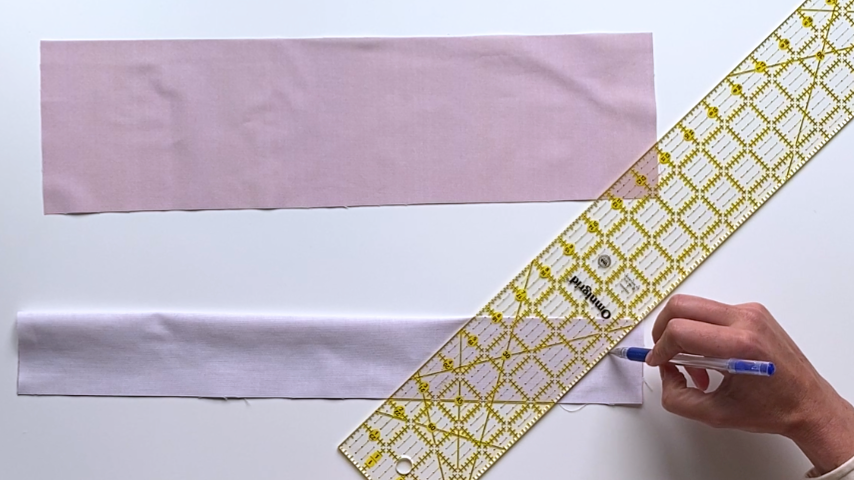
- 2 pieces of fabric that are 18″ x 5″ (for the two ties. Alternatively, you can use ribbon)
- 1/2″ double-fold binding or bias tape:
- 2 pieces that are 11″ long
- 2 pieces that are 9-1/2″ long
*Ignore the seam in my outer fabric; I stitched two pieces together because I was working with scraps of fabric.
Step 2
Place your outer fabric and lining wrong sides together, then sandwich the batting in between.
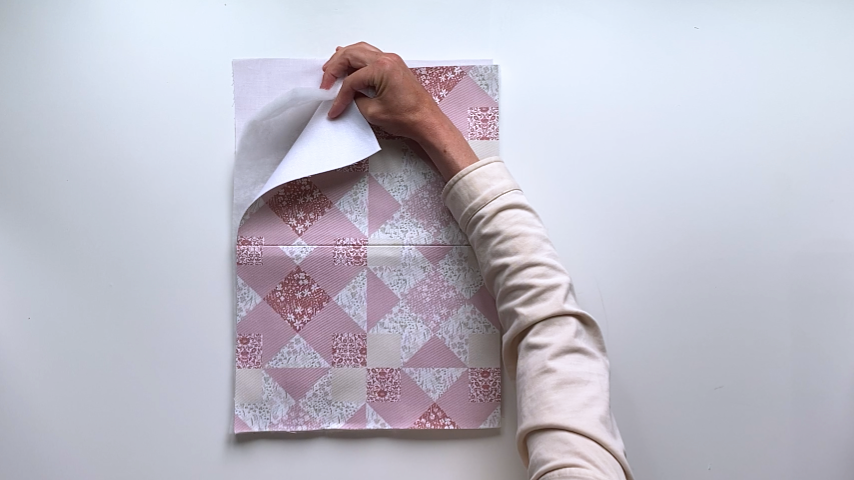
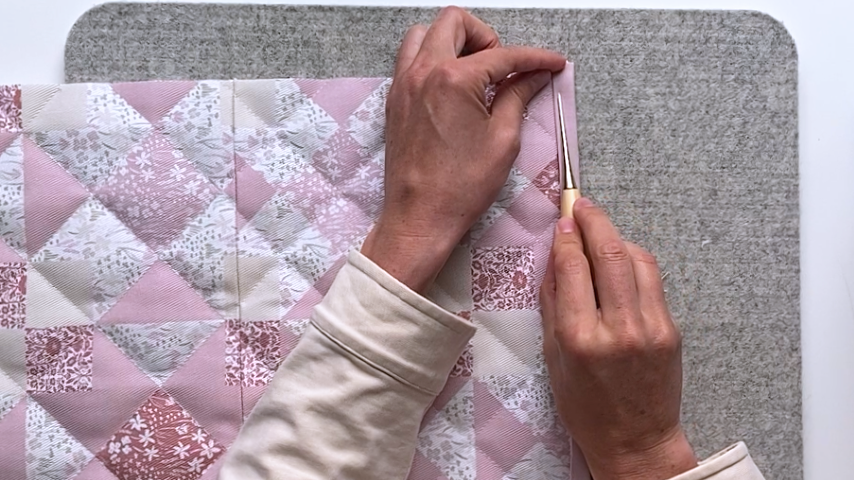
If you’re adding quilting stitches, mark the lines you’d like to follow (I created diagonal lines following the pattern on my fabric), then sew along them.
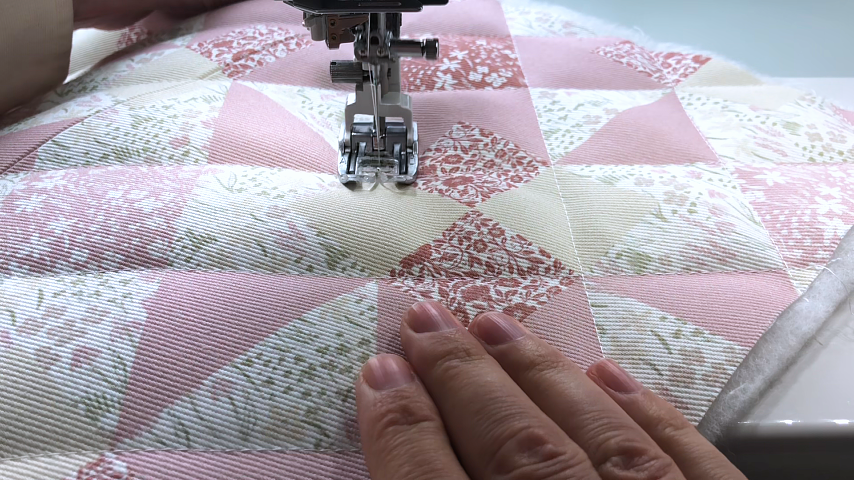
Then cut your quilted piece to 16″ x 11″.
Step 3
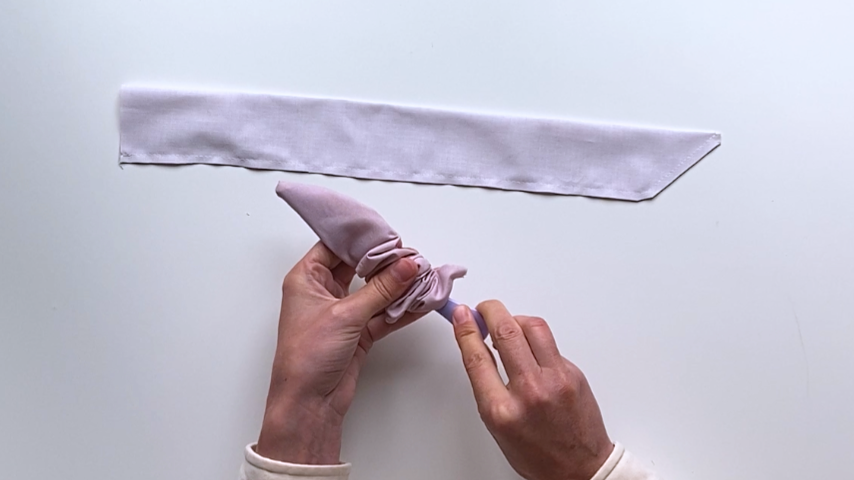
This step is optional as you can use two pieces of ribbon for the ties instead.
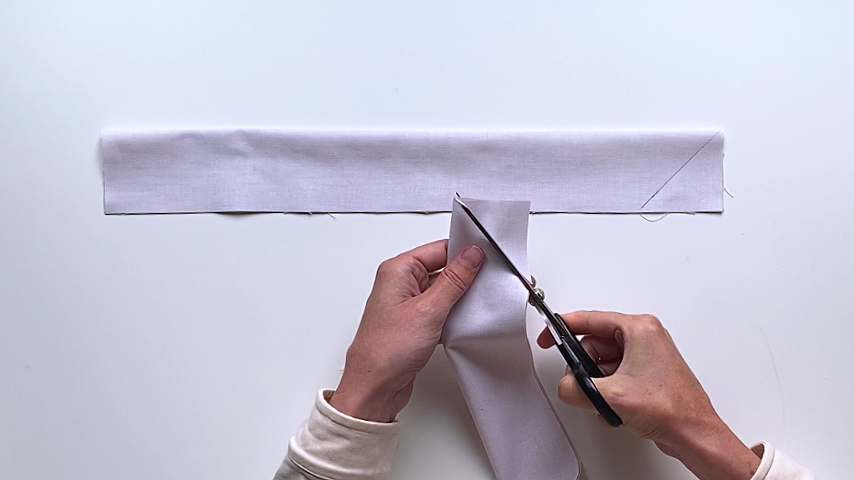
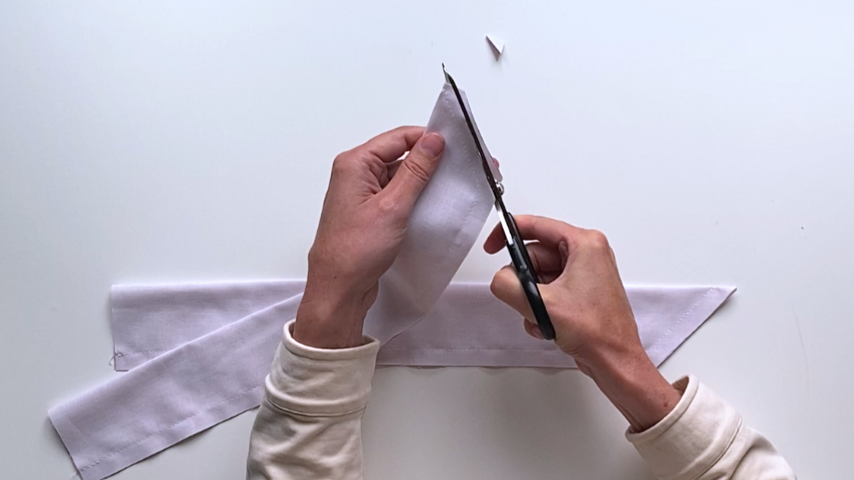
To create ties, fold the two 18″ x 5″ pieces of fabric in half, lengthwise (so the two longer edges meet), with right sides together.
Then cut one end at a 45-degree angle. You can draw the line on first, then cut the angle for more accuracy.
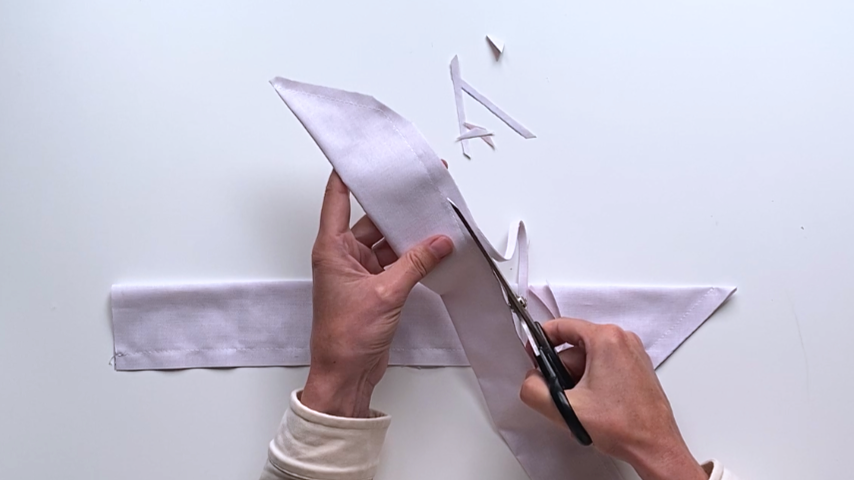
Using a 1/2″ seam allowance, sew along the angled end and the long edge, leaving the bottom open.

Trim the seam allowance and clip the corners to reduce bulk.
Turn the ties right side out. Use a point turner/chopstitch/knitting needle to push the point out (being careful not to push too hard).
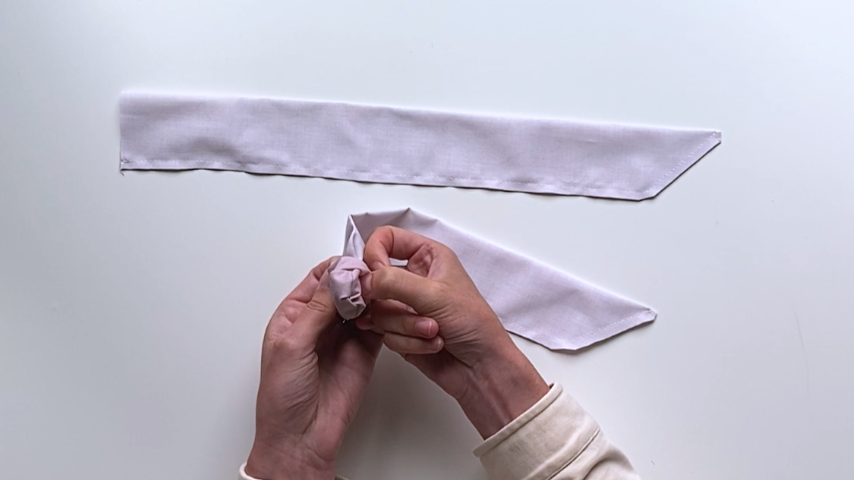
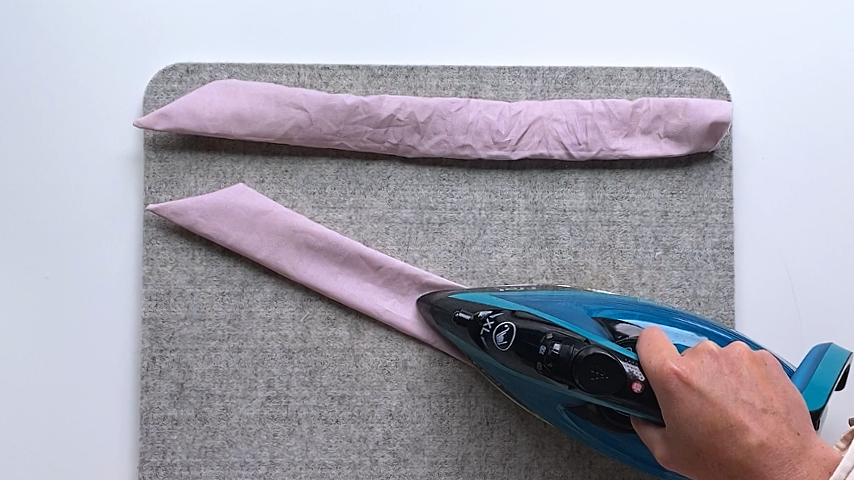
Press the ties to get all the wrinkles out and crisp up the edges. You can topstitch around the edges if you like; I didn’t as I prefer the clean look without the topstitching.
Step 4
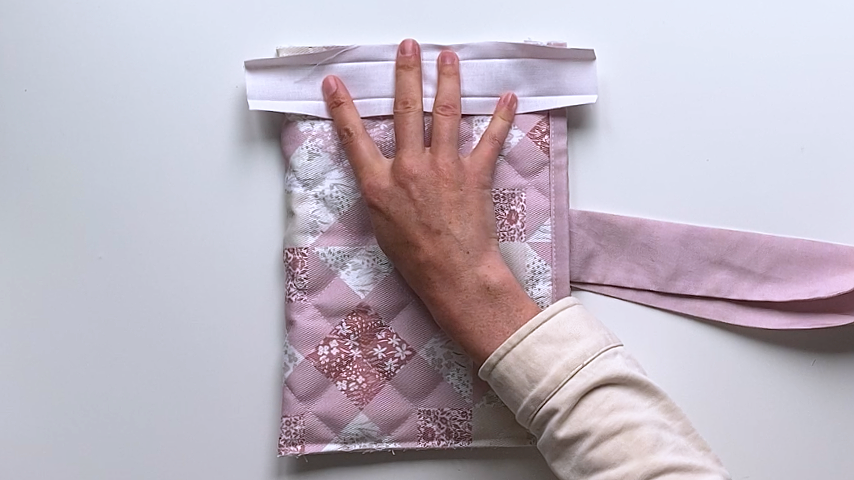
Mark the center of the book sleeve on the top and bottom (11″ edges) and on the lining side. This is where your ties will be centered.
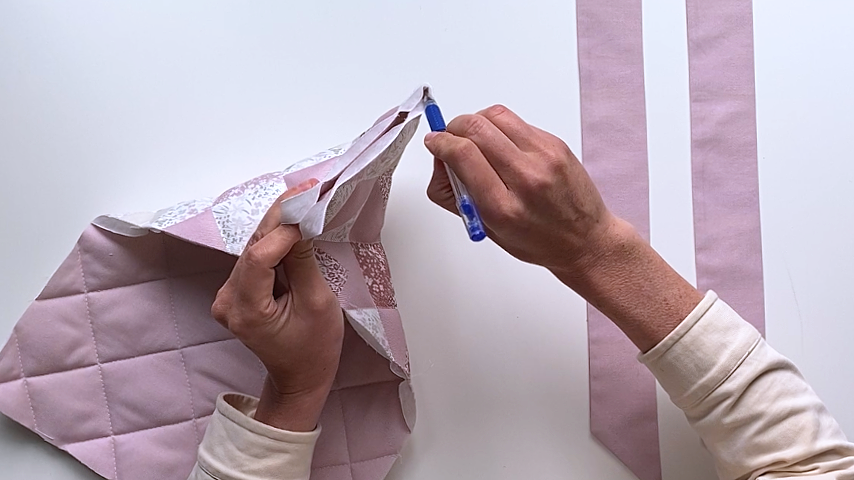
Clip your ties into place by lining up the open/straight edge of the tie with the top edge of the sleeve. Center them over the center line and on the lining side of the sleeve.
I loosely tied them to make sure the pointed end of the ties would mirror each other once the bow was tied (I needed to flip one of my ties).
This is how I ended up clipping my ties based on how I wanted my ends to sit once tied:
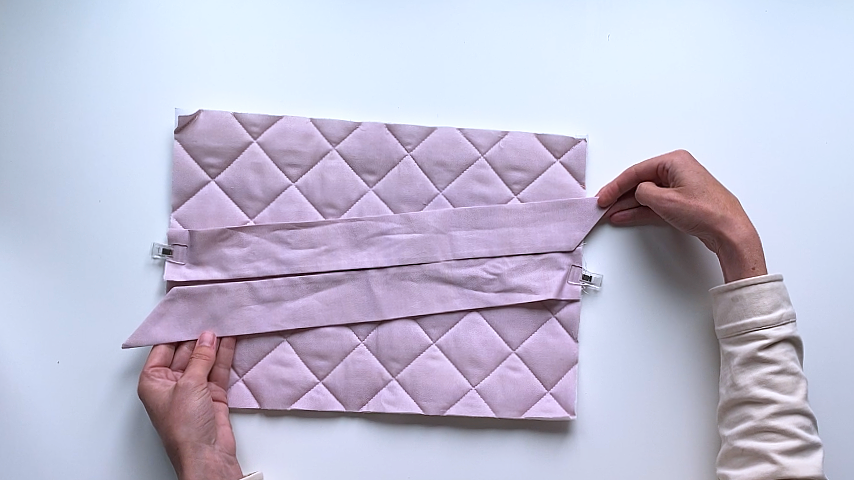
Baste the ties into place.
Step 5
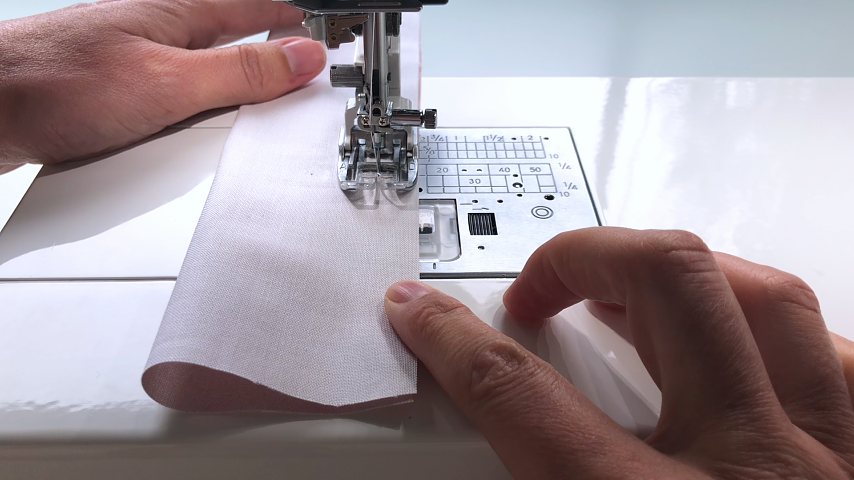
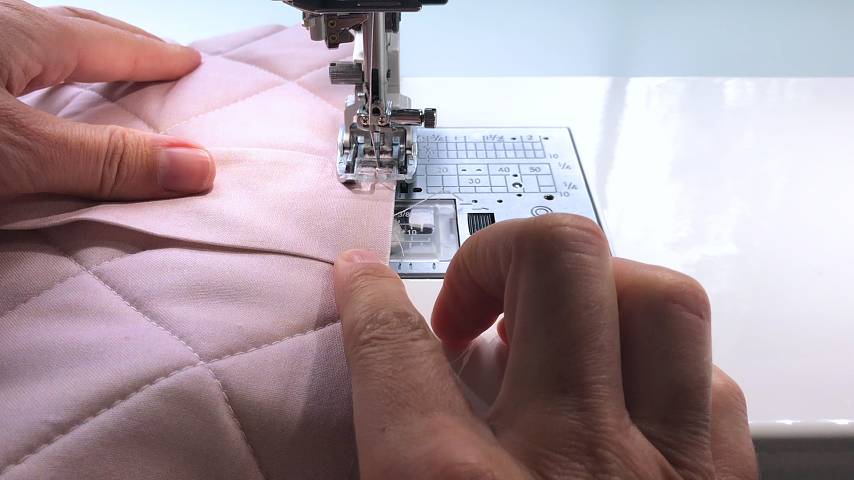
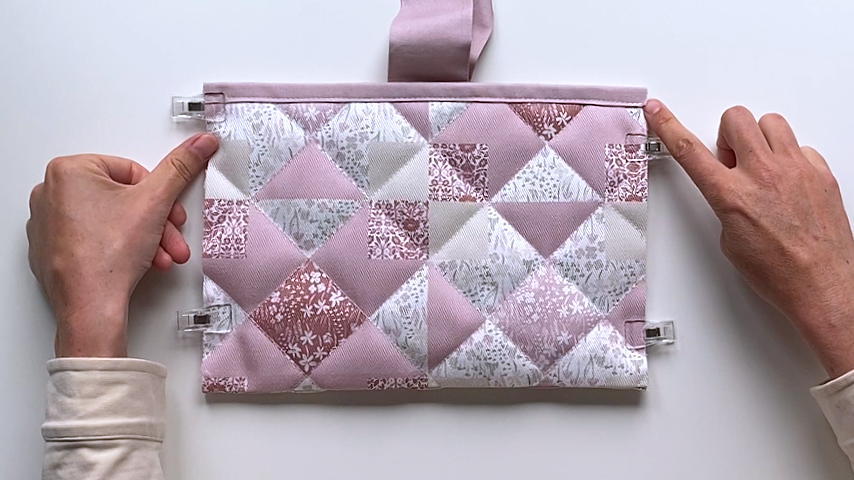
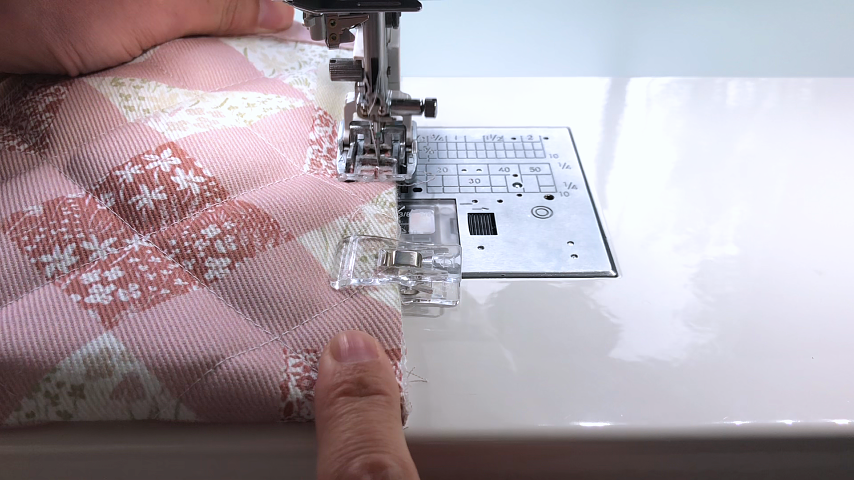
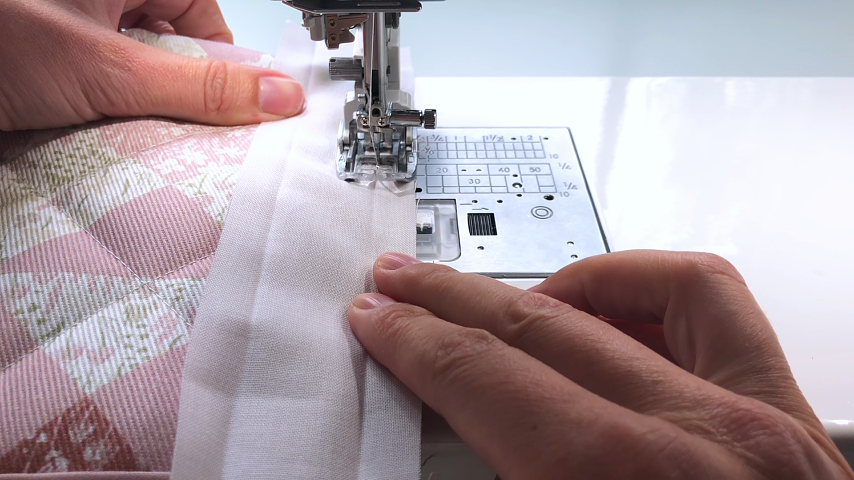
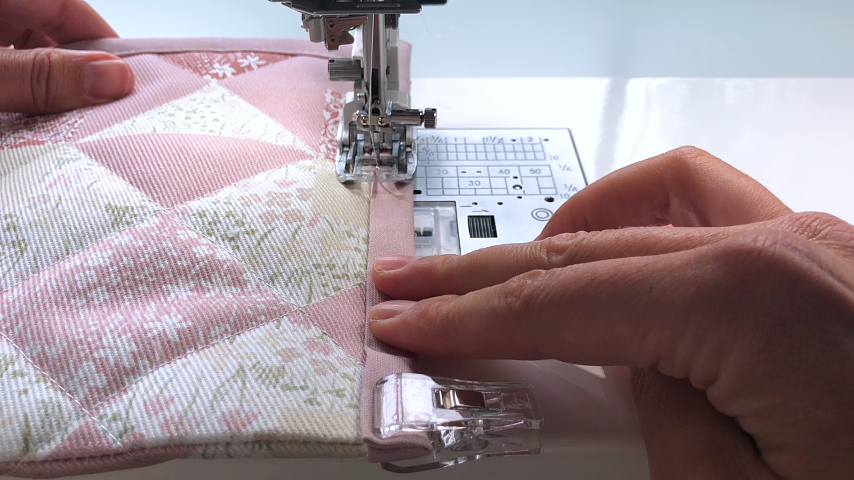
Unfold one of the 11″ long pieces of binding, line up the long edge of it so it is just past the edge of the fabric, then sew in the first fold.

Flip the binding to the other side and clip into place so the inside edge of the binding is in line with the line of stitching.
I like to iron the binding into place, then clip, for crisp edges and even topstitching.
Sew from the top side, about 1/8″ in from the inside edge of the binding.
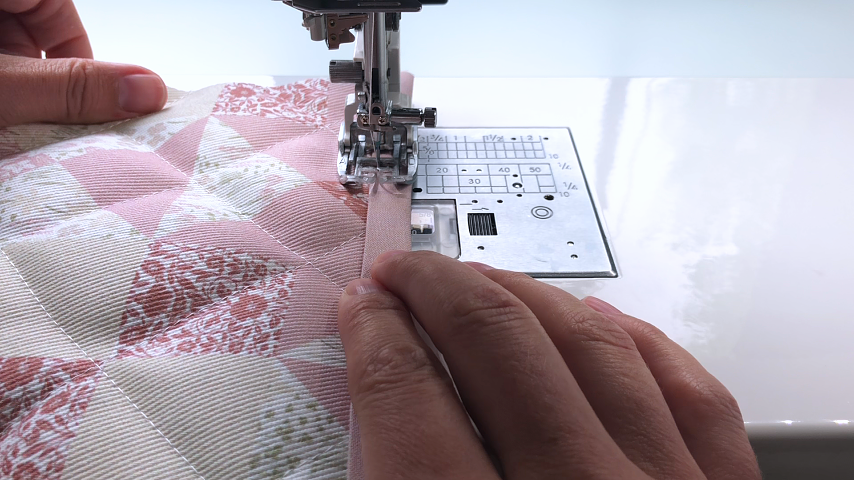
As I sew, I make sure the inside edge of the binding is right in line with the stitching. This ensures the stitching looks good and even on both the top and bottom of the binding.
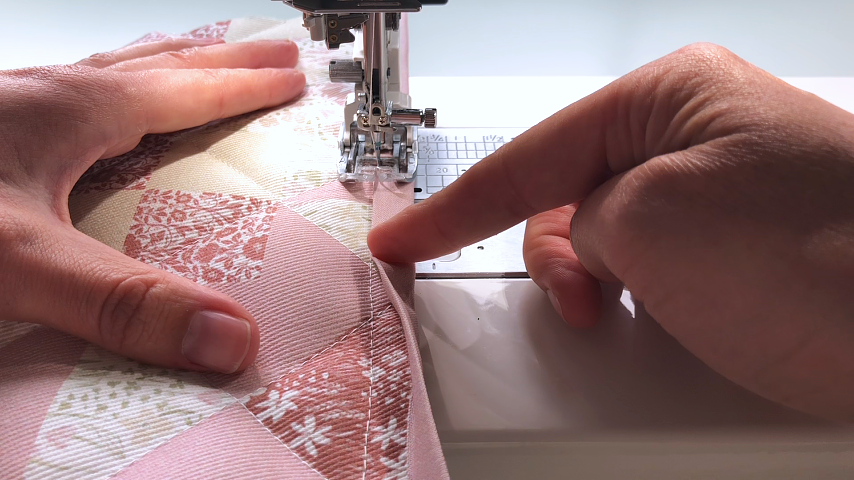
Check the tie placement as you sew to be sure it doesn’t get folded up and caught in the stitching.
Repeat to sew the binding to the other top edge of the book sleeve.
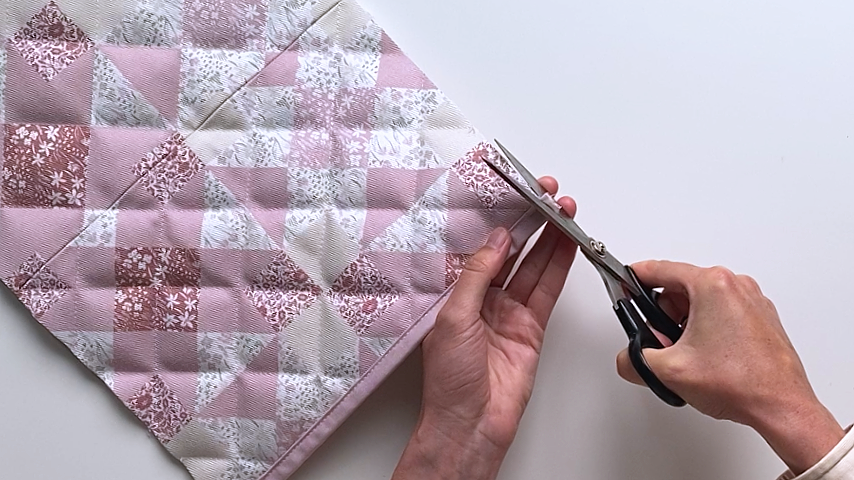
Trim the ends of the binding so they are in line with the edges of the fabric.
Step 6
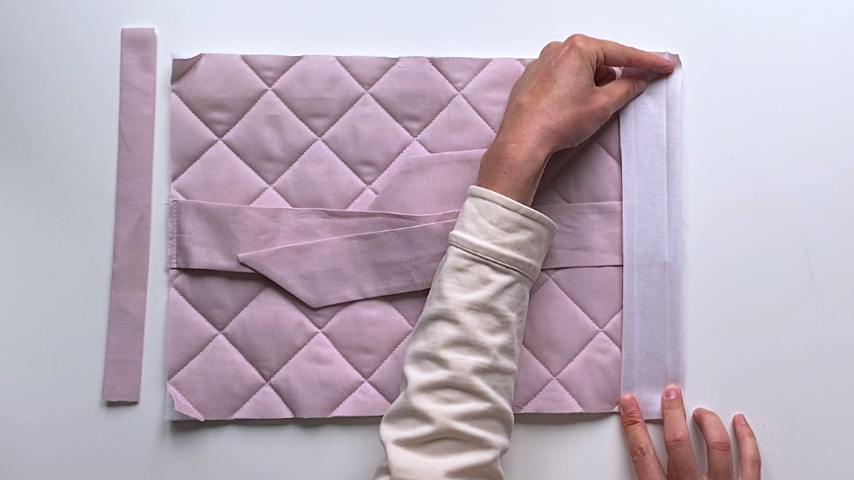
Fold the book sleeve in half, with wrong/lining sides together, so the two 11″ ends (with binding) come together. Clip the sides together and make sure the lining at the bottom is pushed into the fold and smooth.
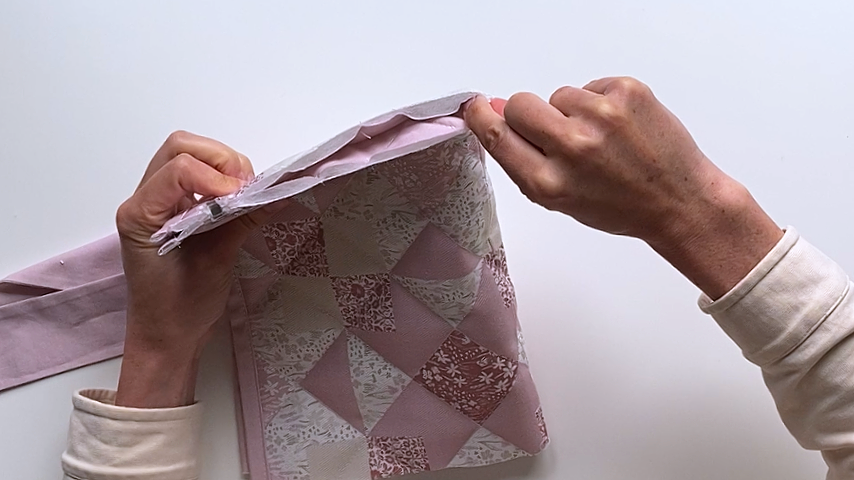
Baste along the two sides.
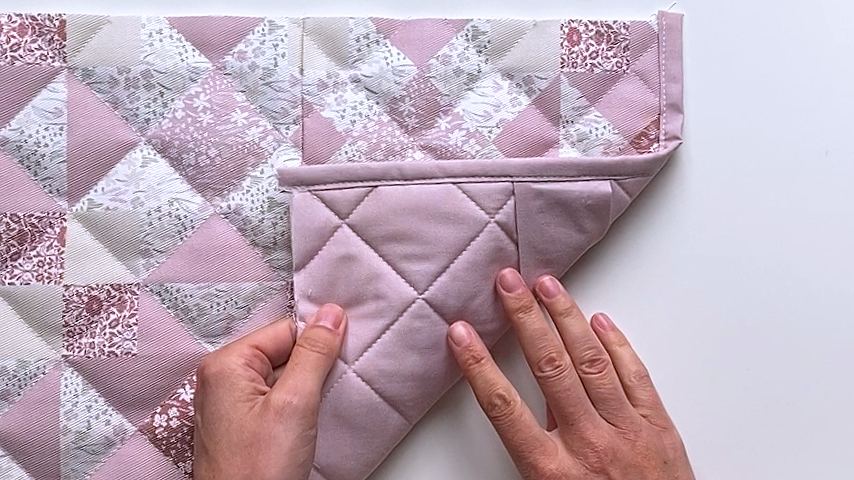
Step 7
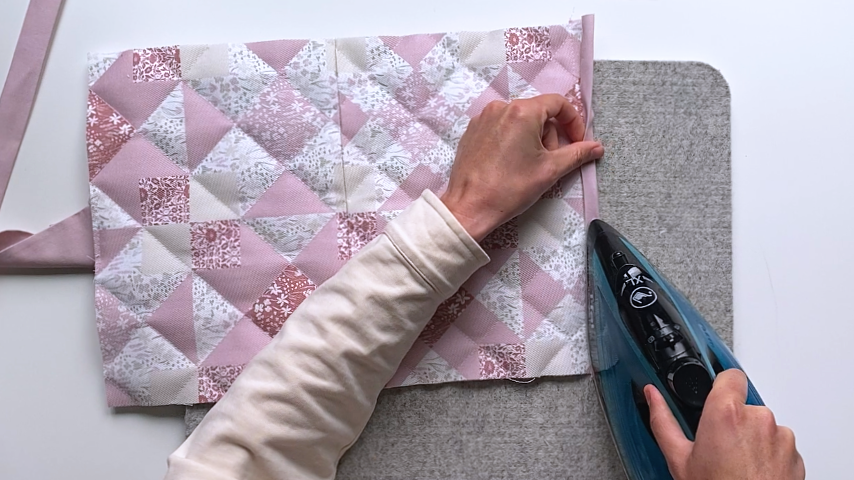
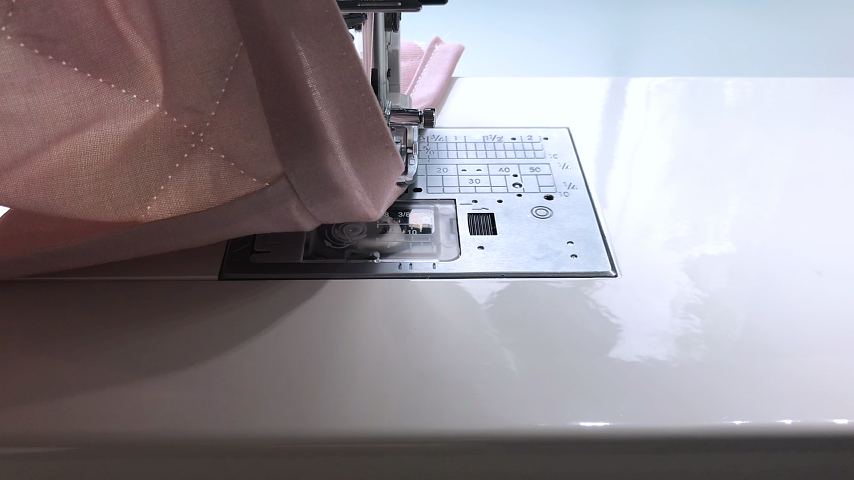
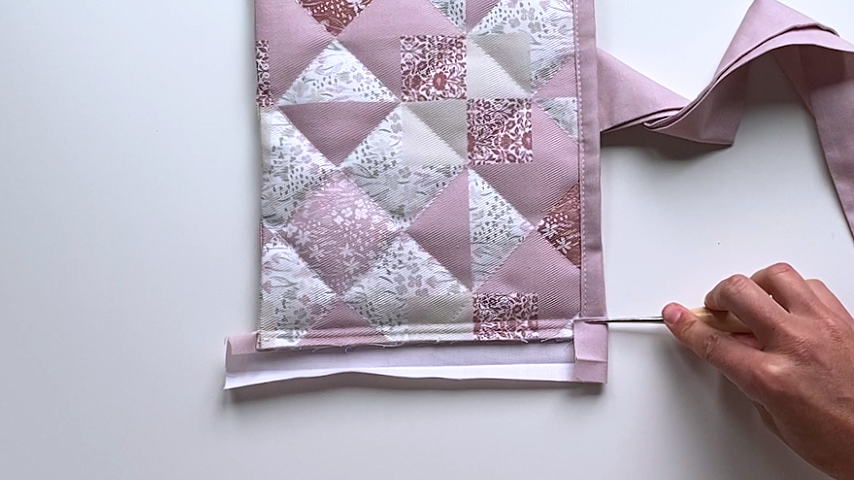
Sew the 9-1/2″” long pieces of binding to each end of the book sleeve.
Follow the same steps as you did to sew the binding to the top edges. However, this time, make sure the binding extends about 1/2″ past the top and bottom edges of the book sleeve.
Sew in the first crease.
Before folding the second side of the binding into place, fold the ends in first:
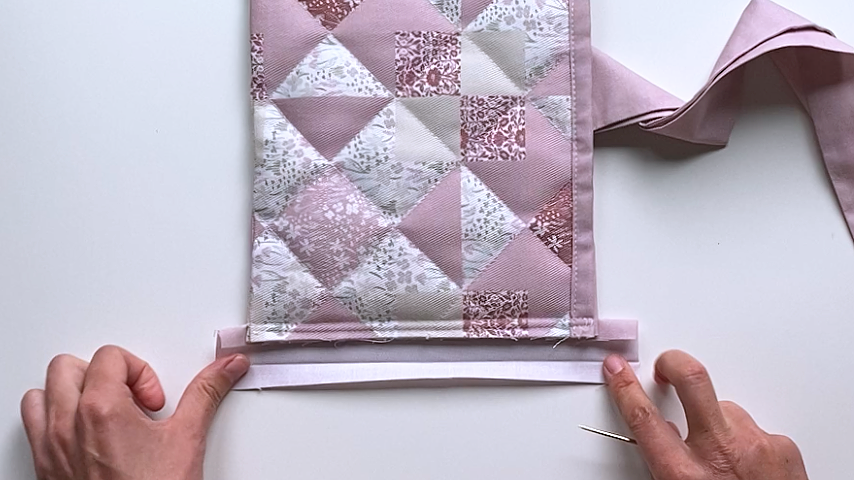
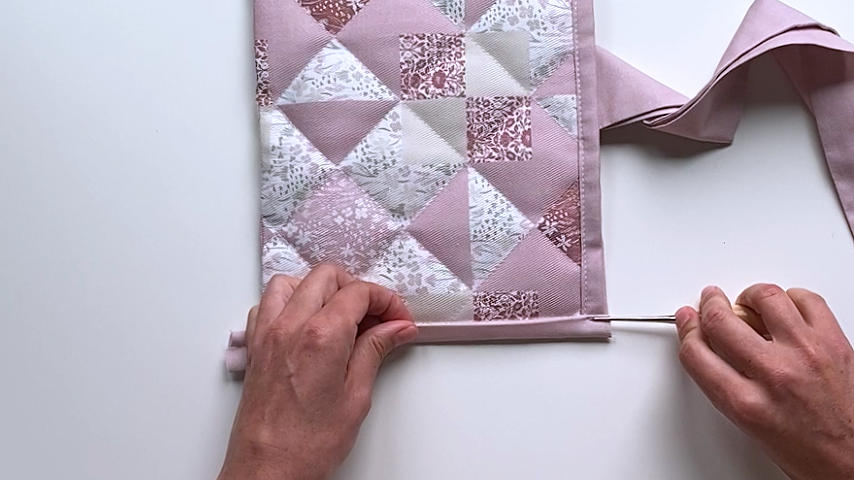
Fold the binding into place so its edge sits right over the line of stitching. Again, I like to press the binding into place. Clip to hold the binding, then sew about 1/8″ in from the inside edge.
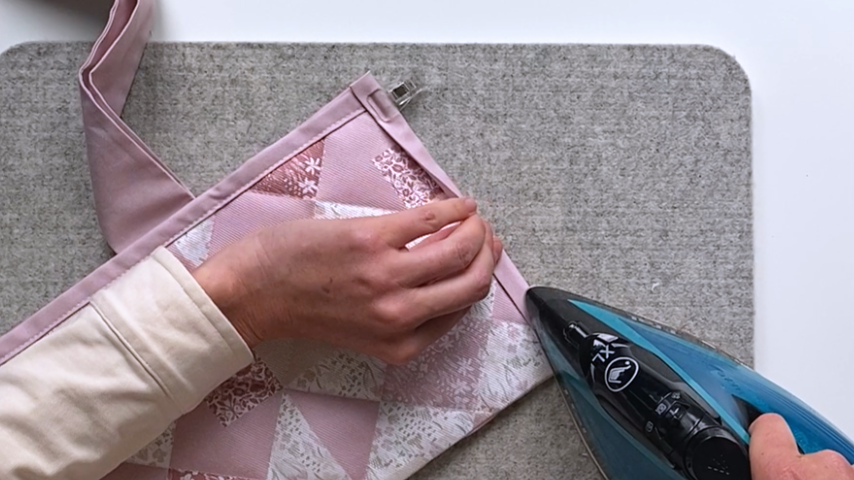
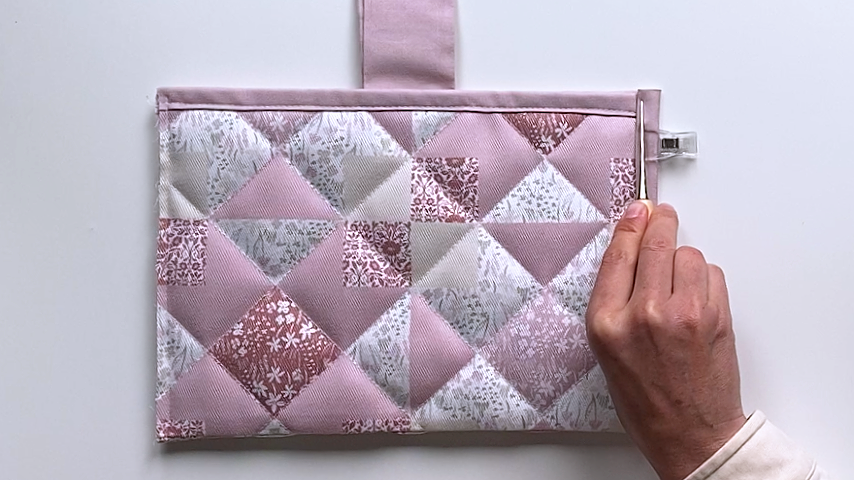
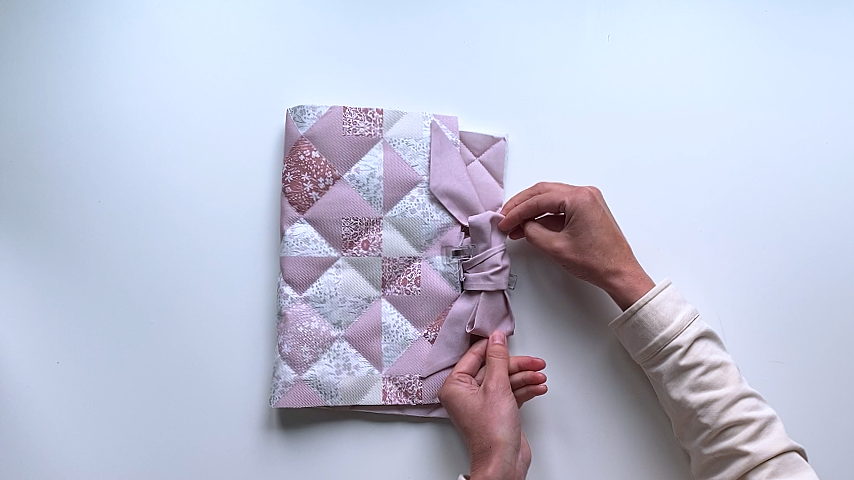
Repeat on the other side and your quilted book sleeve is complete!