How To Sew Double-Fold Binding (& Join The Ends)
Binding is different than bias tape in that it doesn’t have stretch. So it’s meant to finish straight edges. Whereas bias tape is designed to finish curved edges.
You can follow these instructions to make your own bias tape or binding (which allows you to work with different fabrics, colors, and prints). When making binding, you simply cut your strips of fabric with the grain, rather than on the bias (i.e. 45 degrees to the grain). So your cuts would run 90 degrees to the salvaged edge.
>> How To Make Bias Tape (or binding)
Binding is generally cut between 1.5″ – 3″ wide and may be single-fold or double-fold.
Single-fold is when the top and bottom of the strip of fabric are folded in to meet in the center.
Double-fold simply takes single-fold binding, and folds it in half again.
This article shares how to sew with double-fold binding.

Step 1
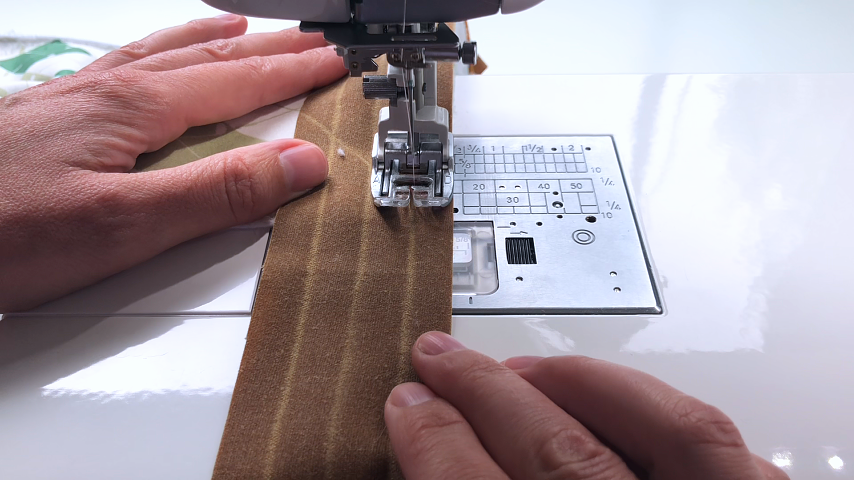
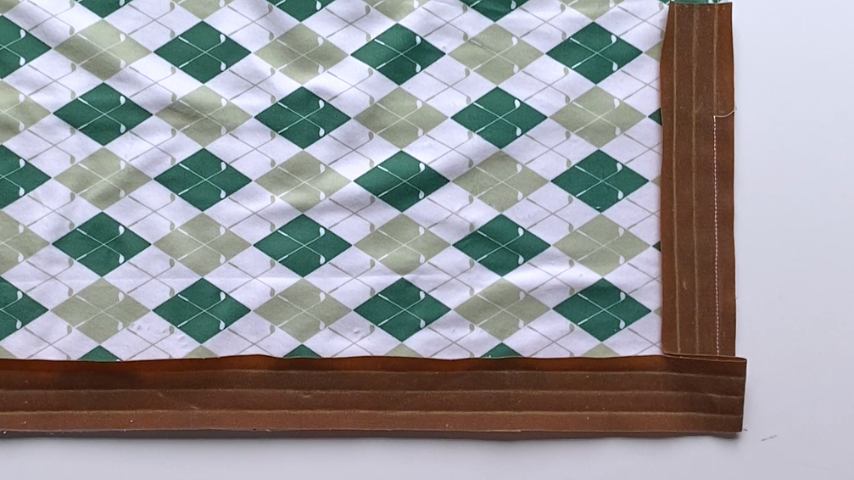
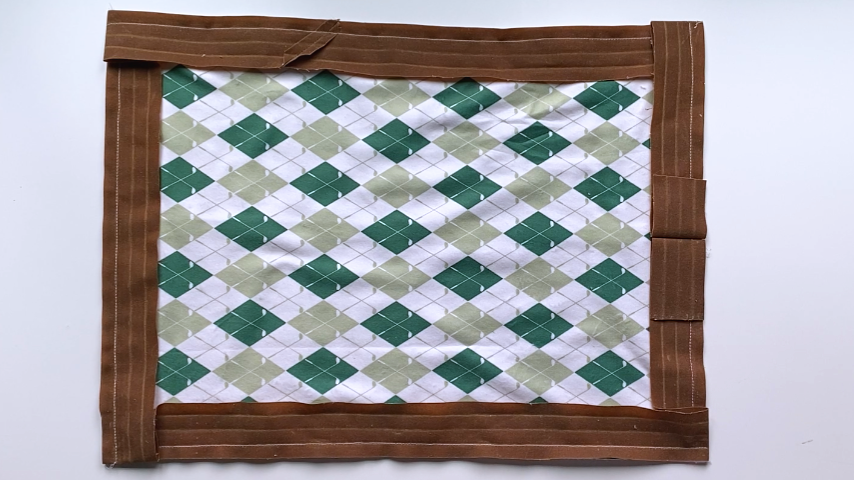
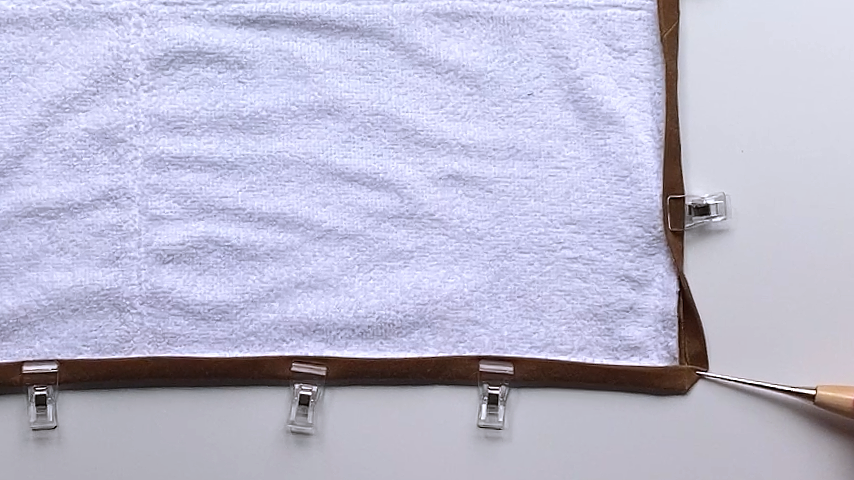
Start sewing the binding on, about 2-1/2″ away from the end (where the pin is in the image below). Backstitch to start. You want to leave at least 2″ loose to be able to join it with the end of the binding.
Sew in the first crease and angle the sewing off at 45 degrees at the corner. It helps to use a temporary fabric pen to mark that 45-degree line, so you know exactly where to stop sewing and pivot your fabric.
Tip
- Think about where you’d like the joining seam to be on your project. I typically place mine at the bottom, and never too close to a corner.
- I also like to set my binding just slightly past the edge of the fabric; so the binding is covering the edge of the fabric by about 1/16″. This gives you just a little extra wiggle room for the other half of the binding to cover the line of stitching on the other side of the project.
- Shorten your stitch length (I usually set mine around 2.5mm), which makes it easier to stop your stitching in the right spot, so you don’t go past your corners.
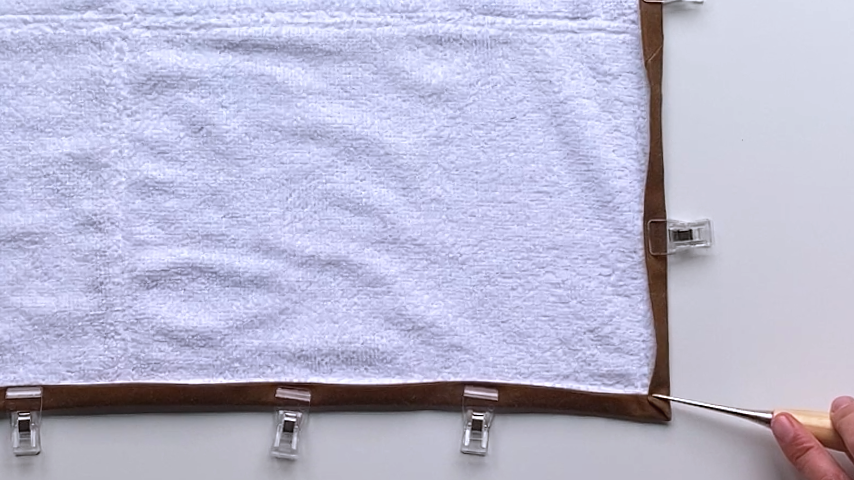
As you come up to the corner, stop with your needle down, lift the presser foot, pivot the fabric, put the presser foot back down, and sew right off the point of the corner, at a 45-degree angle.
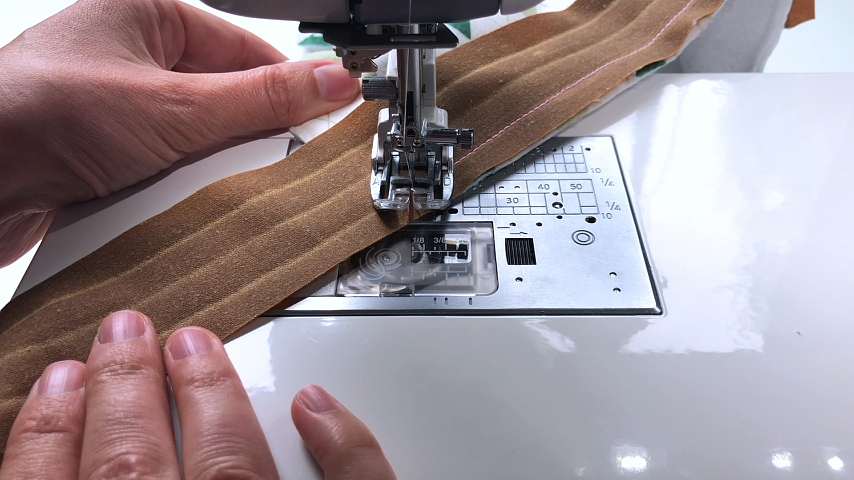
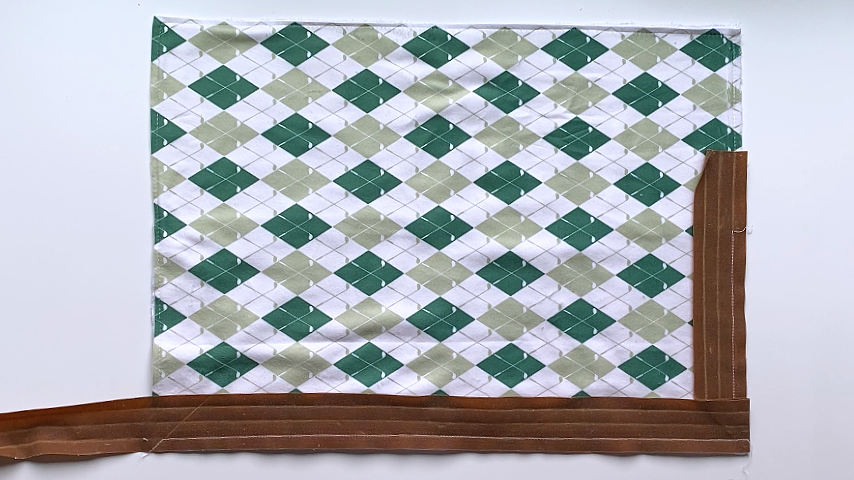
Here’s how the stitching on your first edge will look:
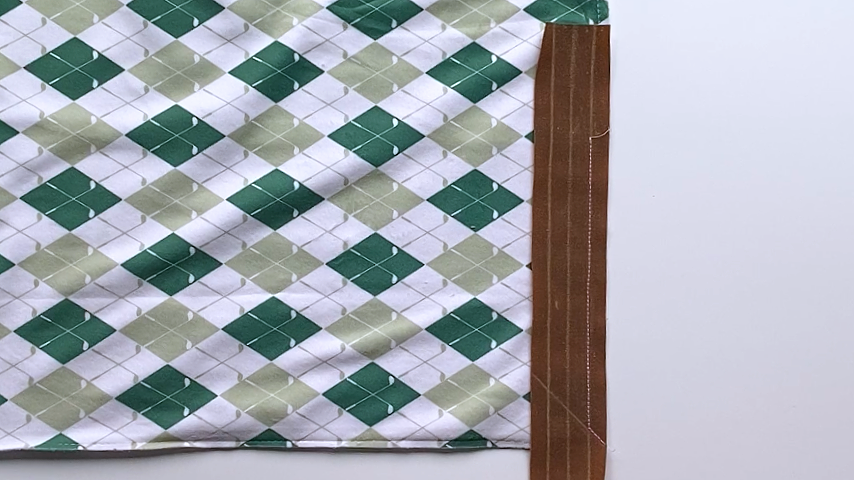
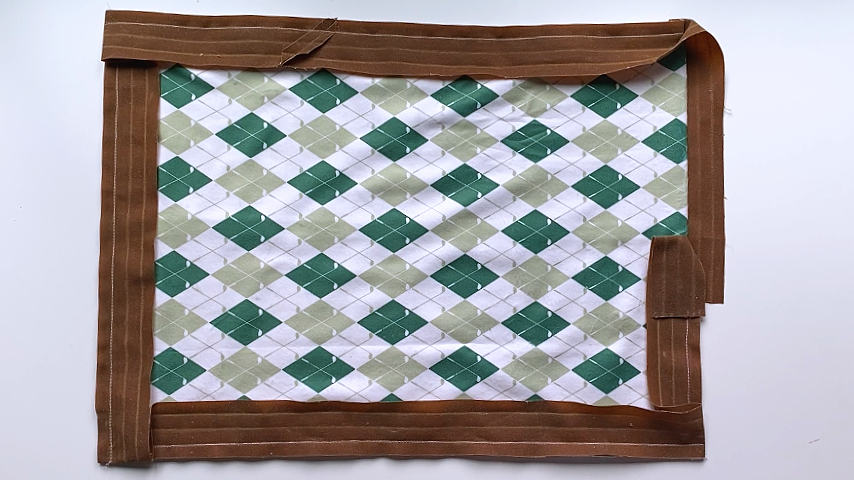
Fold the binding up and away from your project, so it’s at a 90-degree angle to the side you just stitched. This will give you a perfect 45-degree fold in the corner.
Tip
- Make sure your binding is folded so that the outside edge of it lines up just past the edge of the fabric (by about 1/16″).
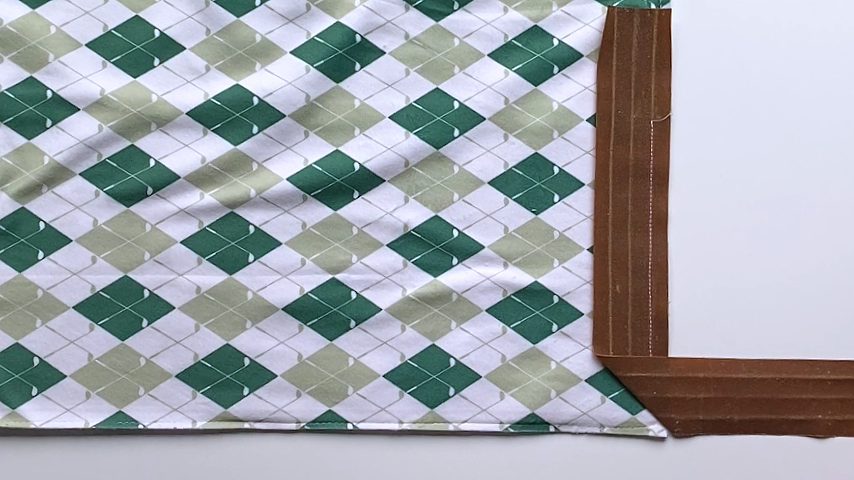
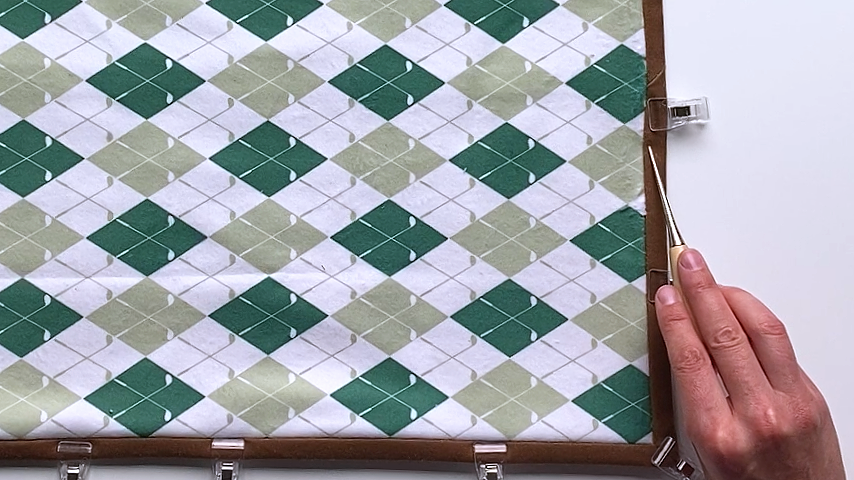
Then fold that piece back down, so the folded top edge is in line with the top edge of the towel.
Again, the edge of the binding should be covering the edge of the fabric by about 1/16″.
Sew the binding to the next edge, and again, sew the corner at a 45-degree angle.
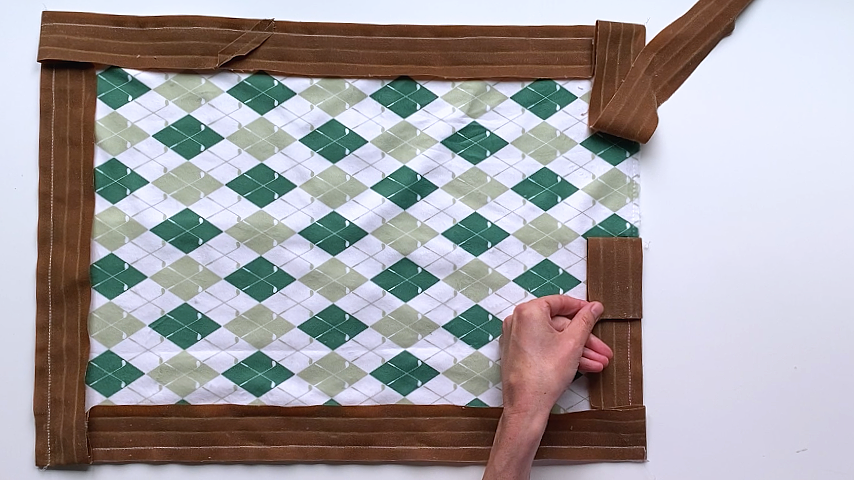
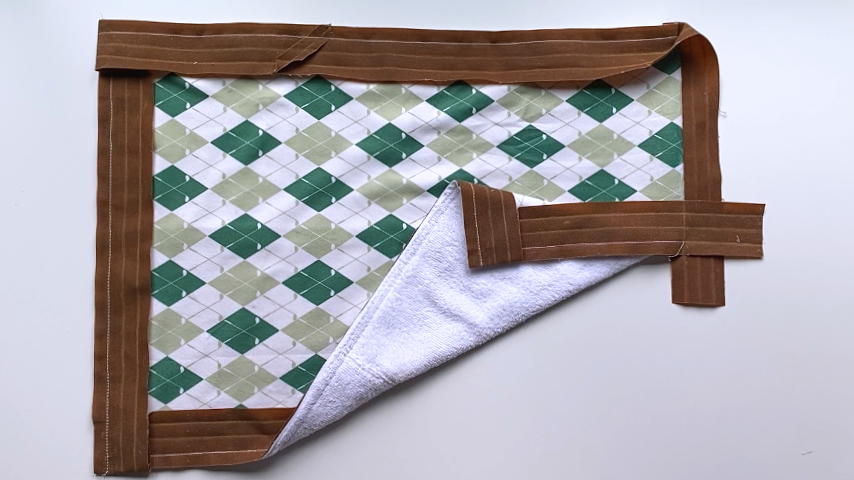
Repeat these steps until all four corners are done. Stop sewing a few inches before the start of your binding.
Step 2
To join the ends, fold the start of the binding back and set the end of the binding on top.
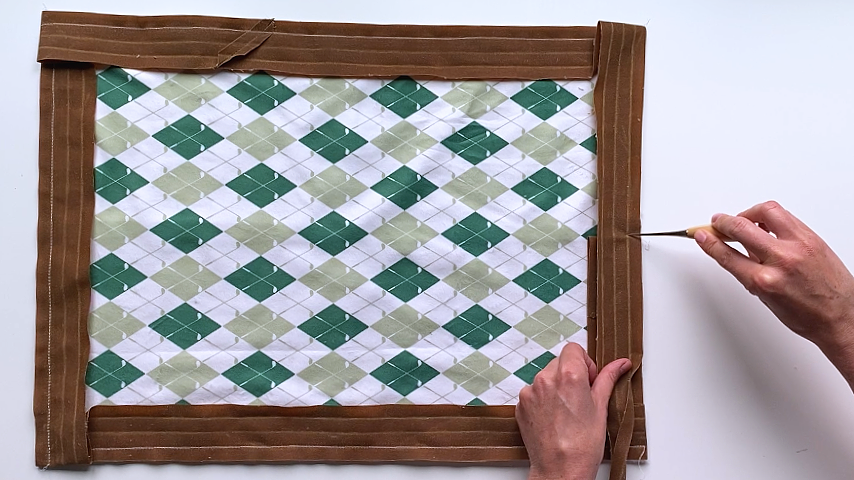
You’ll continue sewing the end of your binding on, running the stitches right up to the folded edge of the start of your binding.
You may want to mark this line with a temporary fabric pen to ensure you don’t sew past it and onto the start of the binding.
Backstitch at the end.
Here’s how your ends should look once you’ve finished sewing:
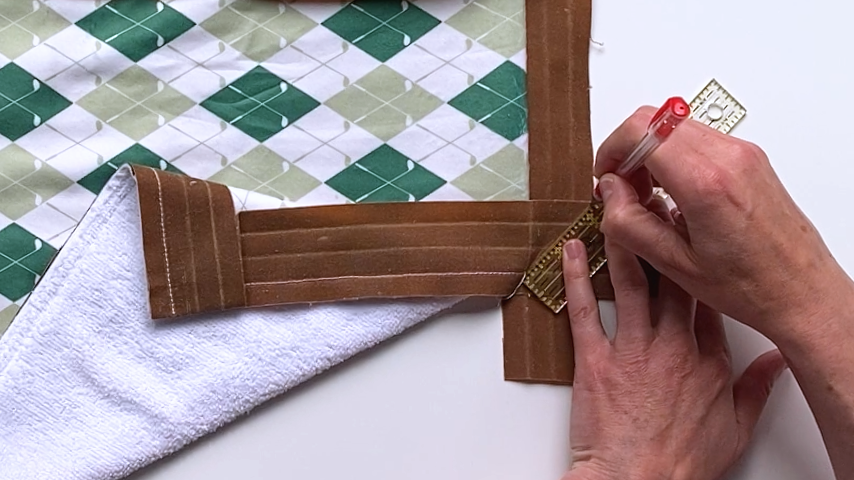
Flip the end of the binding to the other side and unfold it completely
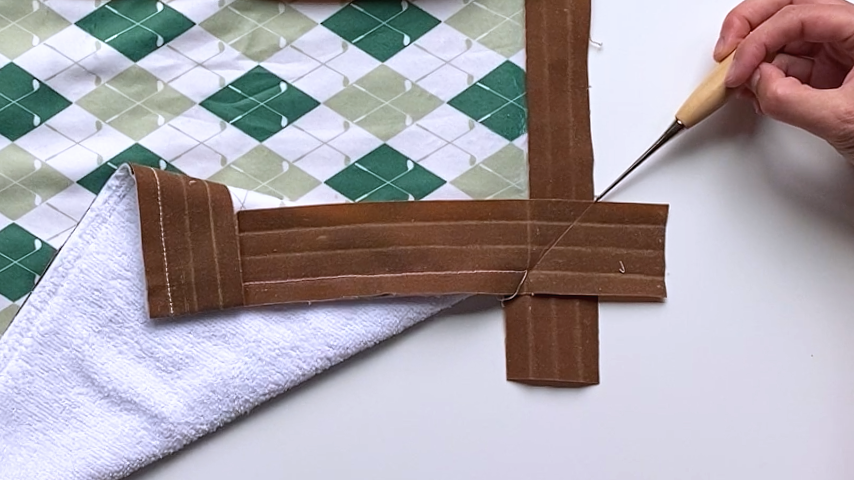
Then fold your fabric so you can set the starting end of the binding at a 90-degree angle to the end of it.
Notice in the picture below how the end tail of the binding is fully unfolded:
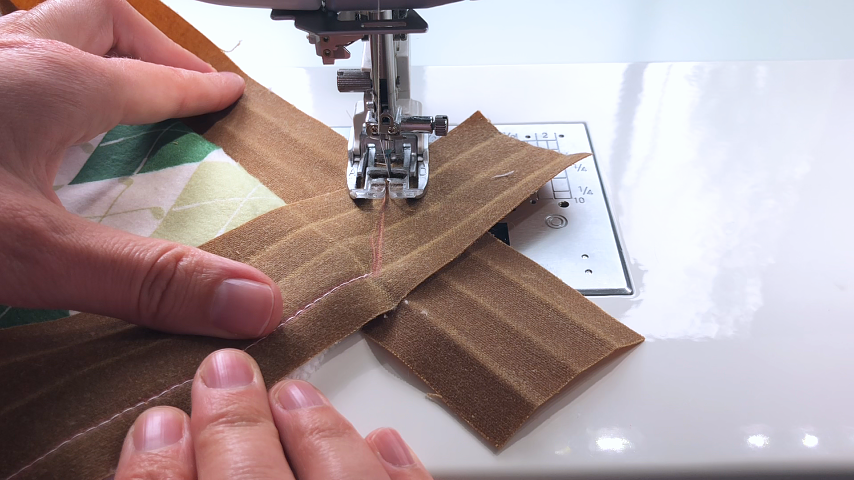
You’ll sew across the two ends at a 45-degree angle. Your stitching should start at the point where your two ends intersect, and end where the start of your stitching is. You can sew past it, right off the other end of the binding, but I typically find that’s hard to do because of the bulk of the fabric.
It helps to draw a line between these two points so you get a straight joining seam.
Tip
- Shorten your stitch length (around 2mm) so you don’t have to backstitch at the start and the end. This step can be finicky, so eliminating backstitching can help and the shorter stitch length ensures your stitching won’t easily unravel.
Below shows where you’ll start your stitching:
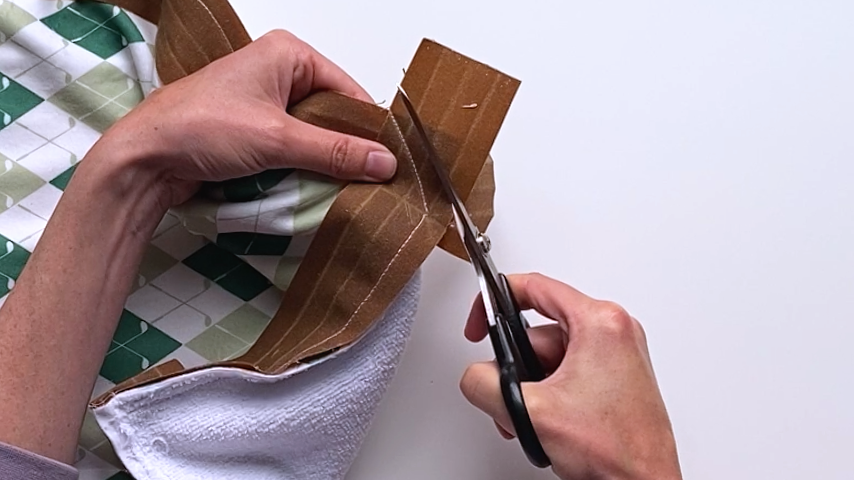
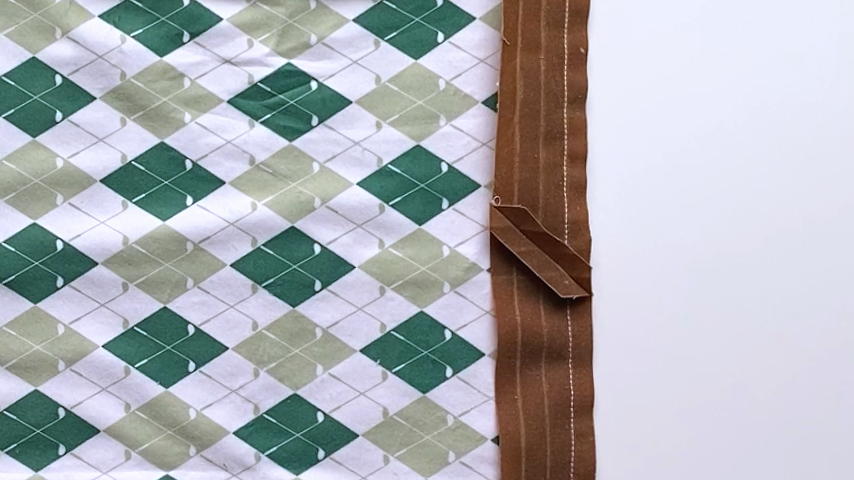
Check to be sure the seam looks good and sits flat, then cut off the excess ends of the binding and finger-press the seam open.

Step 3
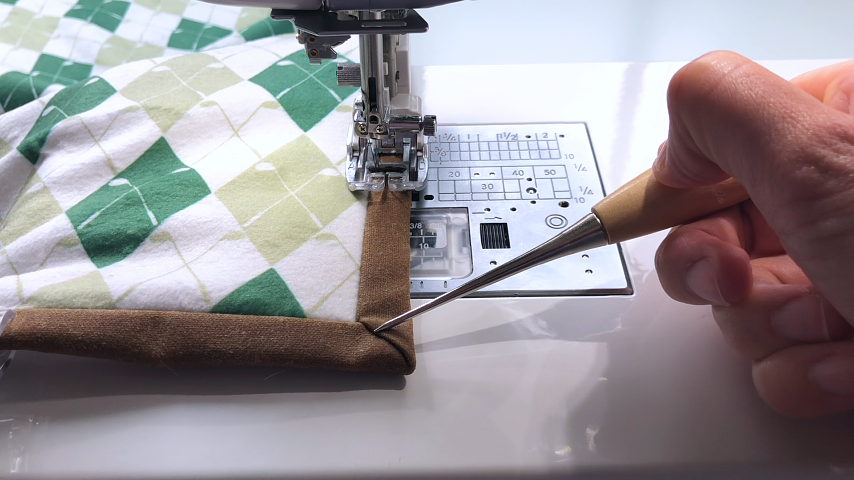
Flip the binding to the other side, fold it into place so the edge of the binding covers the line of stitching, and clip into place.
Tip
- I take my time with this step to ensure the binding is evenly covering the stitching. This ensures your topstitching will look good from the top and bottom. And if you’re top stitching from the top/the first side you stitched the binding to, accurate clipping will ensure you’re catching the binding on the other side and won’t end up with loose binding in any spots.
- Depending on how straight your stitching was when sewing on the first side of the binding, you may or may not need to unfold the binding to cover the stitching.
- After clipping the binding into place, I like to use the tip of my iron to press the binding. This helps flatten the edges and corners, making it easier to sew, and re-crease the binding in any places you had to take it in or out.
At the corners, fold one side flat before folding the other side in, and clip into place.
Ensure the bulk of your corners alternates from top to bottom. Meaning, if you folded the right side of a corner in first on the top, then fold the right side in first on the bottom.
You can see on the top, the left side of the corner has the fabric folded on top; that’s where the bulk is.
So on the bottom, fold the corners so the bulk of the fabric is on the right side.

To distribute the bulk in the corners, fold the binding flat on the side that already has the bulk.
In this example, from the top of the binding, the left side of the corner has the bulk. So on the back of the binding, I’ll fold the left side down first:
Then fold the other side of the binding in. This will give you a 45-degree fold on the corner.
Topstitch 1/8″ in from the inside edge of the binding. I like to sew from the top side, to ensure my stitching looks best from the side of the towel that will show the most.
However, if both sides of your project will be equally seen, then I sew from the second side (i.e. the side of the binding that’s not sewn on yet). As I’m sewing, I lift the binding to ensure it’s evenly covering the stitching.
Tips
- I make my stitch length a little longer (e.g. 3mm – 3.5mm) as I find that gives the project a more professional look but still allows me to be accurate with where I stop my stitches in the corners.
- I also move my sewing machine’s needle position to the left. I find that gives me an edge on the presser foot to line up with the edge of the binding, so I can use it as a guide and keep my stitching straight and evenly spaced from the edge of the binding.
When you come to a corner, stop with your needle down once it reaches the corner crease. Then lift your presser foot, pivot the towel 90 degrees, put the presser foot back down and continue sewing.
This will ensure your stitching stays an equal distance away from the edge of the binding when you start sewing along the next edge.
Backstitch when your stitching comes around and meets the start of your stitching and your binding is complete!