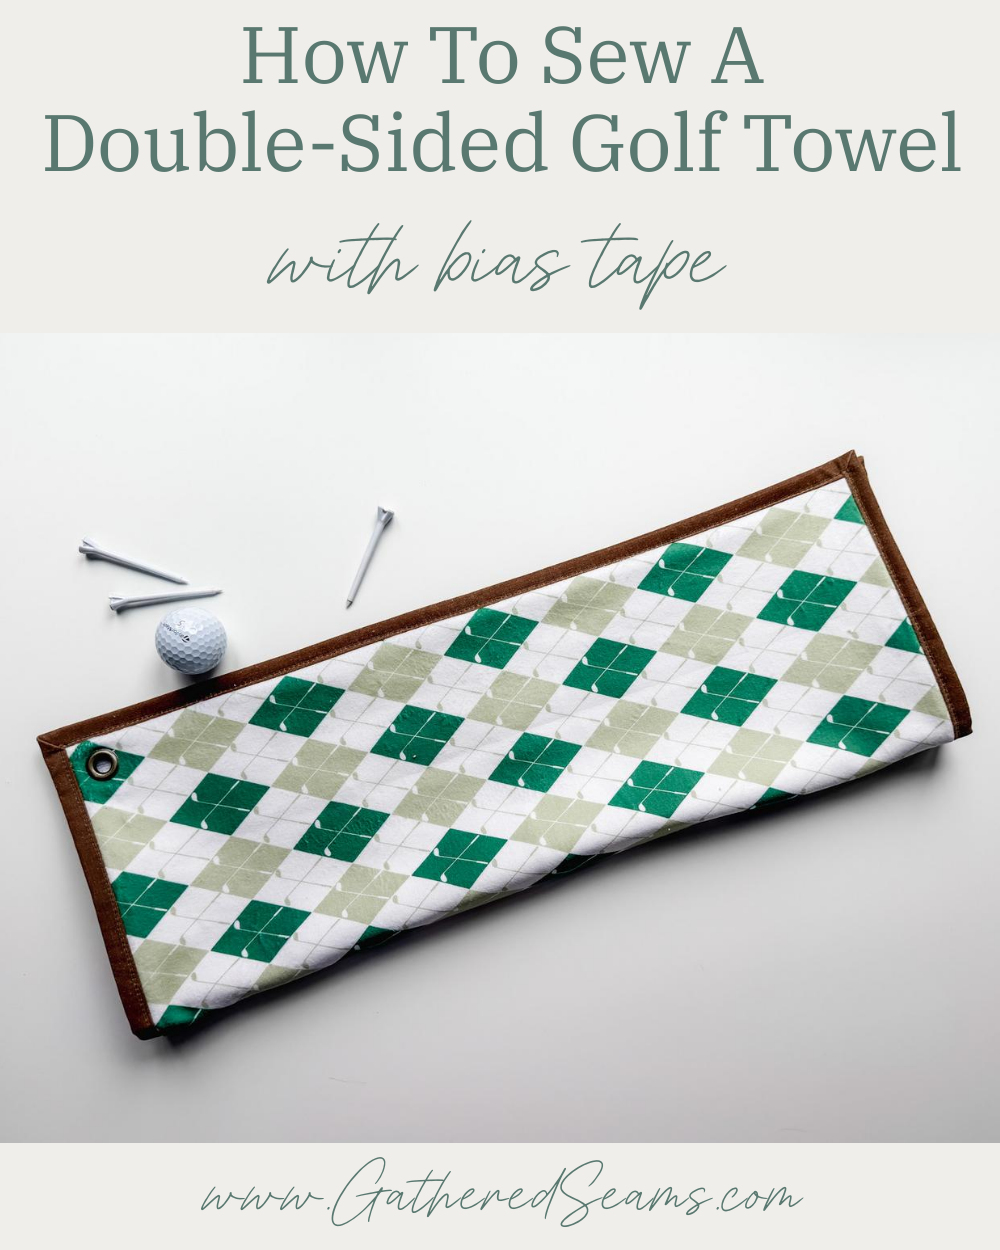
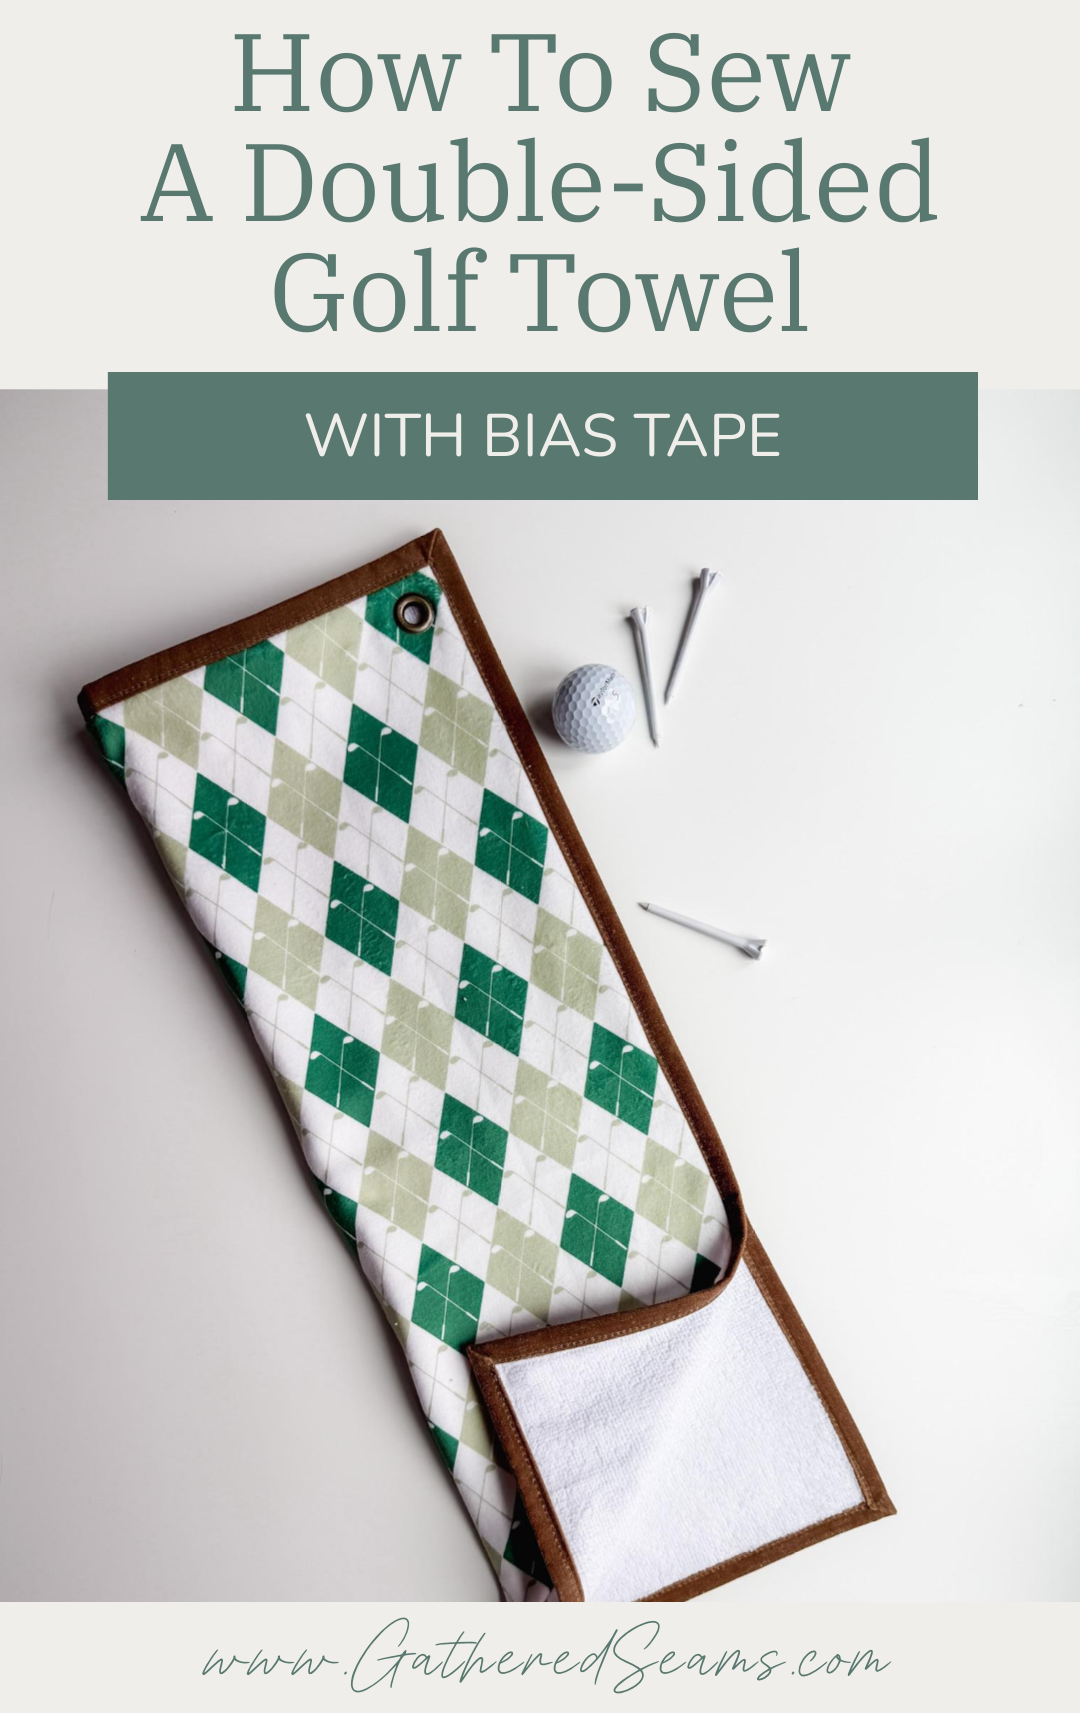
How To Sew a Golf Towel | Easy Gift To Sew
Golf towels are a handy item, since they get dirty and worn each year and periodically need to be replaced. They’re practical to make for yourself (if you’re a golfer), if you sell your sewing and target golfers, or if you’re making a gift for a golfer.
This is a quick and easy sewing project, and can be even quicker if you skip the binding.
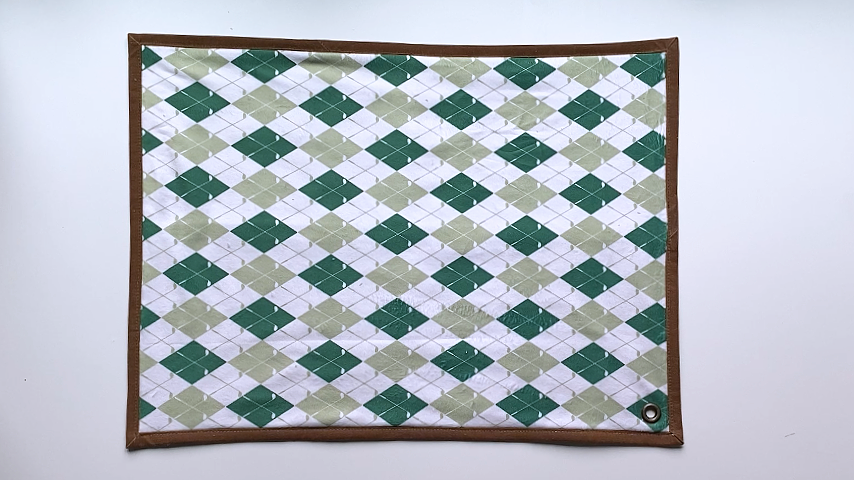
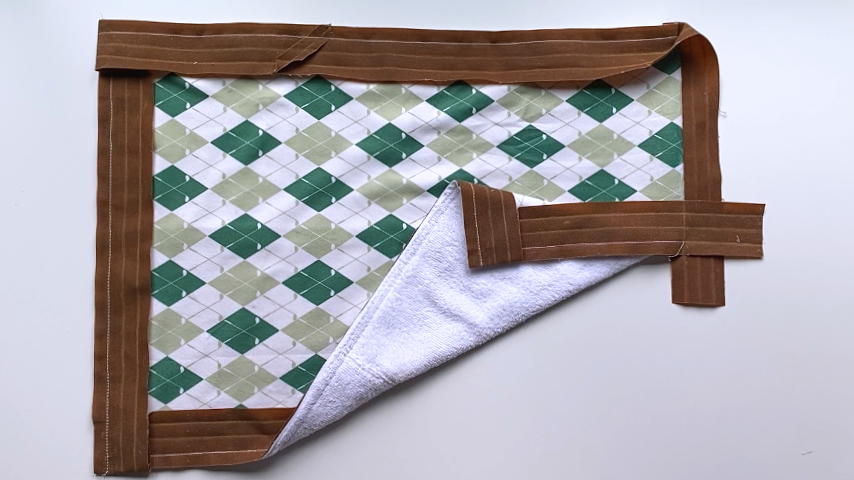
I used binding to add an extra detail and make this item feel more gift-worthy. But you can also make a two-sided golf towel by sewing the two pieces of fabric right sides together and leaving an opening to turn right side out. Then topstitching around the edges.
I prefer the two-sided golf towel because it offers some options: a soft side for wiping hands or polishing clubs, and a side that’s more absorbent and has more texture for “scrubbing” the dirt off clubs and golf balls and drying them off.
You can adjust the size of this pattern to any size you like. Here are some general sizes:
- Pocket towel – 11″ x 18″
- Standard – 16″ x 24″
- Oversized – 22″ x 44″
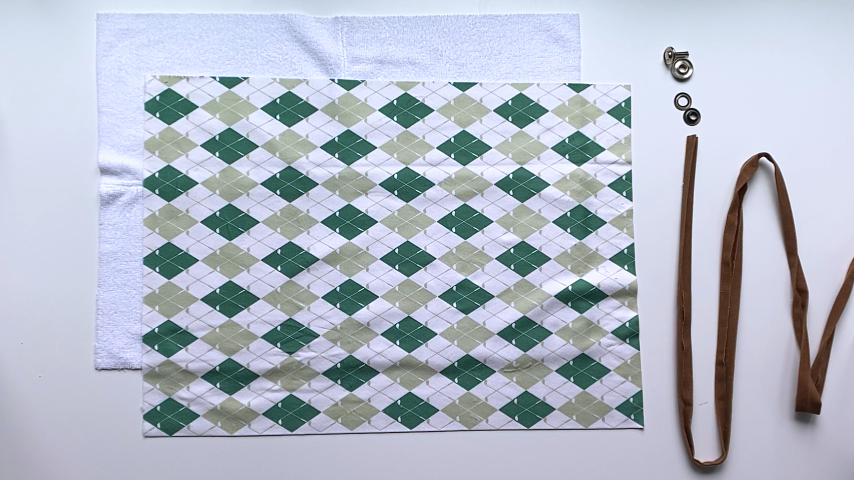
Materials
As an Amazon Associate, I earn from qualifying purchases (see full disclosure here).
- Fabric – You have several options:
-
- Terrycloth
- Microfiber
- Waffle cotton weave
- Cotton velour
*Some people use terrycloth bath towels, but I personally find those a little too thick.
- Grommet (alternatively, you can add a loop to your towel and clip a carabiner to that)
- 1/2″ double-fold binding (2″ when unfolded. Learn how to make your own here)
- Optional: carabiner (to attach the golf towel to a golf bag)
- Thread
Tools
- Sewing machine
- Temporary fabric markers
- Ruler
- Scissors
- Clips
- Grommet tool
Steps to sew a golf towel

Step 1
Start by cutting your two pieces of fabric in your desired size. Here are a few popular sizes for golf towels (but you can adjust to whatever size you like)
- Pocket towel – 11″ x 18″
- Standard – 16″ x 24″
- Oversized – 22″ x 44″
If you’re using binding to finish the edges, you’ll need the total perimeter of your towel, plus 5″ – 6″ extra.
For example, my towel is 16″ x 22″, so I need approximately 81″ – 82″ of binding.
You’ll need a little extra to join the ends, and it’s always best to cut the binding too long than too short.
If you’re not using binding, you’ll need to add an extra inch to the width and height of your desired size, to account for seam allowance.
This tutorial only explains the steps for using binding.
Step 2
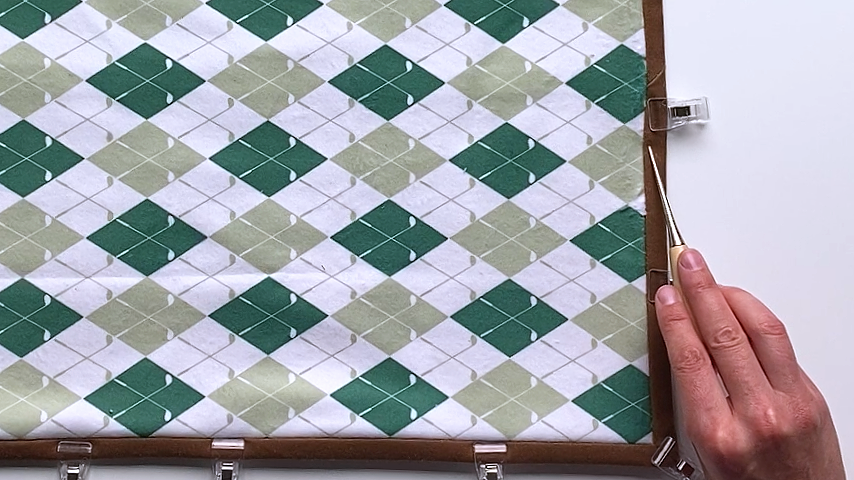
Place your two pieces of fabric, wrong sides together, making sure the fabric is sitting flat and the edges line up. Clip around the edges and then baste the layers together.
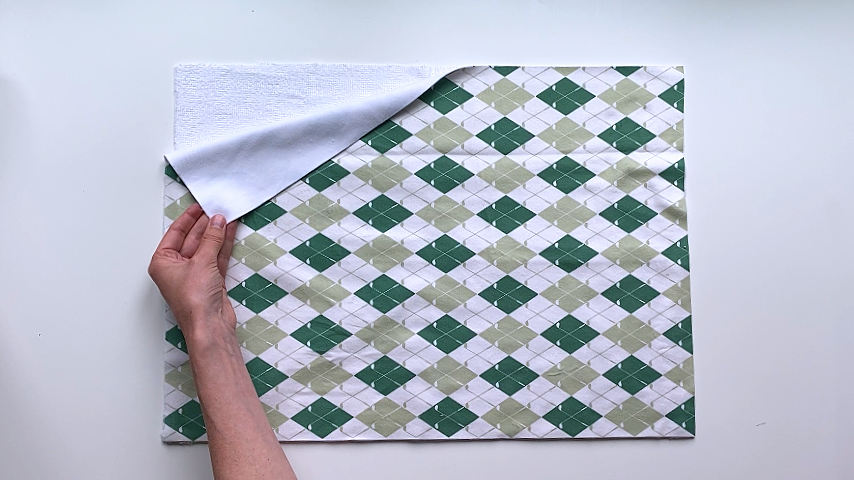

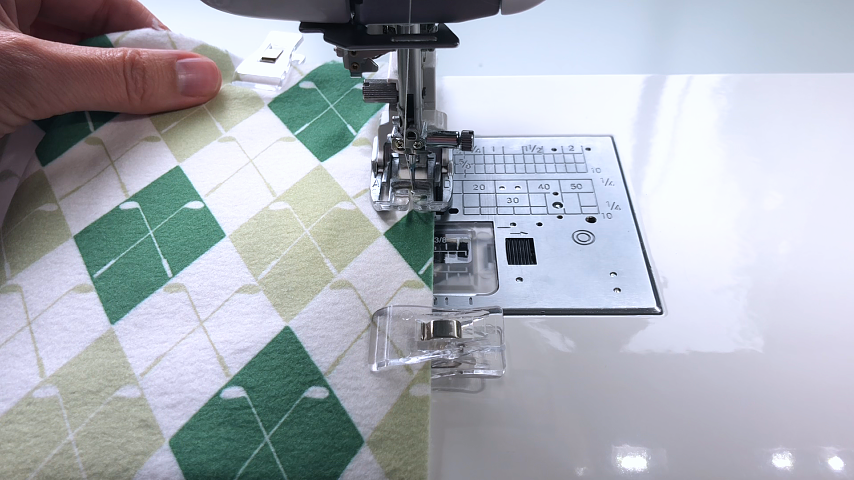
If you’re adding a fabric loop, instead of a grommet, baste the loop on now.
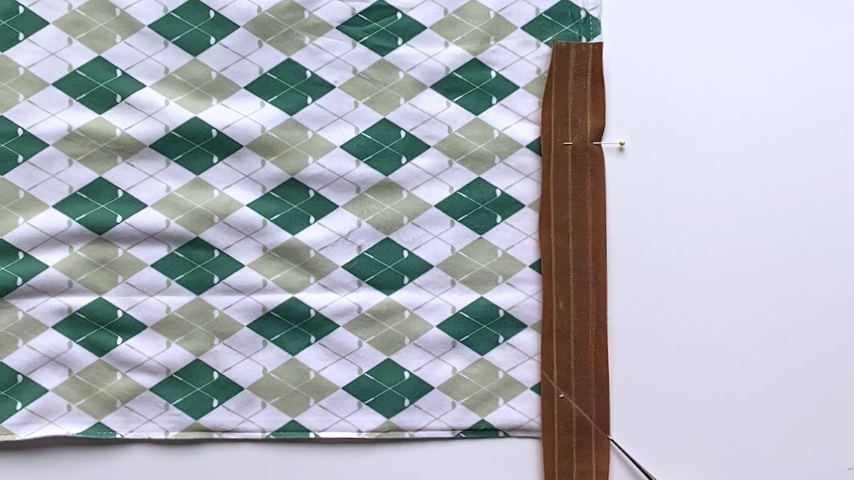
Step 3
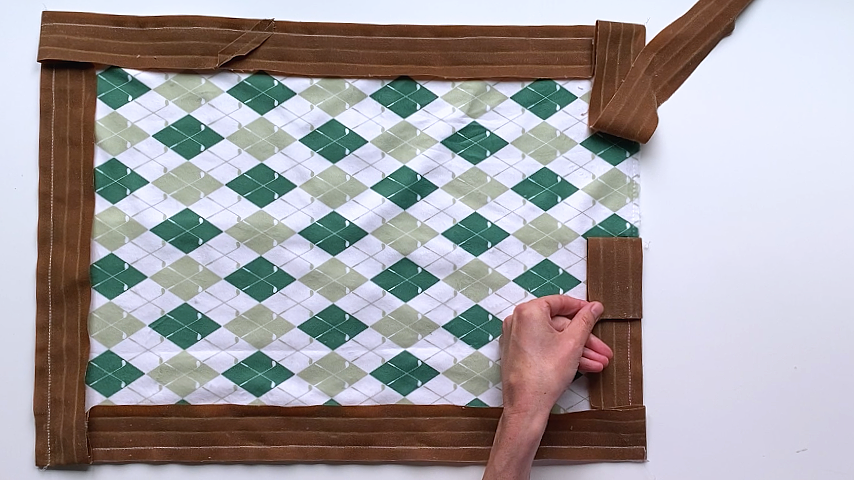
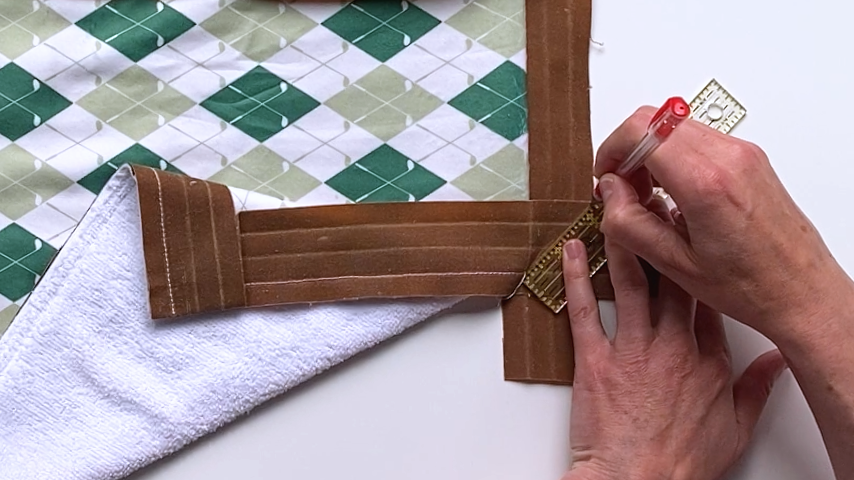
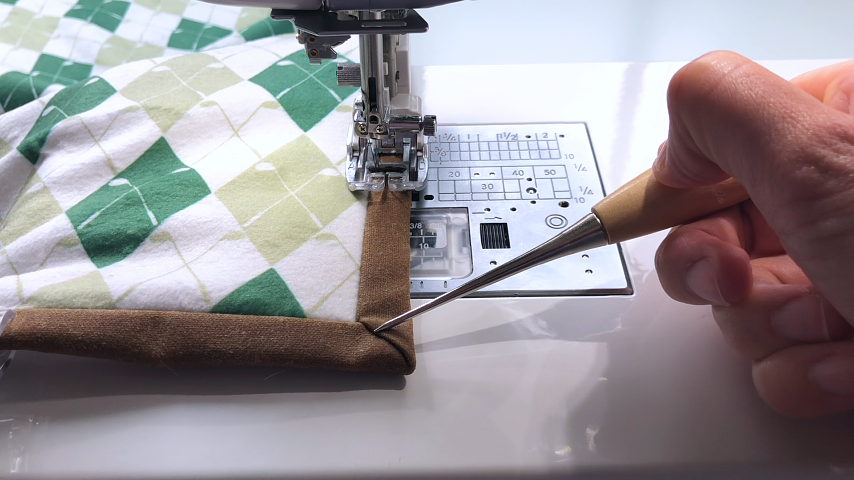
Start sewing the binding on, about 2-1/2″ away from the end (where the pin is in the image below). Sew in the first crease and angle the sewing off at 45 degrees at the corner.
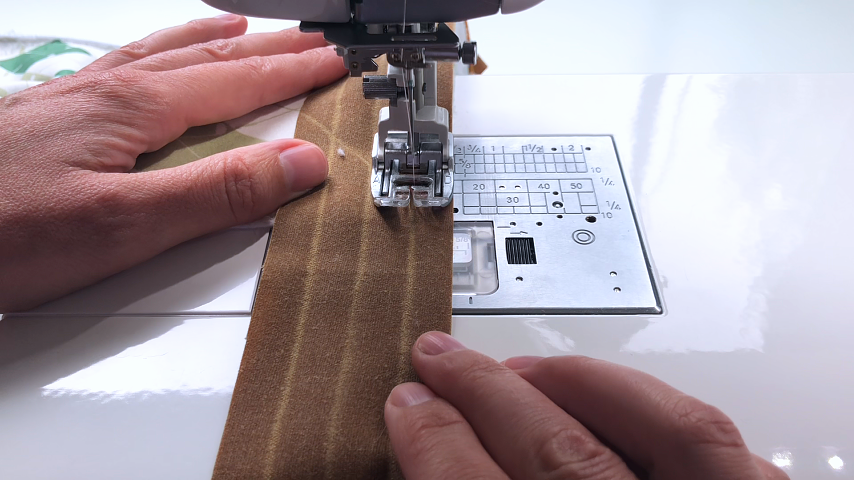
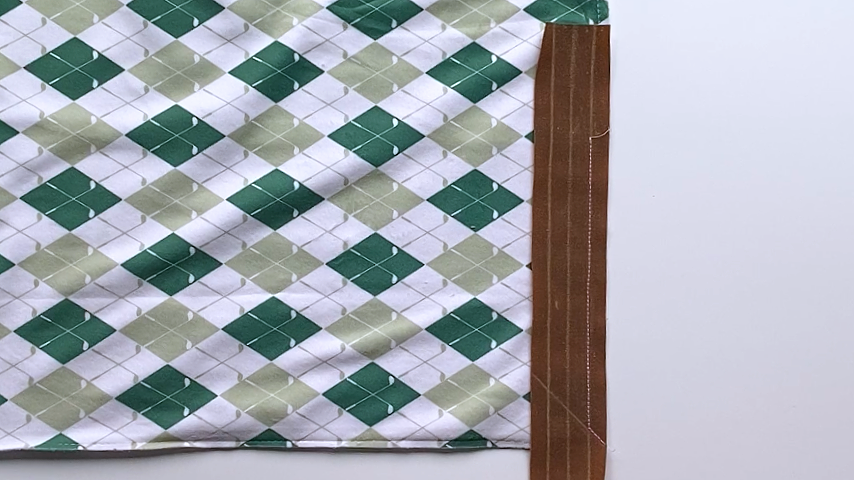
Fold the binding up, so it’s at a 90-degree angle to the side you just stitched.
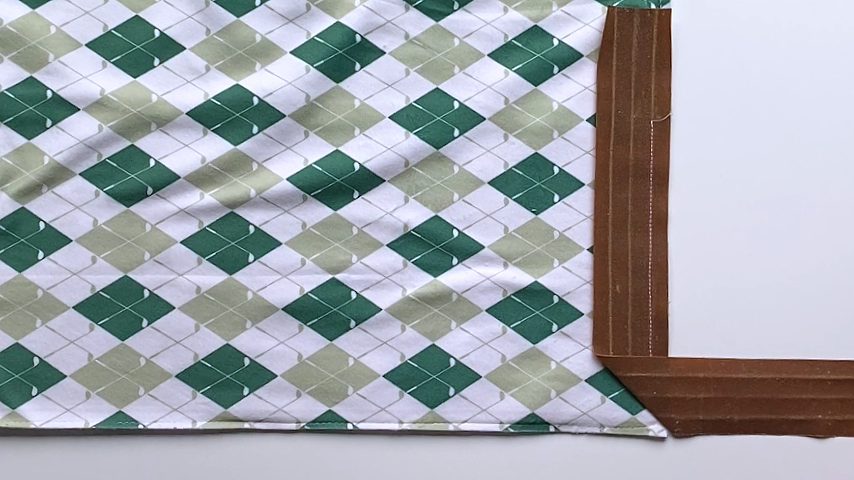
Then fold that piece back down, so the folded top edge is in line with the top edge of the towel.
Sew the binding to the next edge, and again, sew the corner at a 45-degree angle.
Repeat these steps until all four corners are done.
Step 4
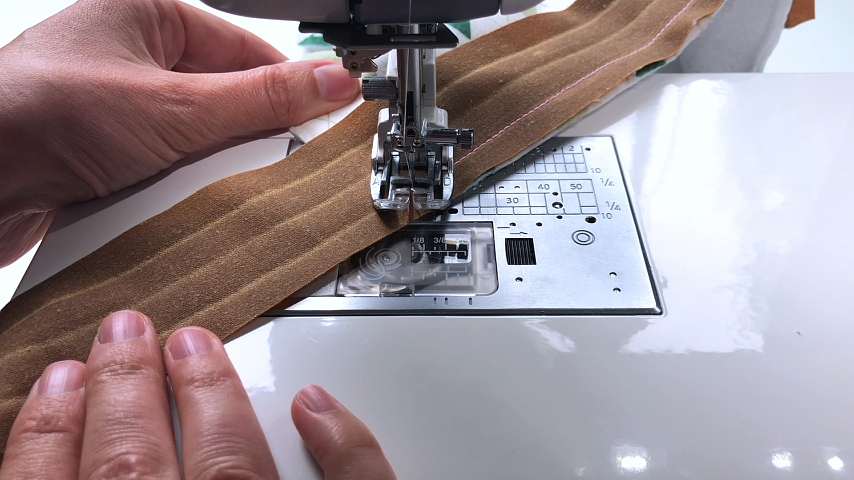
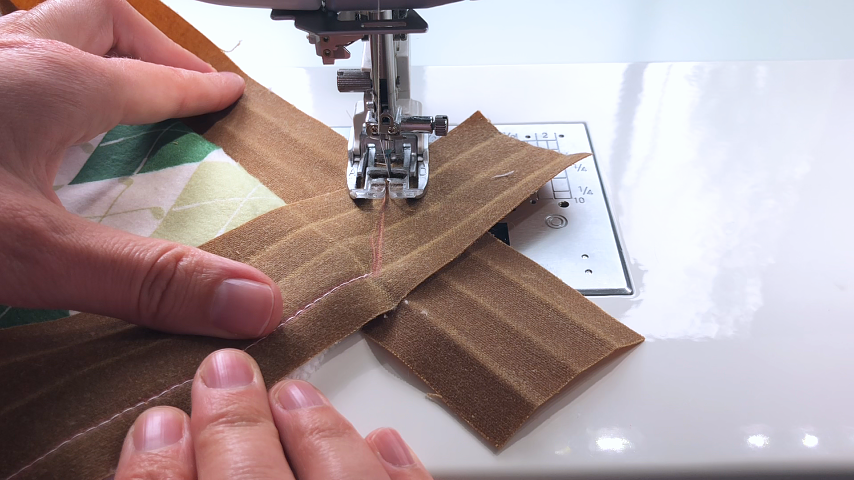
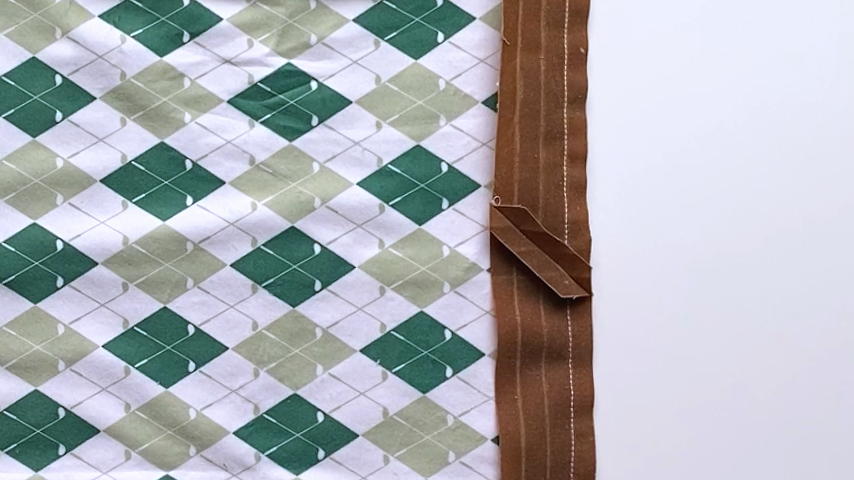
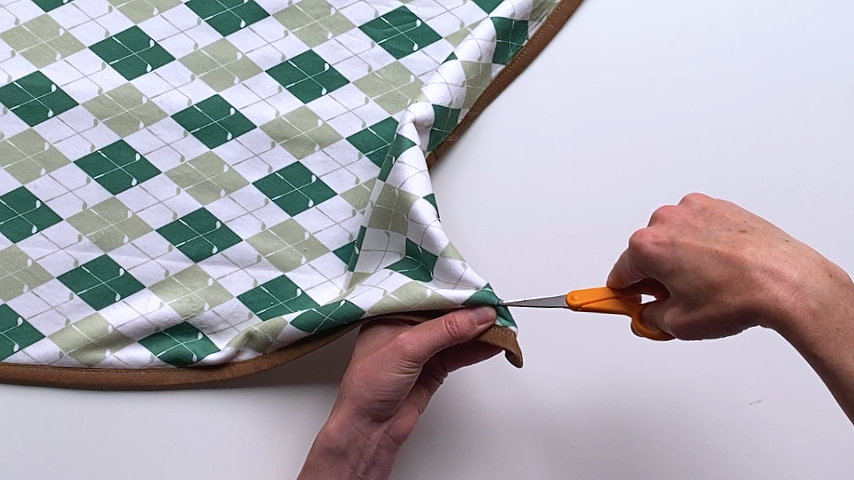
To join the ends, fold the start of the binding back, set the end of the binding on top, and sew right up to the fold.
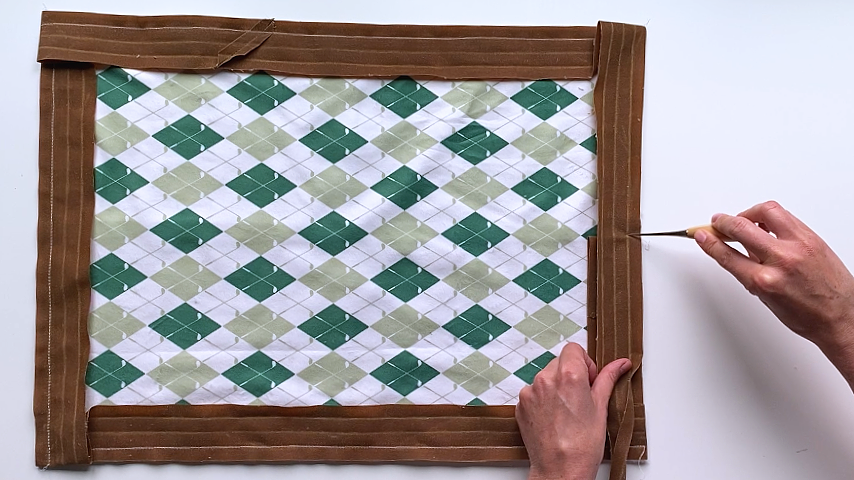
Flip the end of the binding to the other side and unfold it.
Then fold the towel so you can set the start of the binding at a 90-degree angle to the end of it.
You’ll sew across the two ends at a 45-degree angle.
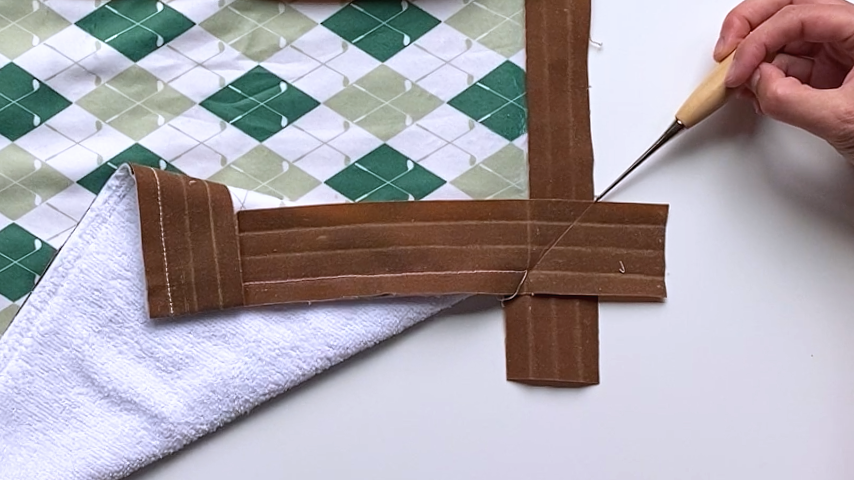
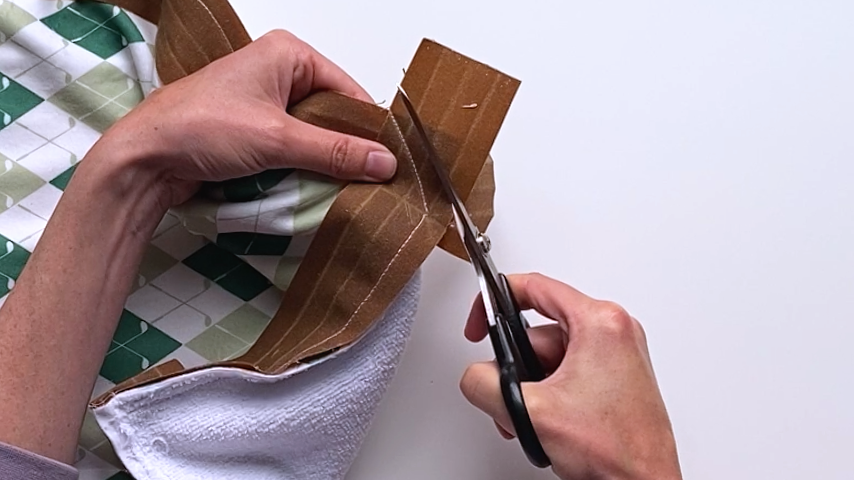
Check to be sure the seam looks good and sits flat, then cut off the excess ends of the binding and finger-press the seam open.

Step 5
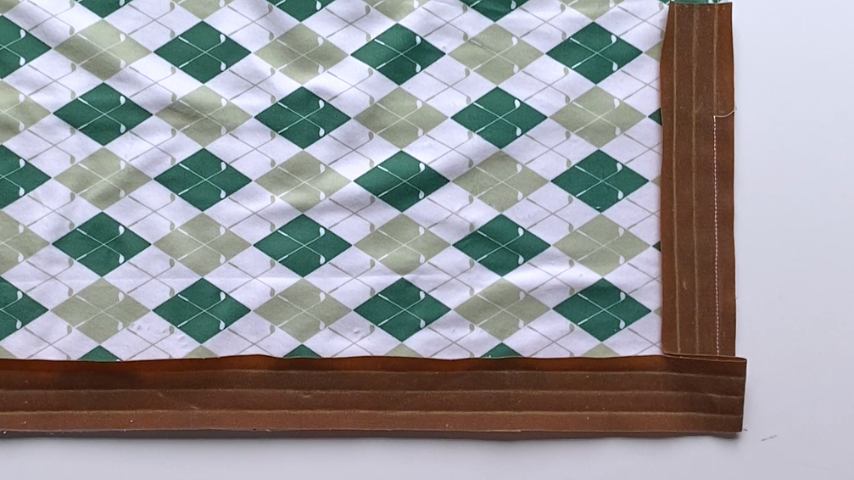
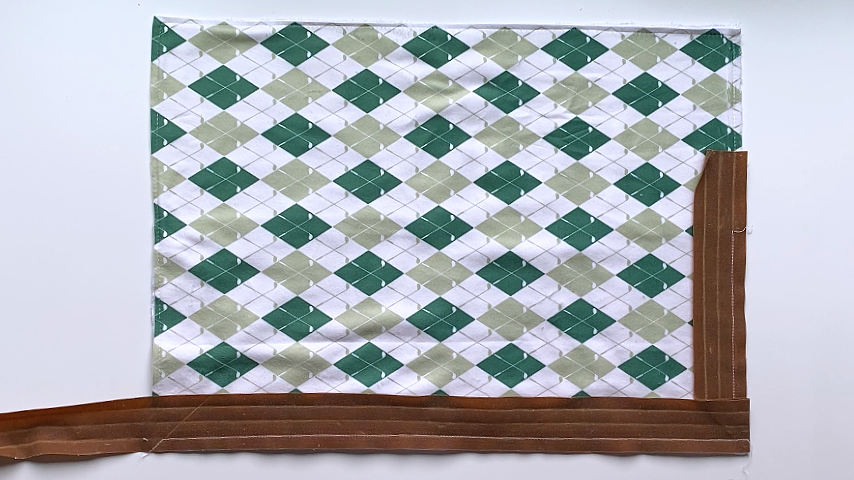
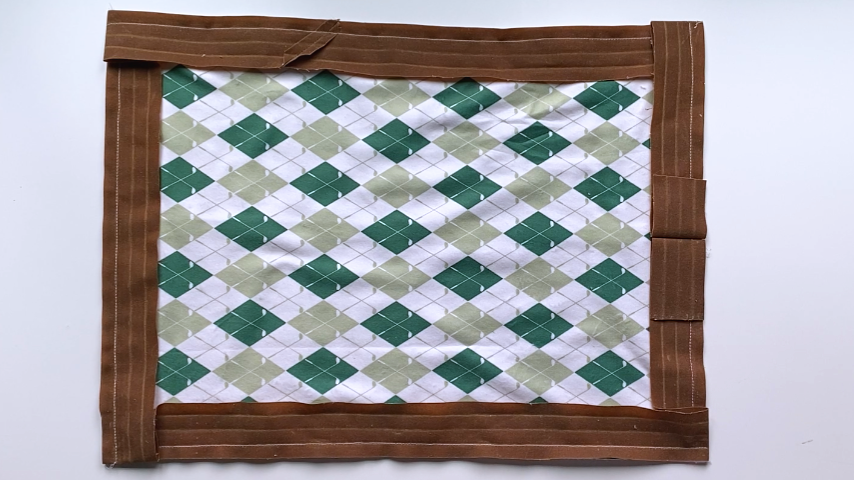
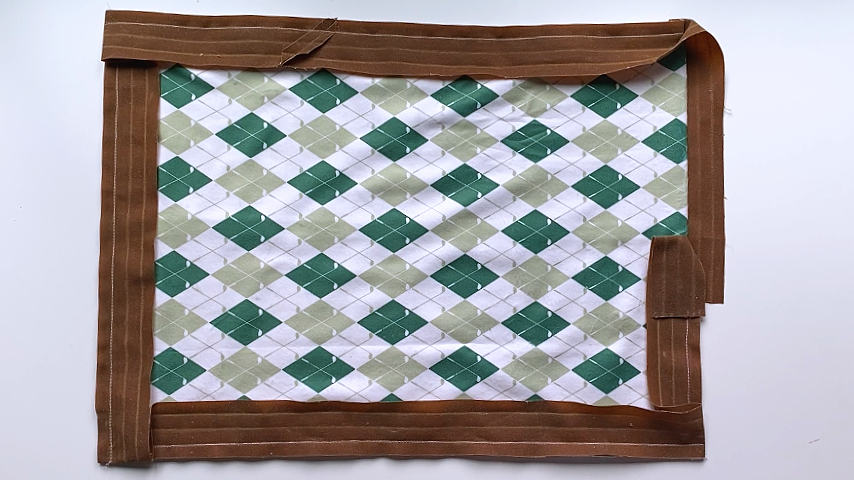
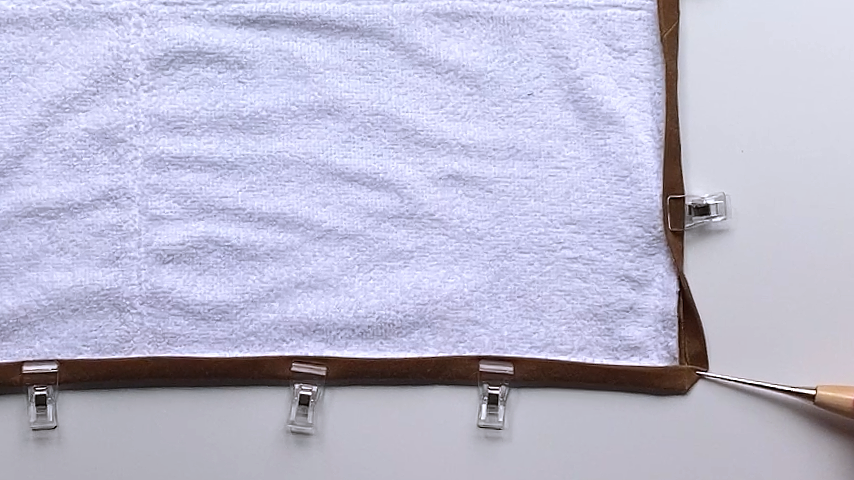
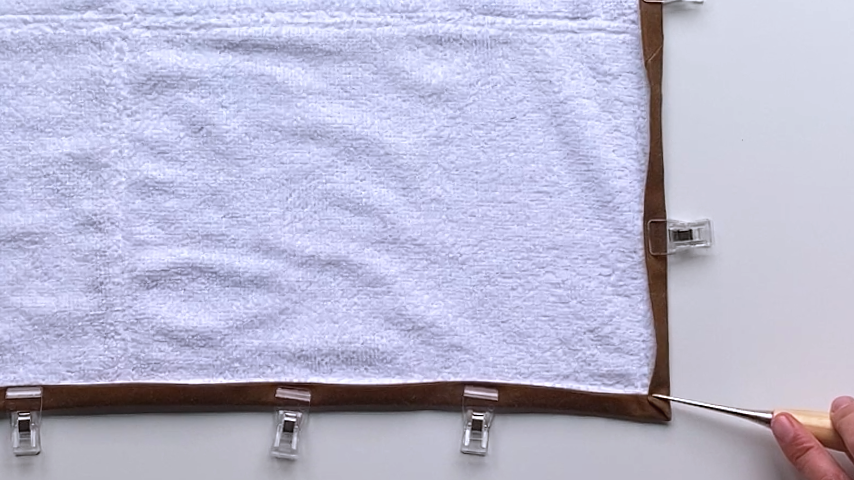
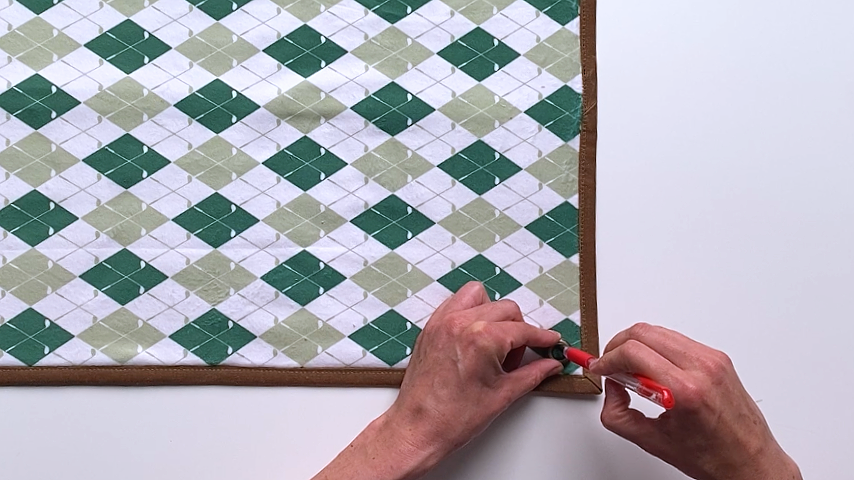
Flip the binding to the other side, fold it into place so the edge of the binding covers the line of stitching, and clip into place.
At the corners, fold one side flat before folding the other side in, and clip into place. Ensure the bulk of your corners alternates from top to bottom.
Topstitch 1/8″ in from the inside edge of the binding. I like to sew from the top side, to ensure my stitching looks best from the side of the towel that will show the most.
When you come to a corner, stop with your needle down once it reaches the corner crease. Then lift your presser foot, pivot the towel 90 degrees, put the presser foot back down and continue sewing.
Step 6
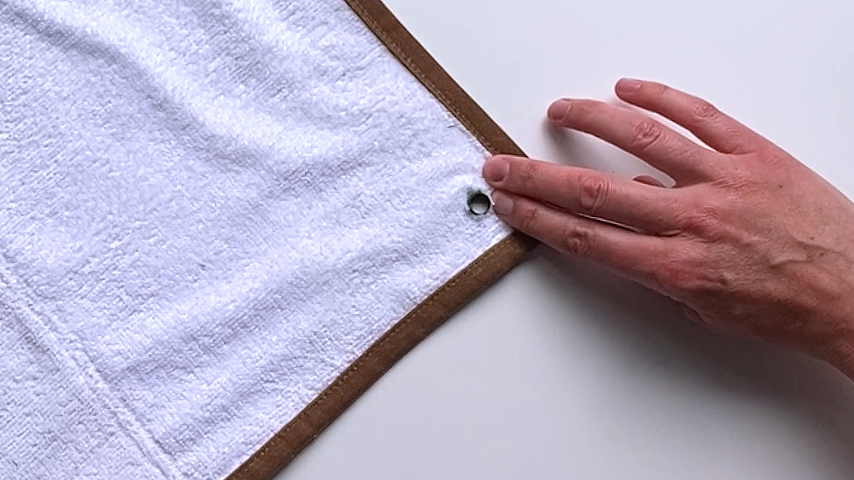
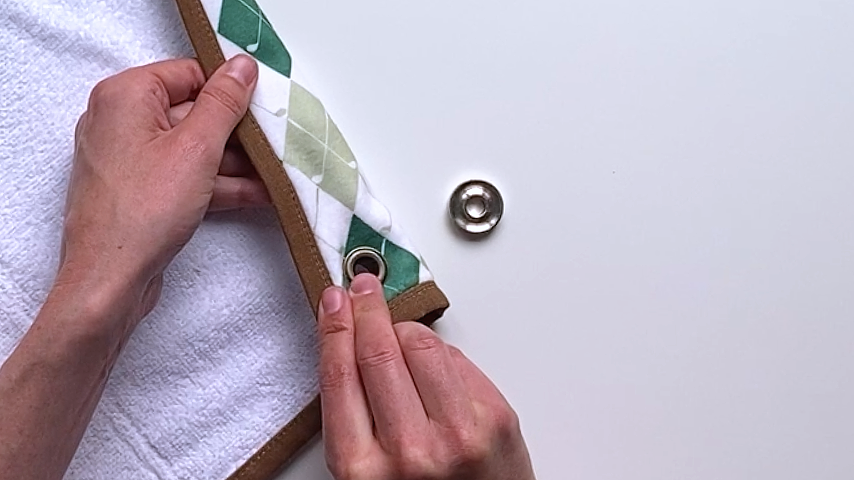
Add the grommet by first marking where it will go, then cutting a small X for the grommet top to fit through.
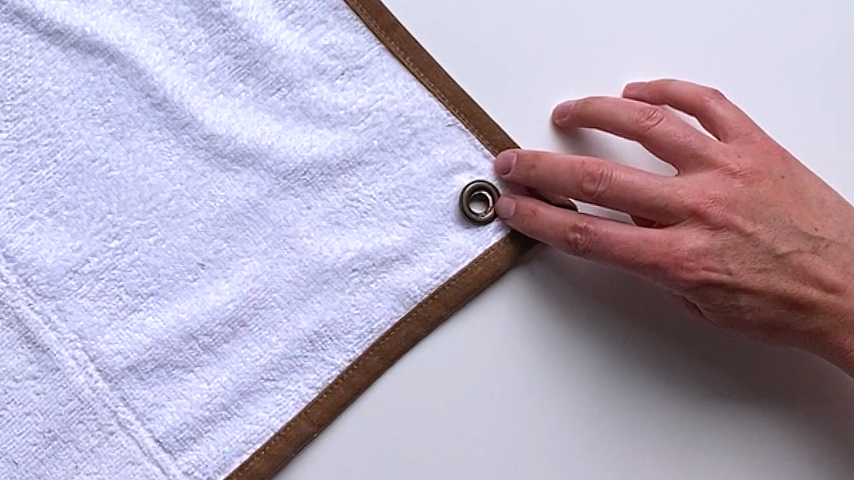
Fit the top through the hole, then flip the towel over and place the back of the grommet on.
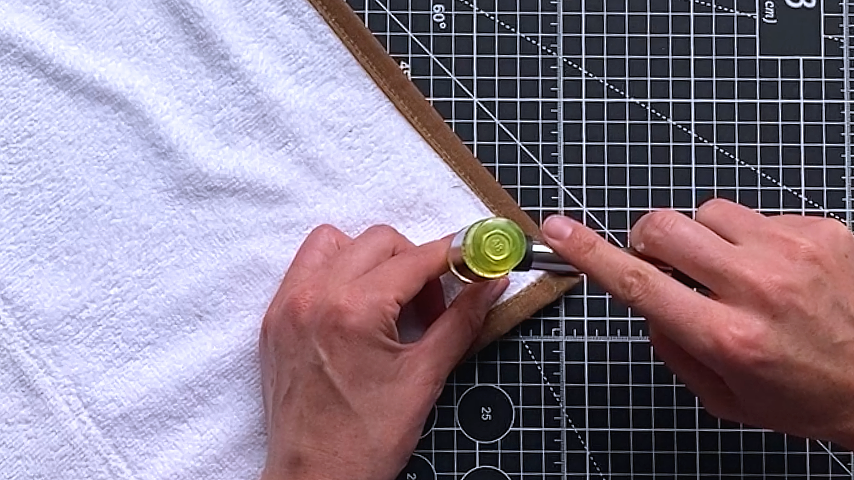
Use the grommet tool and a hammer to secure the grommet in place.
Your towel is complete!