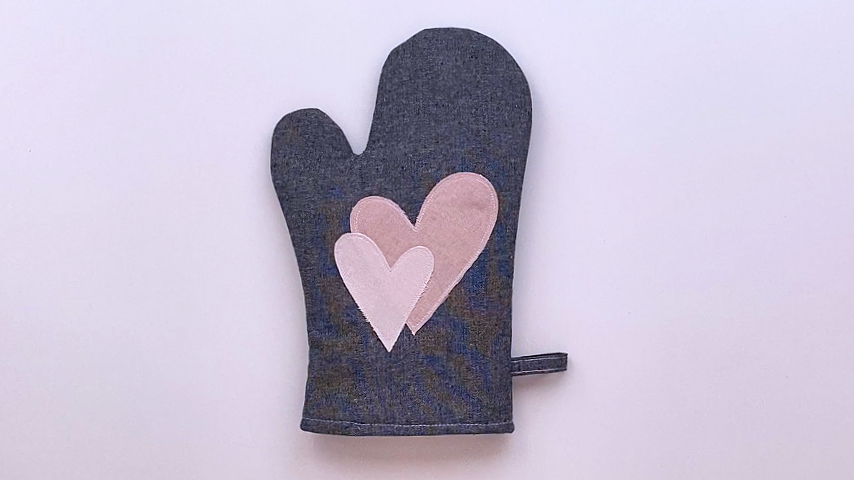
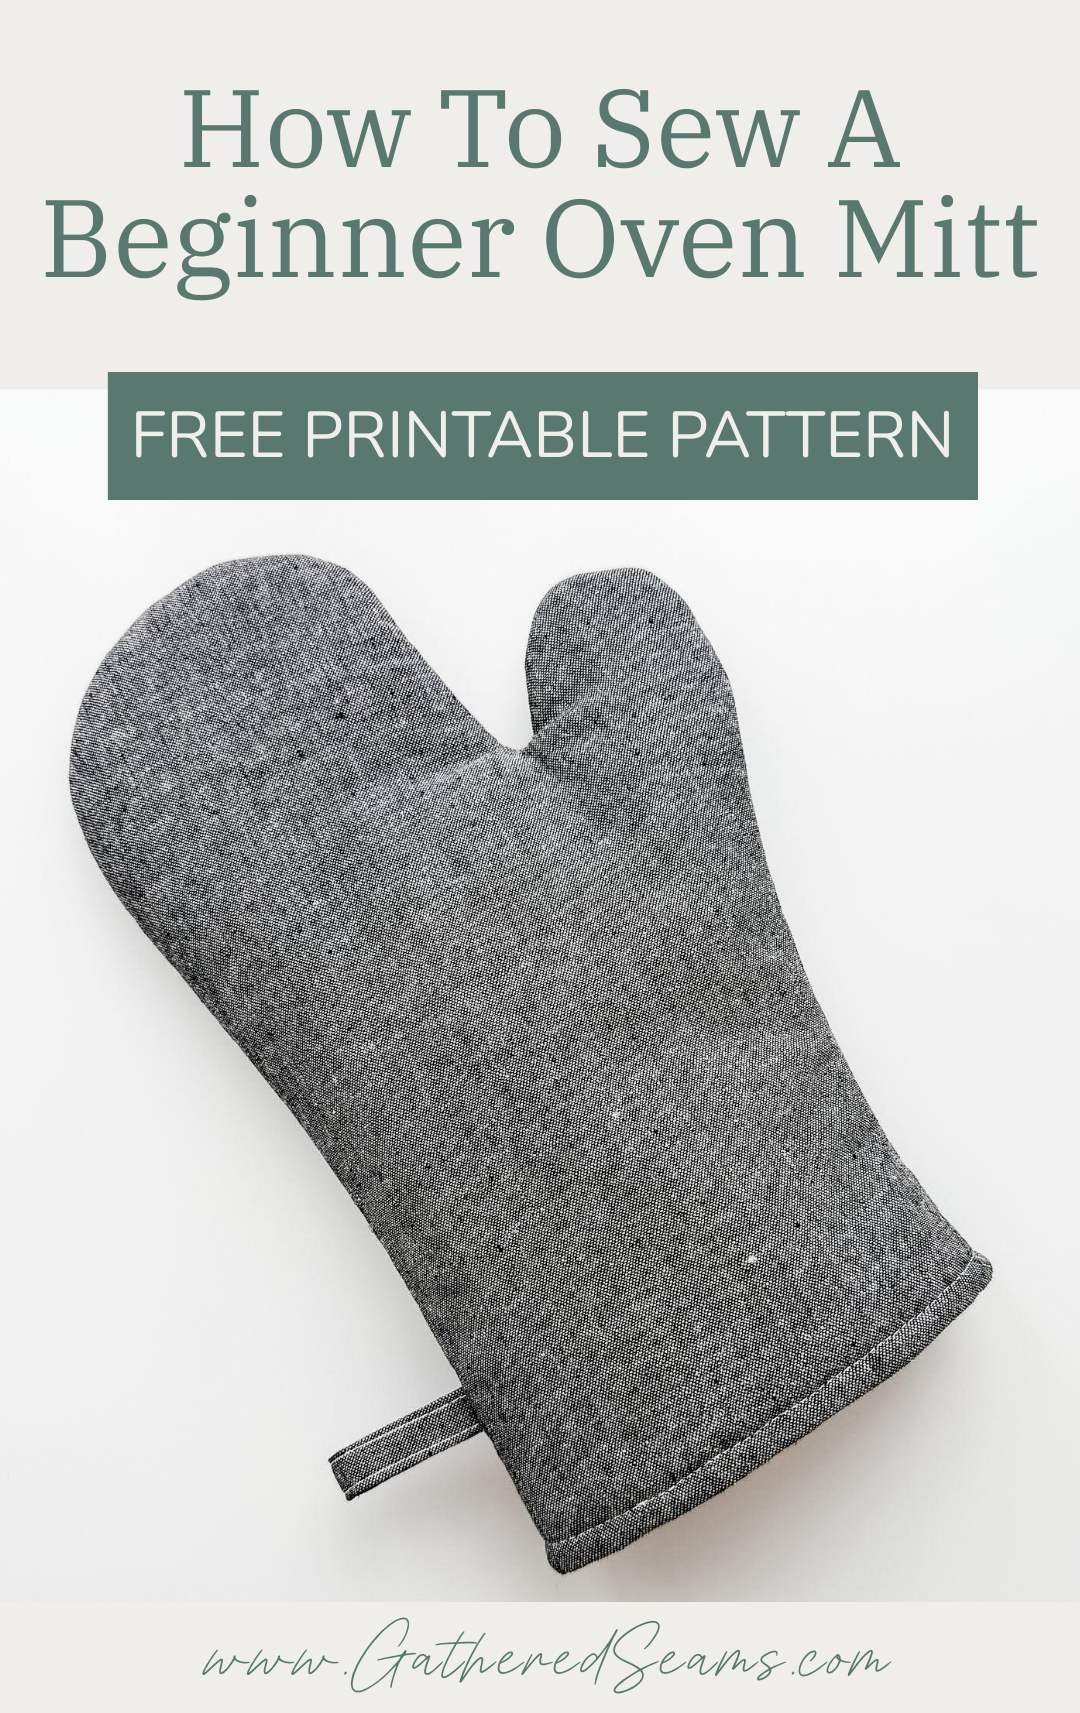
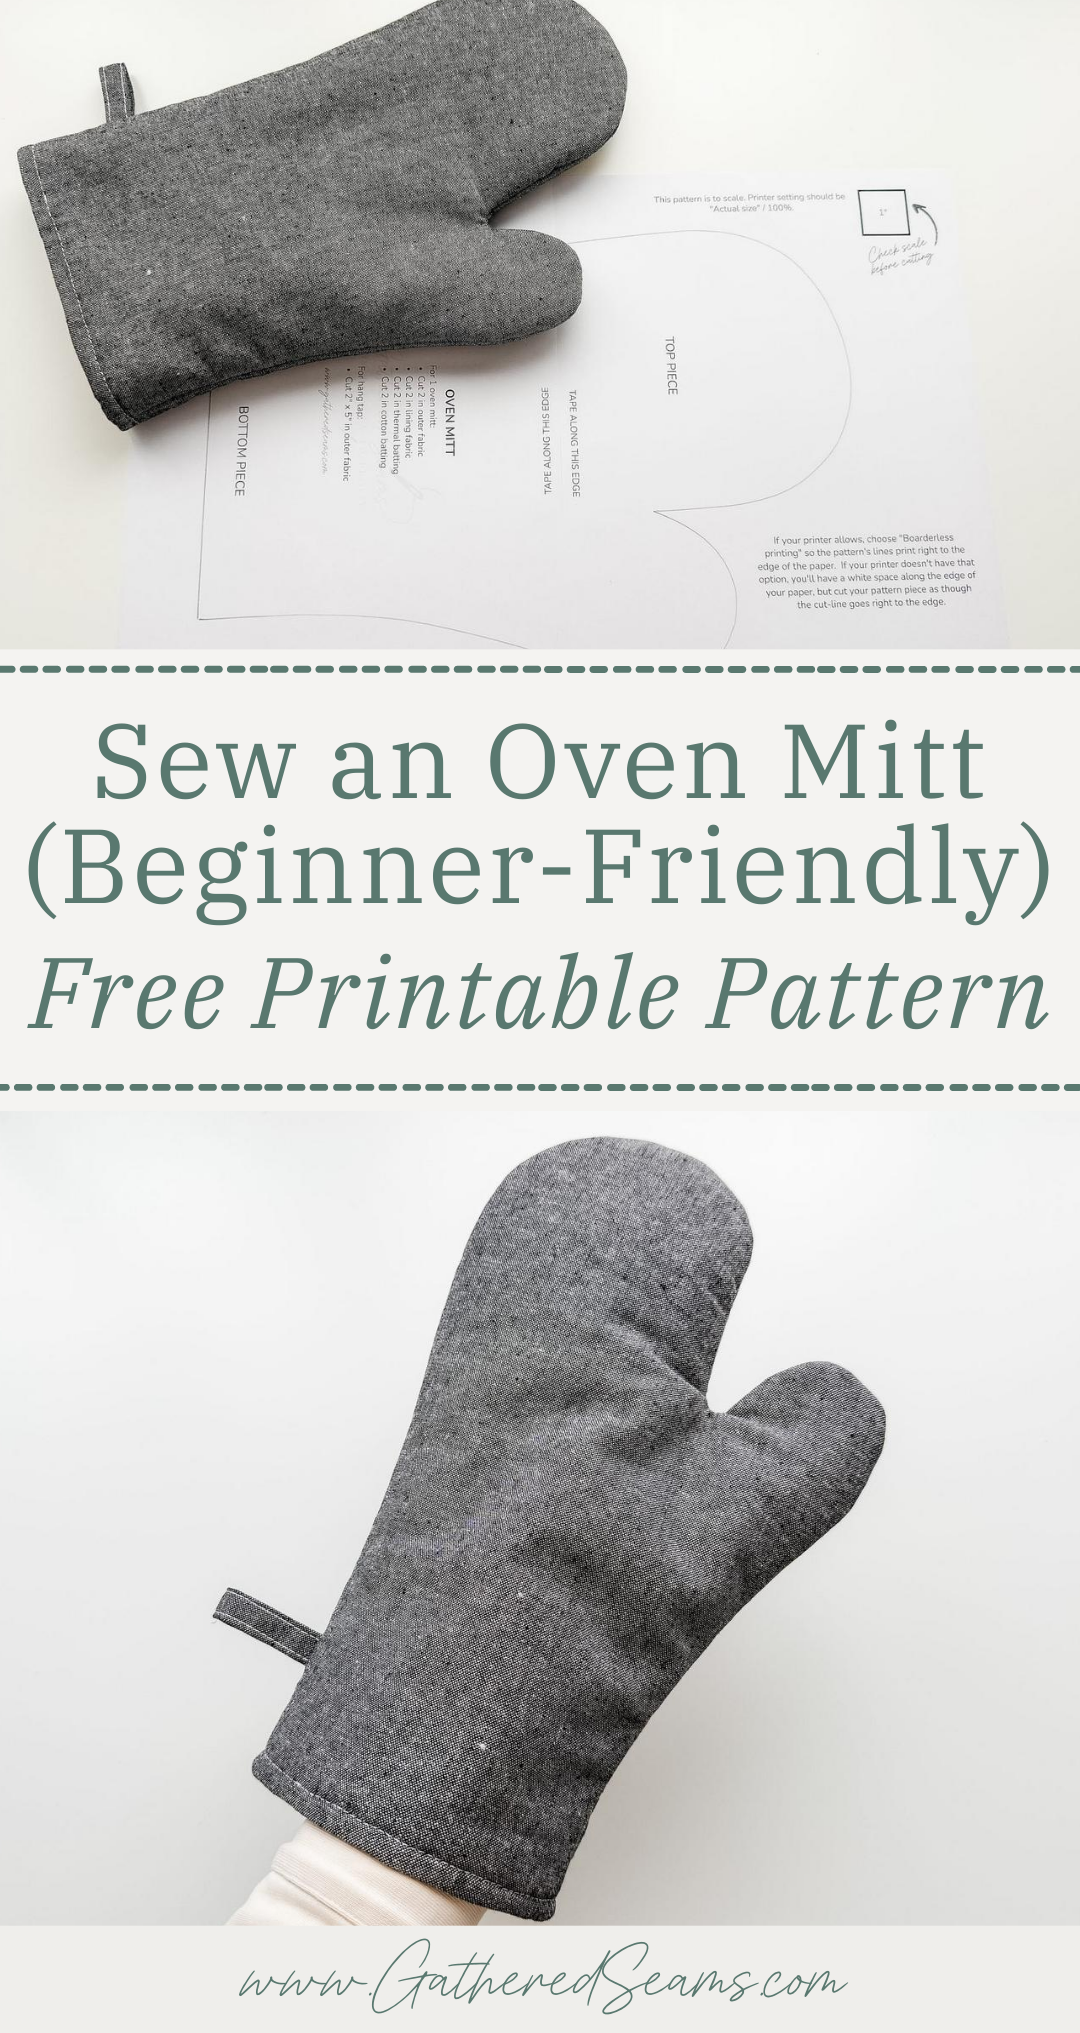
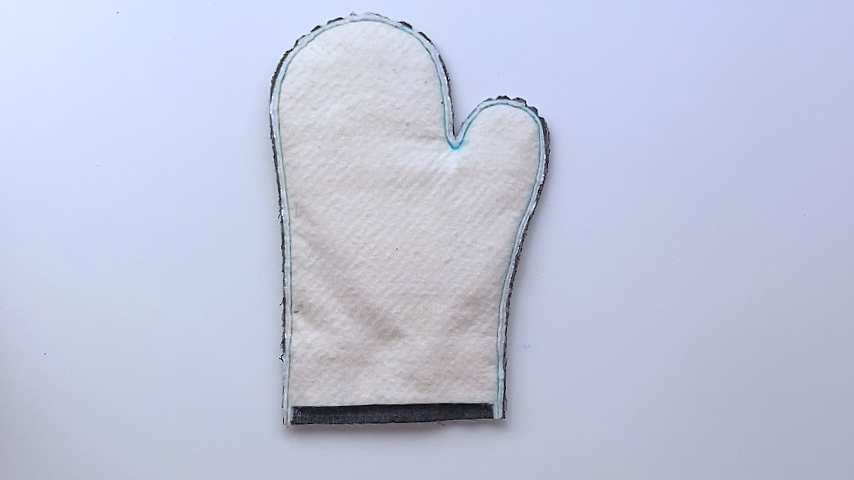
How To Sew a Beginner Oven Mitt | Free Printable Pattern
Oven mitts are relatively easy to sew, however there are a couple of factors that can be challenging for new sewists.
Many find that the quilting step is harder than expected.
Layers shift, fabric bunches, their sewing machine has a hard time sewing through the batting and fabric, and the quilting lines don’t look as clean as they’d like.
A few other complications that come up are having bulky seams, wrinkled fabric around the thumb, and turning the oven mitt right side out.
This sewing tutorial shares tips and methods to avoid these issues and to help a beginner sewist create an oven mitt that looks professionally made.
Materials
As an Amazon Associate, I earn from qualifying purchases (see full disclosure here).
- Cotton or linen fabric (avoid synthetic materials)
- Thermal/heat-resistant batting (Insul-Bright or something similar) (this has “heat-reflective” properties)
- 100% cotton batting (I used Warm & Natural) (this adds extra insulation)
- Cotton thread
Tools
- Sewing machine
- Walking foot (this makes sewing with thicker materials, like batting, easier. This is the universal one I purchased for my Baby Lock, which is a different machine than what’s shown in the photos)
- Seam ripper
- Temporary fabric pen or chalk
- Temporary fabric adhesive
- Ruler (be sure it’s in the measurement system you prefer; imperial or metric)
- Iron
- Scissors
- Pins or clips
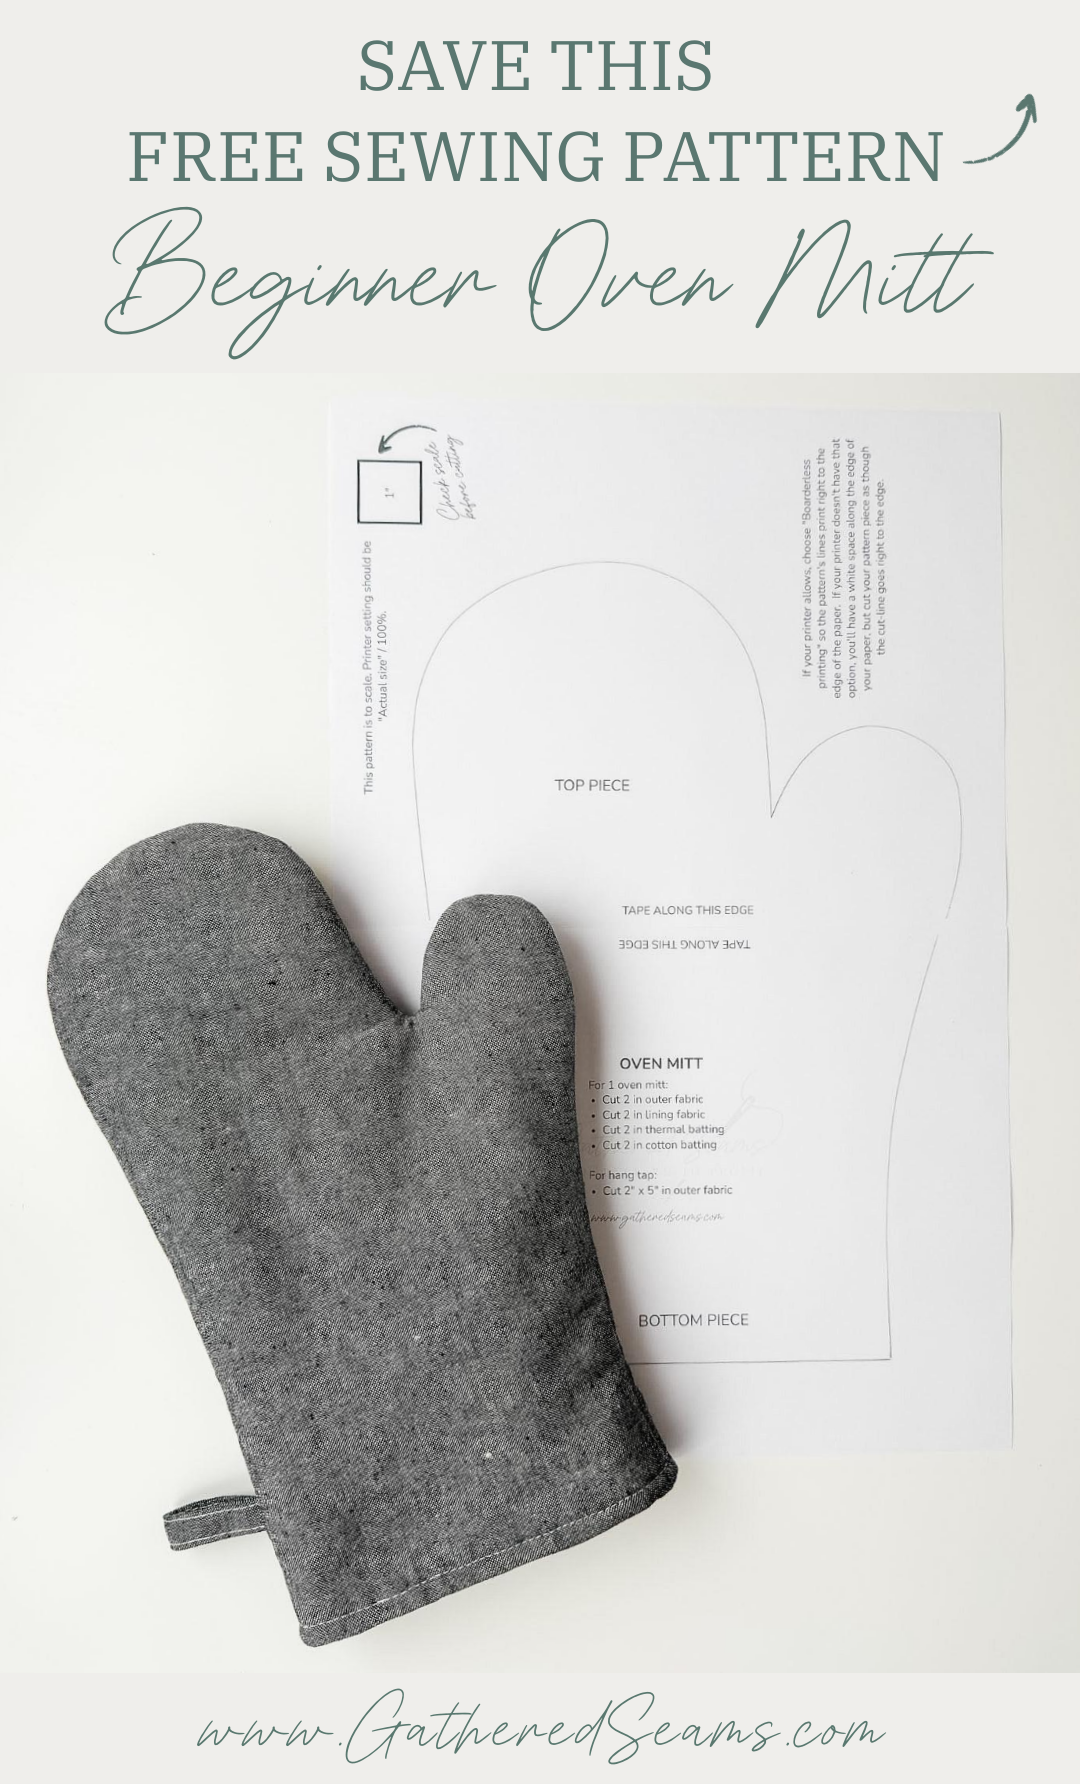
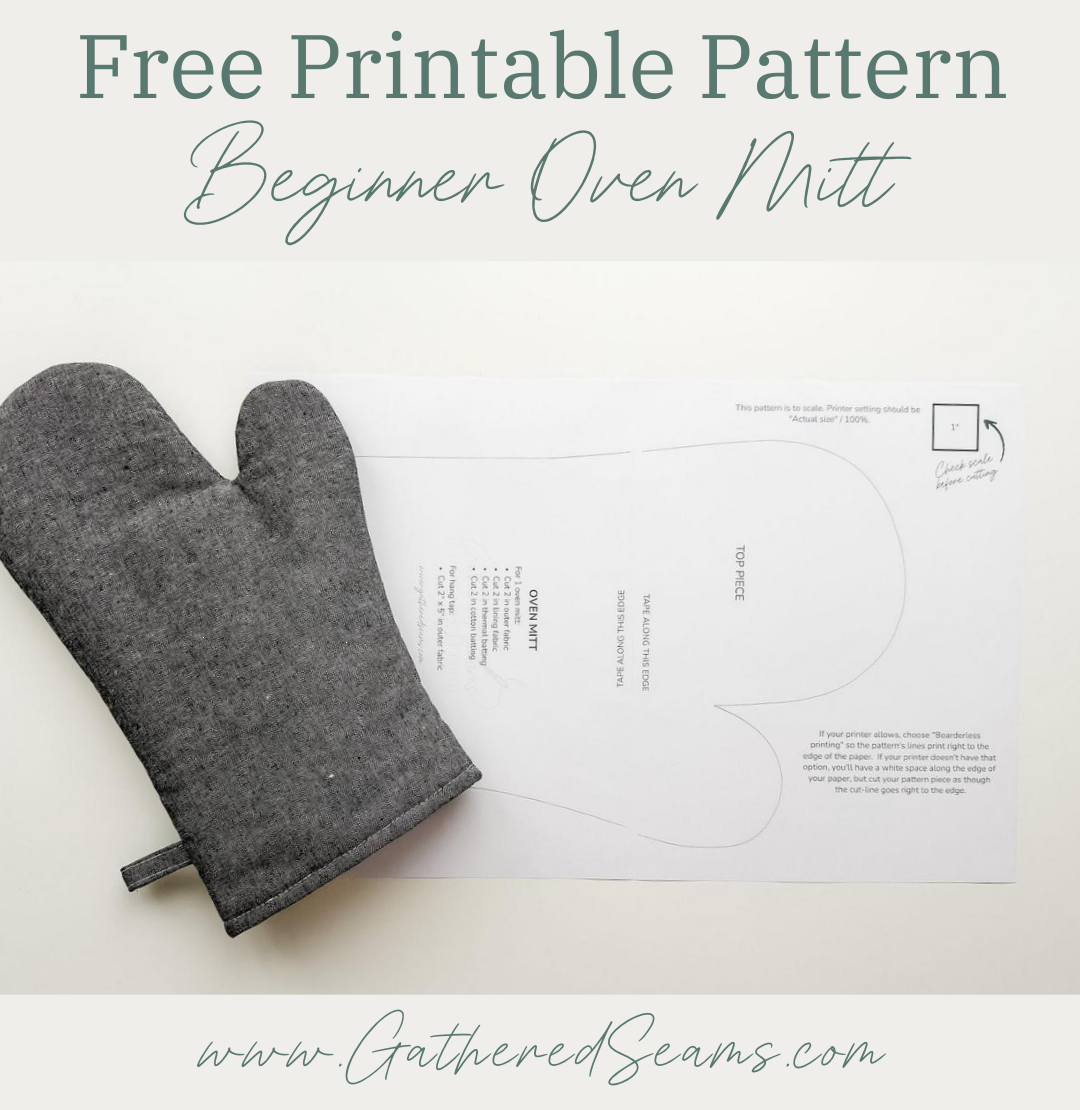
Free Printable Pattern for a Beginner Oven Mitt

Steps to sew a beginner oven mitt
Step 1
Please note: these instructions are to make one oven mitt (and not a set).
Download the free pattern and print it out. Tape the pieces so the edges butt together, and there is no overlap. Then cut the pattern shape out.
Don’t cut your fabric to the shape of the pattern piece yet.
For the outer fabric, thermal batting, and cotton batting, cut your fabric pieces slightly larger than the pattern piece; so that there is about 1/2″ – 1″ extra on all sides.
Your lining can be cut following the pattern shape.
Make sure the fabric pieces mirror each other. The easiest way to do this is to place two layers of fabric wrong sides together, then cut both layers at once. Alternatively, you can cut one set with the writing on the paper pattern facing up, and one set with it facing down.
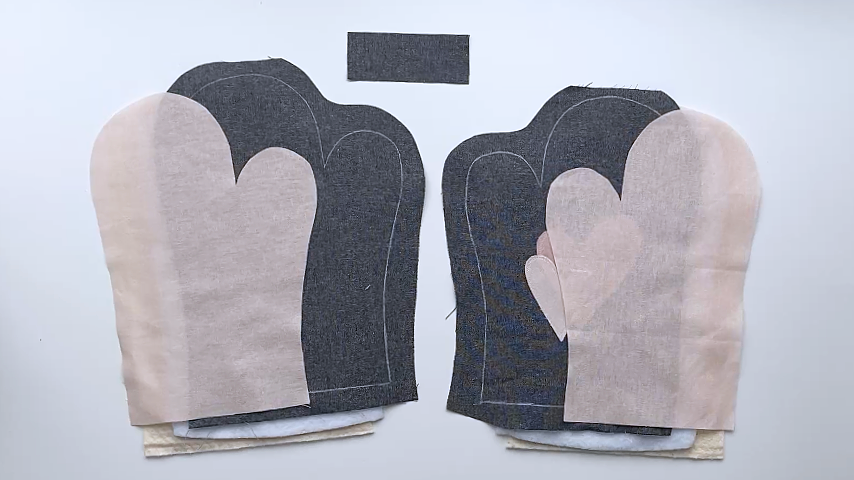
For the top and bottom of one oven mitt, you will need your pattern pieces cut in:
- 2 pieces from outer fabric
- 2 pieces from lining fabric
- 2 pieces in thermal batting
- 2 pieces in cotton batting
If you want to add a hang tab to your oven mitt, you will also need to cut a piece of fabric that is:
- 2″ x 5″
Step 2
For each the top and bottom oven mitt pieces, layer your outer fabric and batting as follows:
- Cotton batting (so it will be closest to the hand)
- Thermal batting
- Outer fabric
Whether you’re adding quilting stitches or not, temporary spray adhesive is helpful to keep all the layers of fabric and batting together and prevent shifting when sewing.
If you don’t have spray adhesive, use clips or pins to hold all the layers together.
Optional
If you want to add quilting stitches to your oven mitt, complete that step now.
Tips for quilting stitches
I’m not a “quilter” and only started working with batting a short time ago, but I’ve created many projects that require batting and quilting stitches and here are just a few tips I’ve found that make the step easier and leave me with a more polished look.
-
-
-
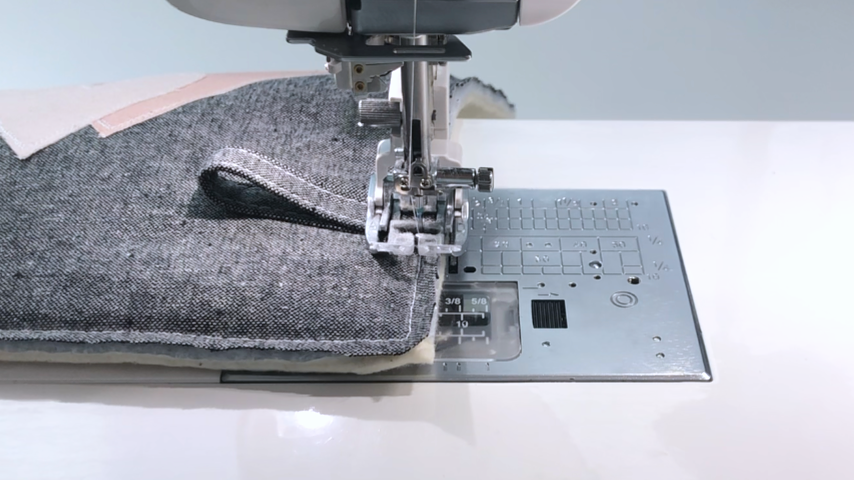
- Walking foot – switching out the foot on your sewing machine to a walking foot will be the biggest help. Instead of the presser foot sliding across the top fabric (which can push the fabric forward and cause bunching and wrinkles) the walking foot acts like a second set of feed dogs on top of the material. You can buy a universal one (this is the exact one I’ve purchased for one of my sewing machines).
- Presser foot pressure – if your sewing machine has a setting or dial that allows you to reduce the presser foot pressure, this can help reduce shifting and wrinkles.
- Stitch length – if your quilting design has lots of curves, a shorter stitch length (e.g. 2mm) is better. However, if you’re sewing straight lines, a longer stitch length (e.g. 4mm) will help the machine glide through the layers and help you sew straighter lines.
- Temporary fabric adhesive – this will temporarily bond your fabric and batting together to reduce shifting when sewing. Make sure you’re using one specifically created for sewing, like this one, so it doesn’t gum up your needle or machine.
- Mark lines – use chalk or a temporary fabric pen and a ruler to draw your lines on the outer fabric. Then follow those lines as you sew, which will help you sew straighter.
-
-
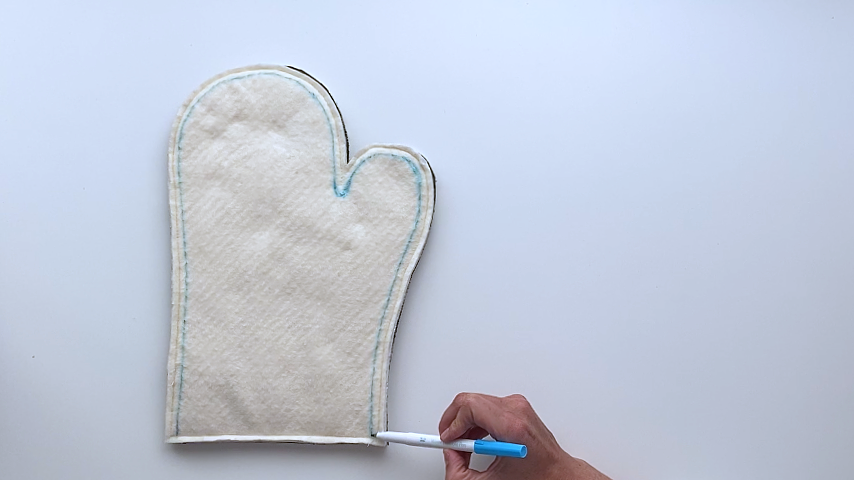
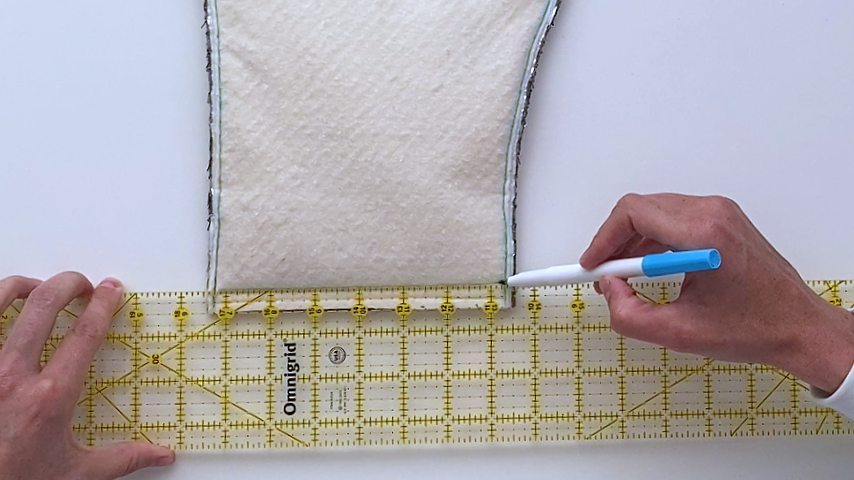
Once you’ve completed the quilting stitches, or, if you’re not adding quilting stitches, use a temporary fabric marker and the printed pattern piece to trace the shape of the oven mitt on the outer fabric.
With your three layers together (outer fabric, thermal batting, cotton batting), sew them together by sewing right on top of the traced line.
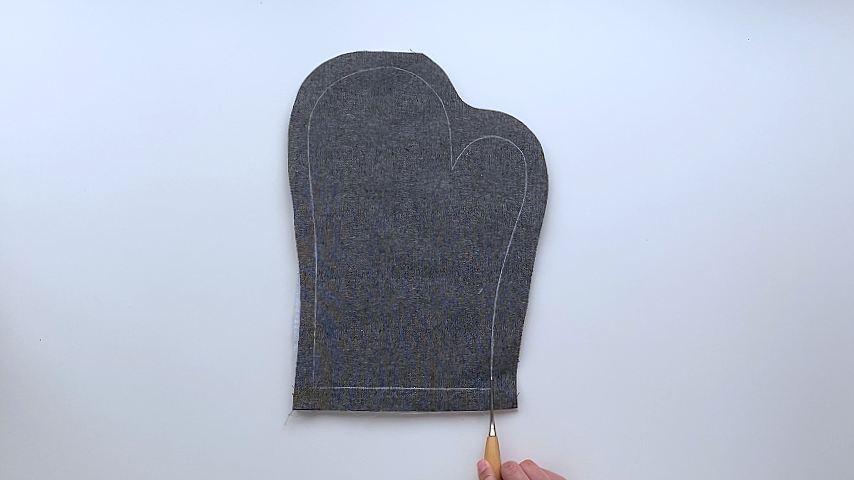
Cut away the excess fabric by cutting close to your stitched line. Try to be accurate with this cutting so you get clean edges and you’re cutting an even distance away from the stitching all around the oven mitt.
Repeat this for the outer bottom piece of your oven mitt.
Step 3
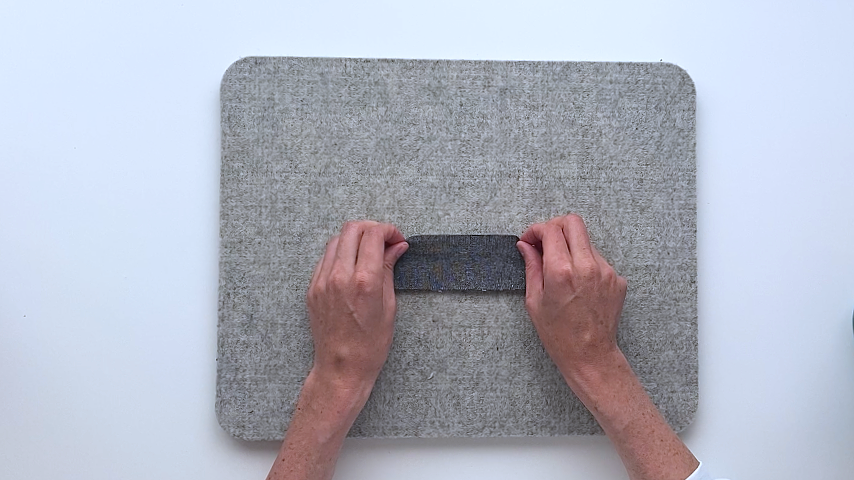
If you’re adding a hang tab to your oven mitt, take your 2″ x 5″ piece of fabric and fold it lengthwise so the wrong sides are together and press.

Then fold the bottom edge up to meet that center crease and press the bottom edge.
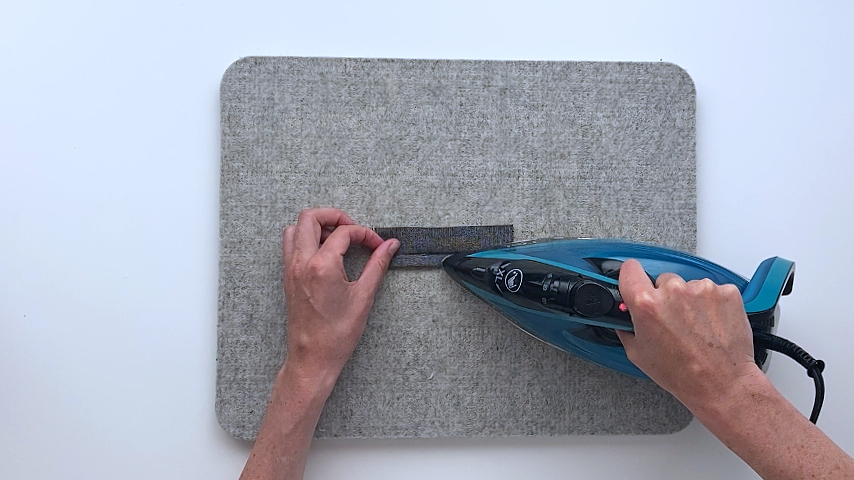
Fold the top edge down to meet the center crease and press.
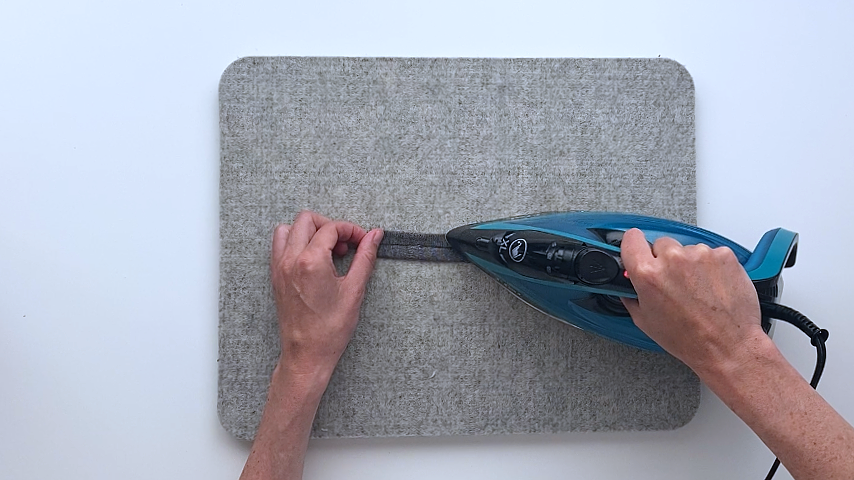
Fold in half lengthwise again and press.
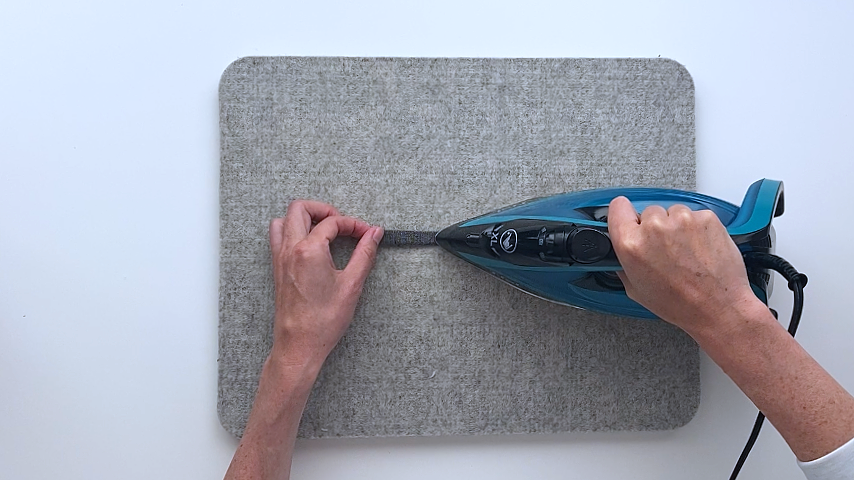
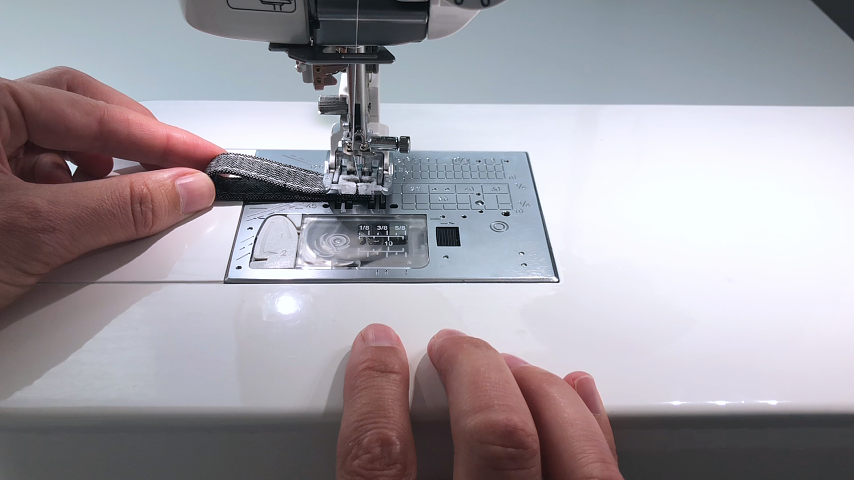
Topstitch down both sides.
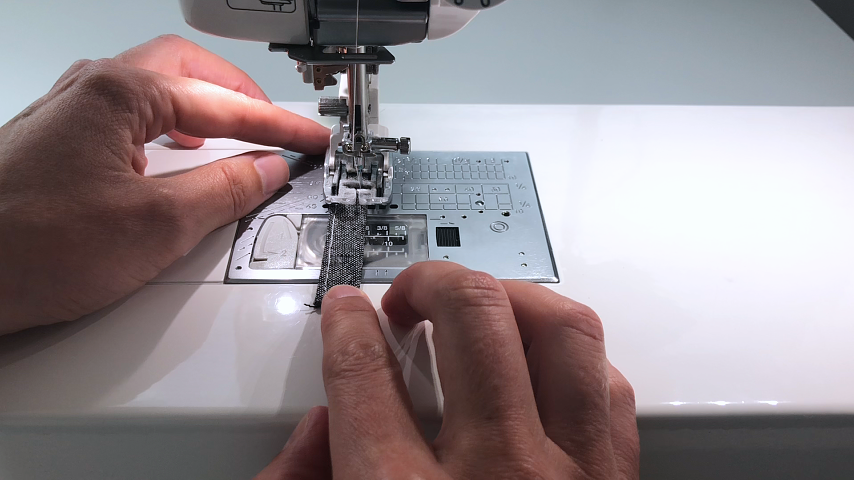
Fold it in half width-wise, so it creates a loop, and sew the two ends together.
Place the loop on the outside edge (so it will be on the outside of the hand rather than the thumb side) of one of your outer pieces. I placed mine 2″ above the bottom hem.
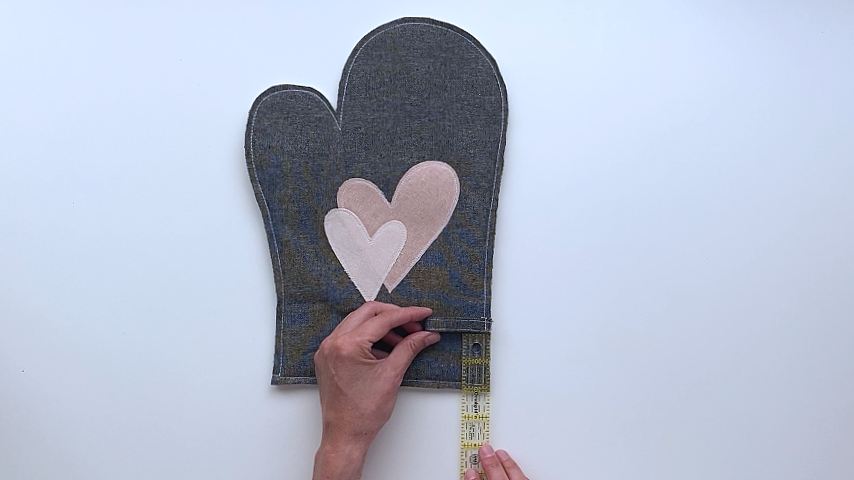
It should be on the fabric side (not the batting side). Line up the cut edges of the loop with the cut edge of the oven mitt and clip or baste it into place.
Step 4
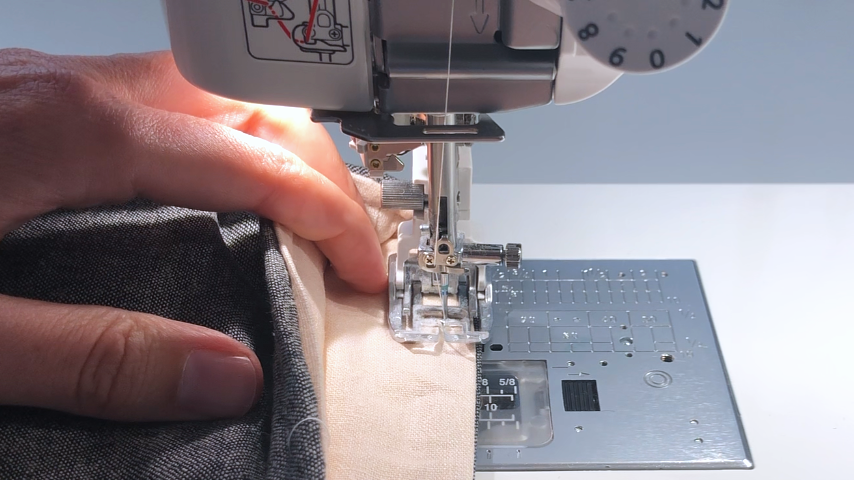
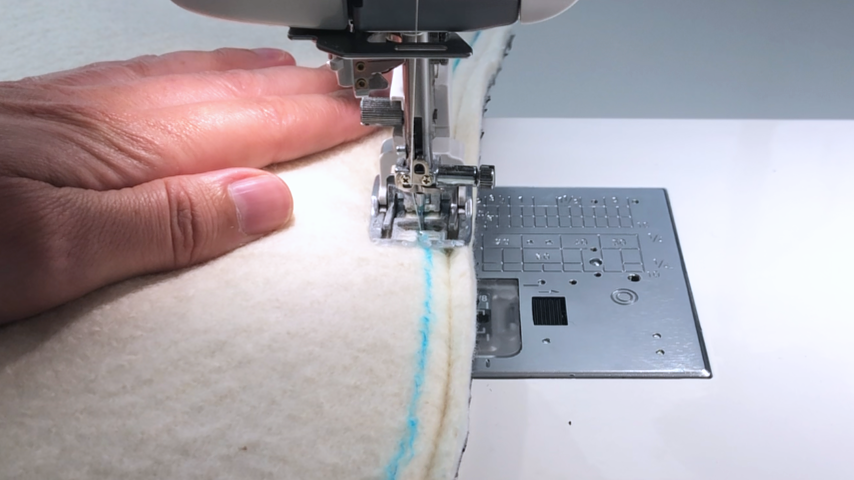
Place the two pieces of your outer oven mitt with right sides together and line up the edges. It’s okay if the edges don’t line up exactly since you were eyeballing it when cutting out the shape. Use clips to hold the layers together.
I find it helpful to use a temporary fabric marker to draw a line a 1/4″ away from the line of stitching, so I can follow it as I sew and keep my seam allowance consistent.
This is especially helpful around the bottom of the thumb, where the fingers and thumb meet. The stitch line should be rounded at the bottom (rather than come to a sharp point).
It’s important to use the line of stitching as your guide (and sew 1/4″ in from that), rather than the cut edge.
Following the drawn on line, or using a 1/4″ seam allowance from the stitching, sew around the sides and top of the oven mitt.
Lower your stitch length (about 2.5mm), which will create a stronger seam and will help you sew around the curves.
Step 5
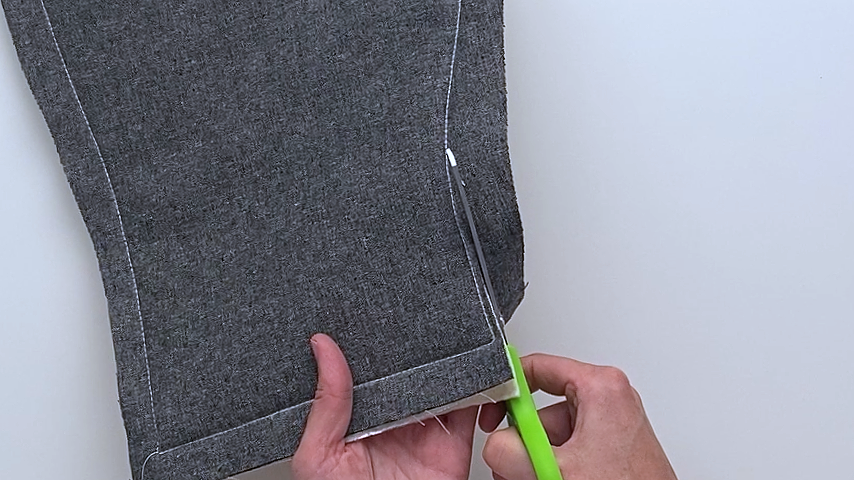
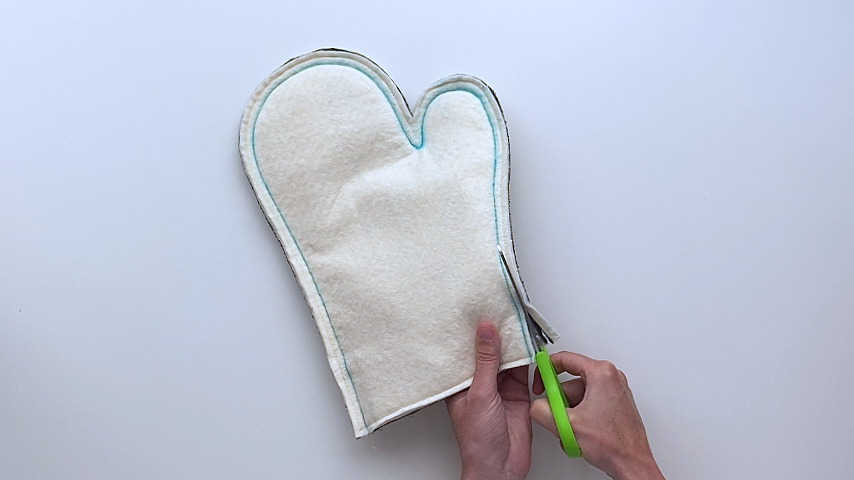
Now we will trim the seam allowance to remove bulk, and grade the batting, which will also reduce bulk and give you cleaner-looking seams.
Trim seam allowance
Cut all 6 layers about 1/4″ away from the inside stitching.
In this step, it’s important to cut off the first/outer row of stitching (the basting stitch that’s holding the fabric and batting together), so all the layers of fabric and batting can now be separated.
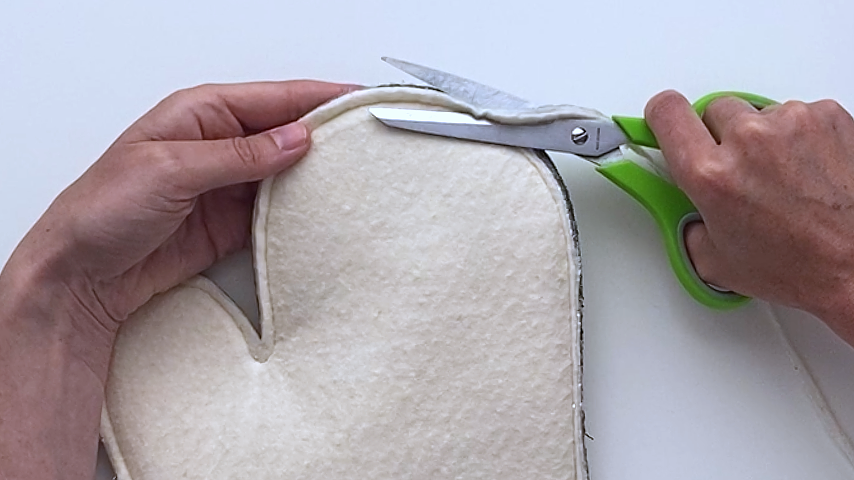
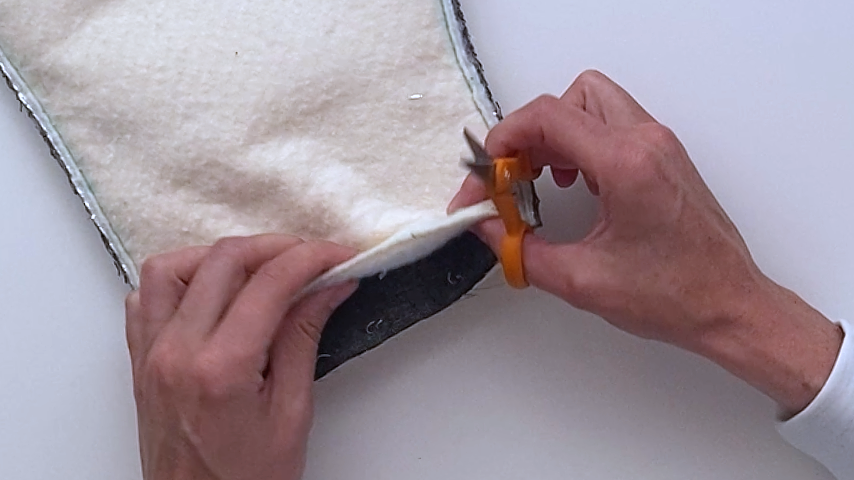
Grading
We’ll reduce the seam allowance of the batting further by grading it (cutting it shorter than the fabric layer).
To do this with bulky batting, I hold my scissors almost parallel to the oven mitt and cut the batting only.
You don’t want to cut the stitching (which is difficult to do if you’re holding the scissors parallel), but you do want to cut the batting as close to the stitching as you can.
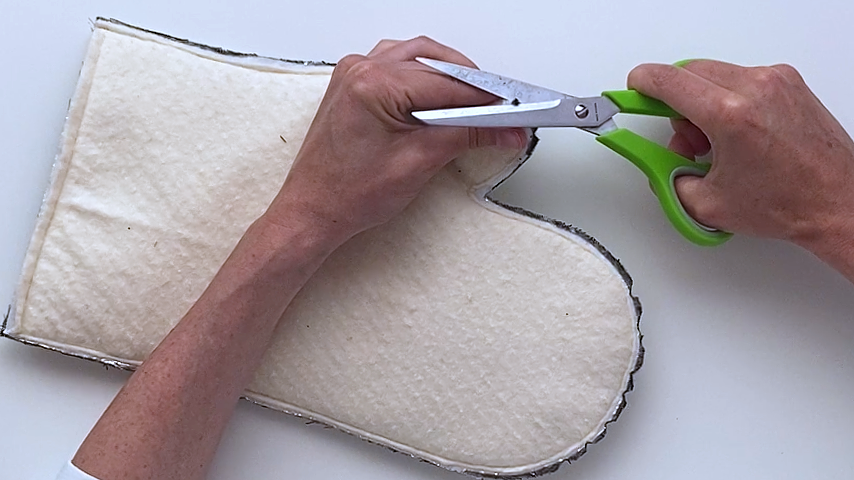
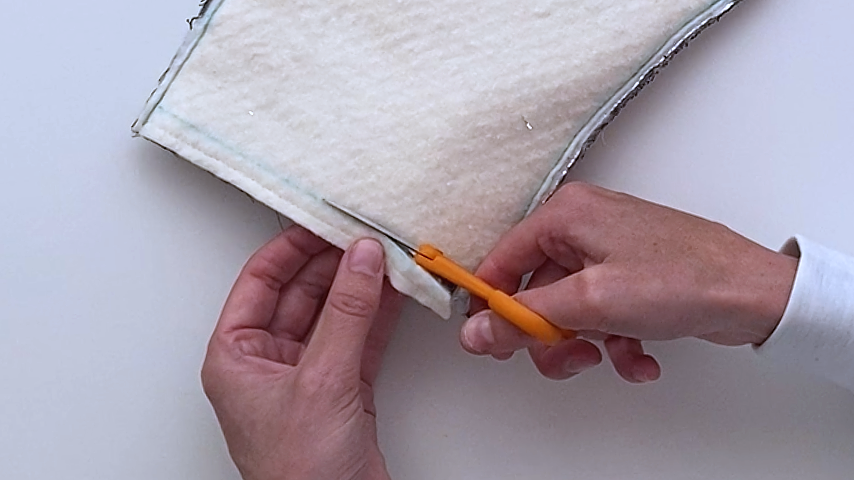
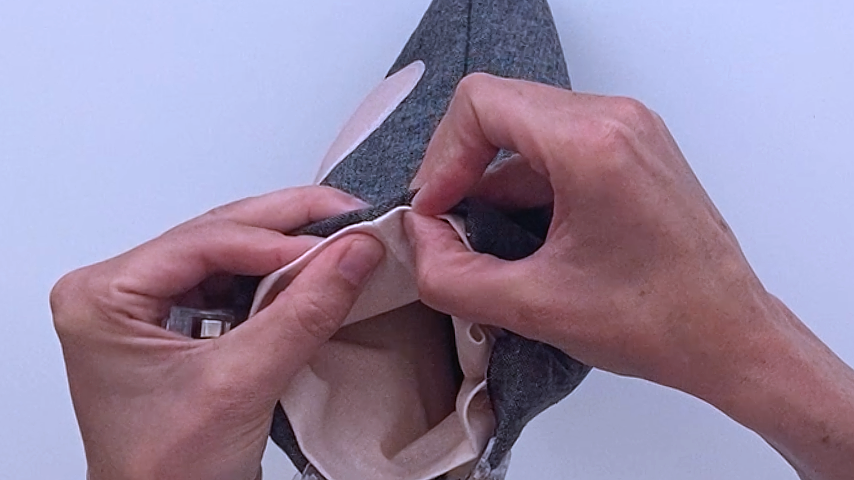
Notching
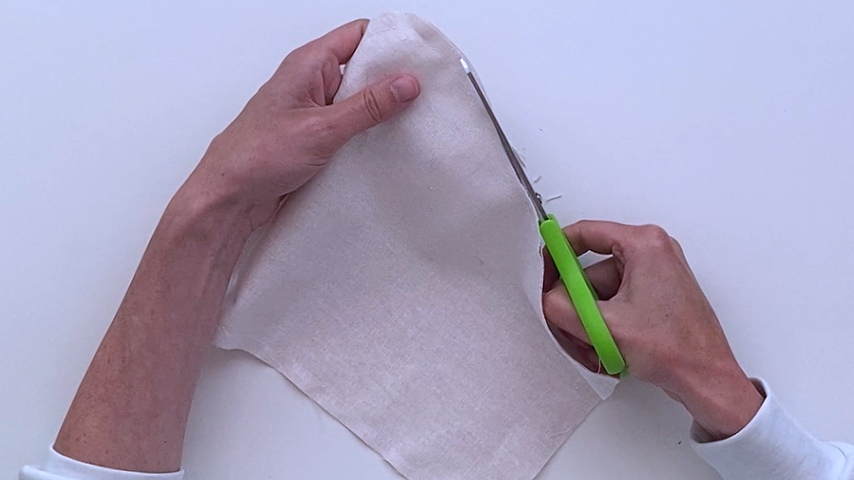
Use sharp scissors to cut small triangles out of the seam allowance around the top of the fingers and the top of the thumb.
This will reduce even more bulk and help smooth out the seam once you turn the oven mitt right side out.
Be very careful not to cut into the stitching. If you do, just take the oven mitt back to the sewing machine and sew just below the cut.
It can also be helpful (especially if your scissors aren’t sharp) to fold the fabric in half and cut both sides of the triangle at once.
You can do this in stages, so you’re not cutting through multiple layers at once. E.g. cut the batting and fabric of the top side first, then the bottom.
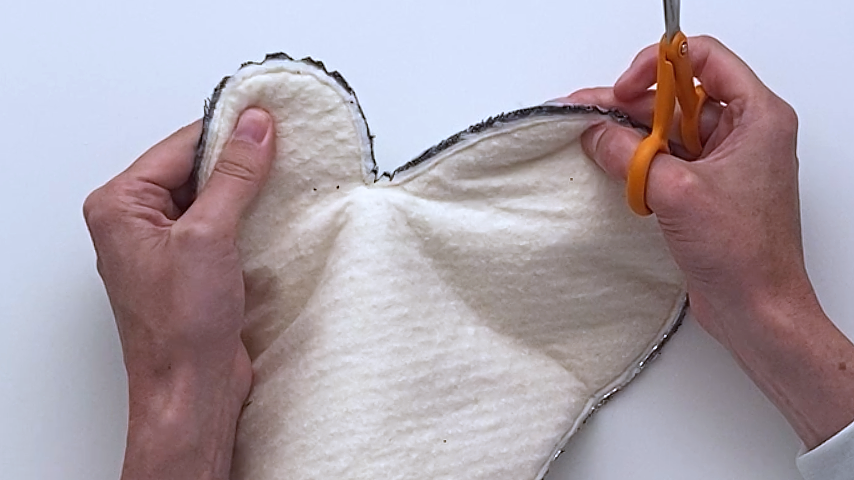
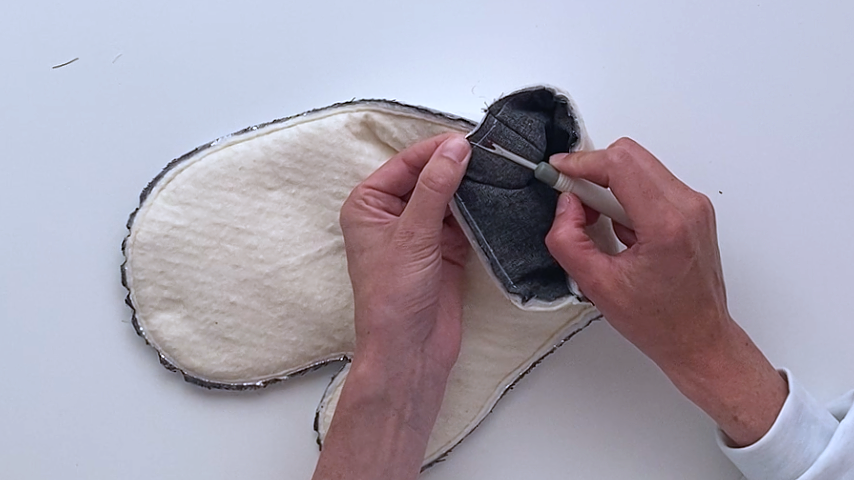
Clipping
Clipping is cutting short lines into the seam allowance that allows the fabric to spread out once it’s turned right side out.
We’ll clip at the bottom of the thumb (where the thumb and fingers meet).
Again, be careful not to cut through the stitching. If you need to, complete this step in stages, cutting through one layer of fabric or batting at a time.
Bottom hem
To start, make sure all layers are lined up along the bottom hem. Trim the bottom hem if needed to have a clean line and to even up the hem.
Along the bottom of the oven mitt, use a temporary fabric pen and ruler to mark a line on the batting side that is 1/2″ above the bottom edge.
Use a seam ripper to remove the basting stitches that are holding the fabric, and two layers of batting together, on both the top and bottom pieces. Once you remove those, all layers of fabric should be free, and you should be able to separate them.
You are only cutting away the thermal batting and cotton batting in this step. Don’t cut the fabric.
Cut up on the inside of the stitching, getting as close to the side seam as possible, without cutting the stitches or fabric, across the marked line, then down on the inside of the stitching.
Repeat this for both sides of the oven mitt.
This will remove the bulk along the bottom of the oven mitt, making it easier to top stitch around the opening.
Step 6
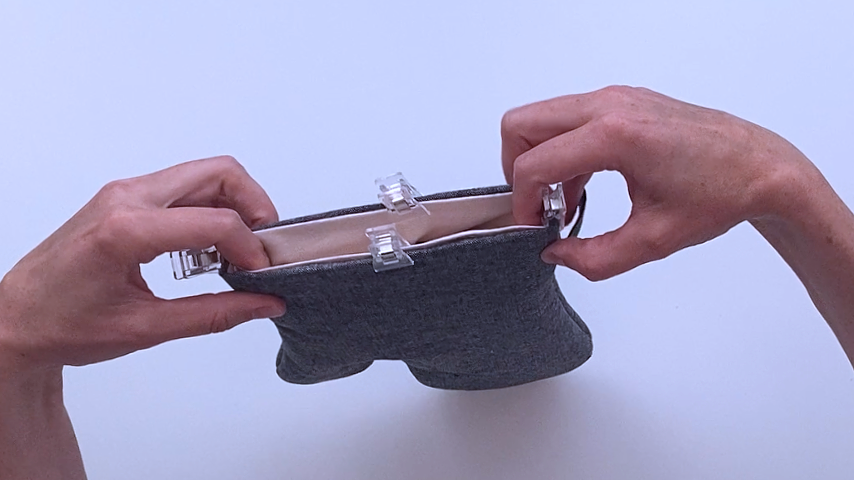
Place your two lining pieces right sides together and clip around the edge.

This time, sew around the sides and top using a 1/4″ seam allowance. However, I like to start and end using a 1/4″ seam allowance, but taper it to 3/8″. This will ensure the lining fits inside the oven mitt without too much bulk.
I also like to set my outer oven mitt on top of my lining pieces and mark on the lining, where the side stitching is. Just to ensure, if your seam allowance wasn’t accurate when sewing the outer oven mitt, that the lining won’t be too big or too small.

Again, you can use a temporary fabric pen to mark your sewing line so it’s easier to follow as you sew.
Trim the seam allowance so it is 1/4″ all around the oven mitt and cut notches into the bottom of the thumb (where the fingers and thumb meet).
Step 7
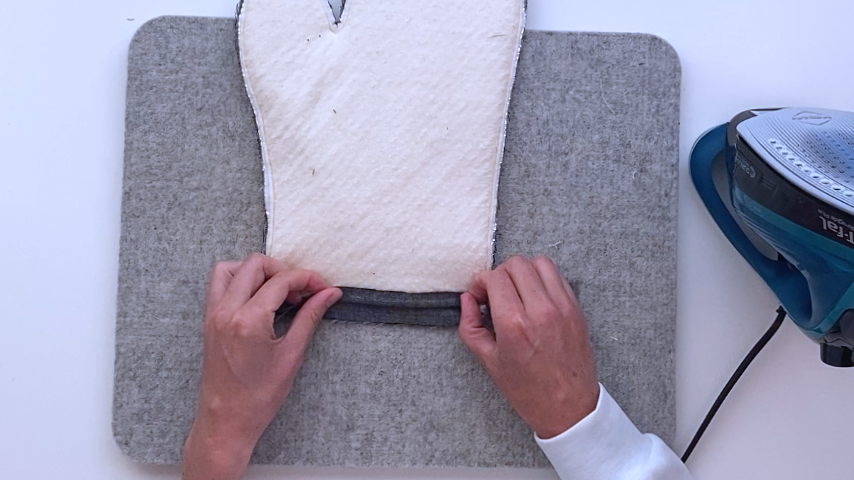
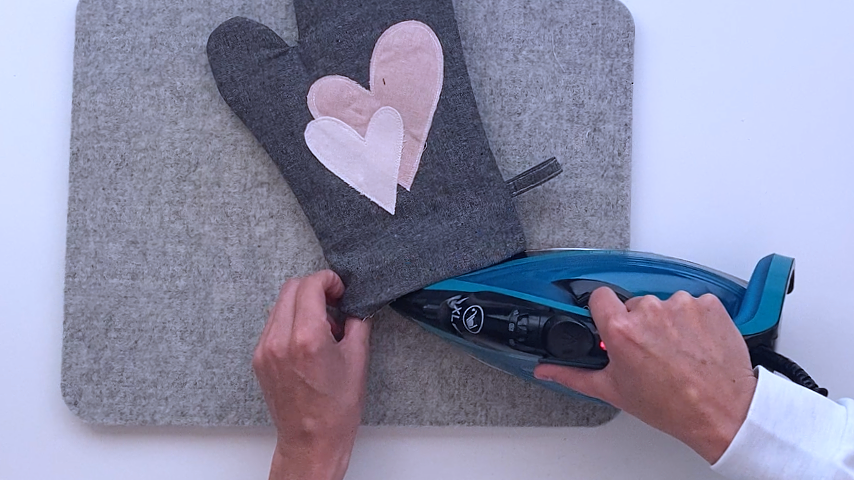
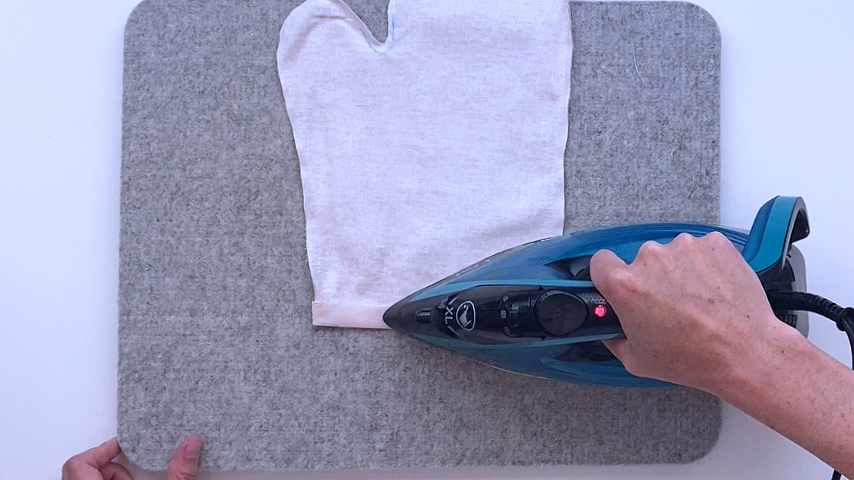
Press your side seams open on both the outer part of your oven mitt (if possible) and your lining.
Fold the bottom hem up 1/2″ on the outer part of your oven mitt and press into place. Take your time with this step and use a clapper or piece of wood if you have it to help the fabric cool, so you get a crisp folded edge.
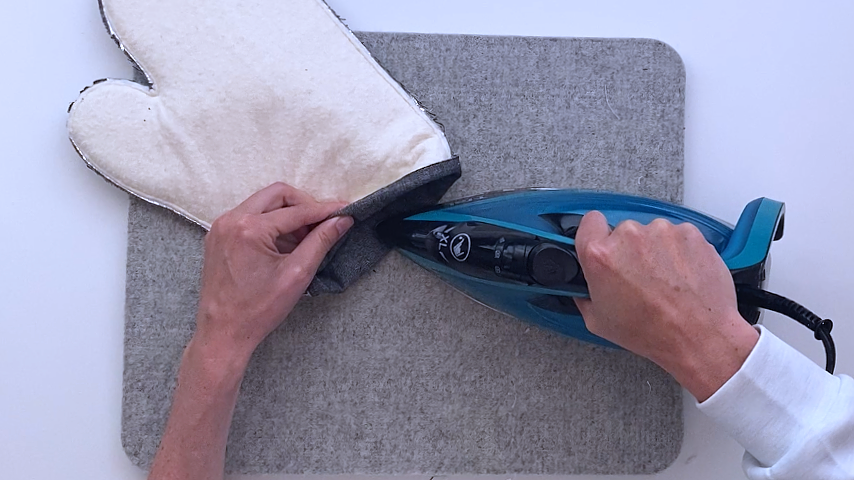
Turn the outer part of your oven mitt right side out.
Use your finger to press the seams out from the inside of the oven mitt. From the outside, you can run the iron over the seam to warm up the material, then roll the seams back and forth between your fingers to get them fully pushed out and smooth.
Give the bottom hem another press to make sure it’s in the right place. You may also want to put a few clips in to hold the hem in place.
Set the lining inside the outer part of the oven mitt and get it fully pushed all the way in so the top of the fingers and thumbs are tight against the outer part.
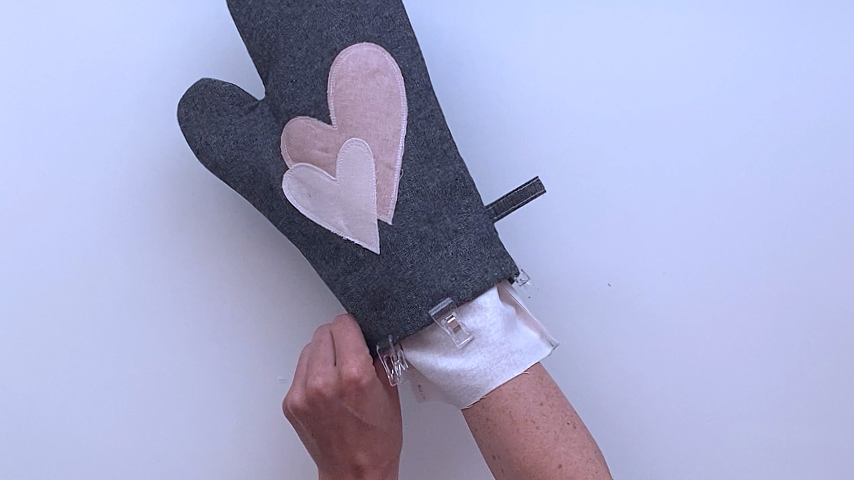
If your lining feels too big inside the oven mitt (the fabric is bunching in places), take the lining out and sew it again to increase the seam allowance where needed to get a better fit.
Use a temporary fabric marker to mark the bottom of the outer oven mitt on the wrong side of the lining.
Take the lining back out.
Following the drawn line along the bottom of the oven mitt, fold the lining’s hem up and press into place.
Step 8
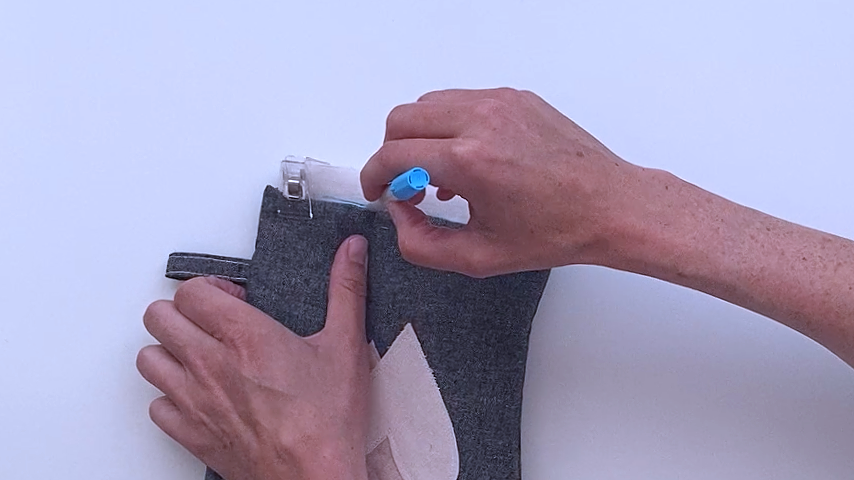
Place the lining back inside the outer piece of the oven mitt and make sure all of the seams are pressed tight against the outer oven mitt’s seams.
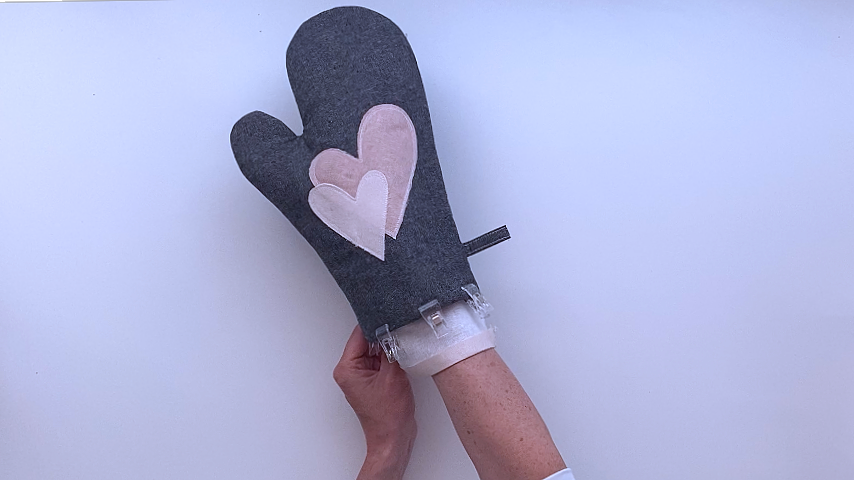
Line up the bottom hems so the folded edges are stacked on top of each other and the side seams line up.
Clip together. Don’t use too many clips or they’ll get in the way when sewing.
Sew around the opening to secure the outer oven mitt and the lining together. Sew about 1/4″ away from the outer edge, use a longer stitch (3.5mm – 4mm), and backstitch at the start and end.