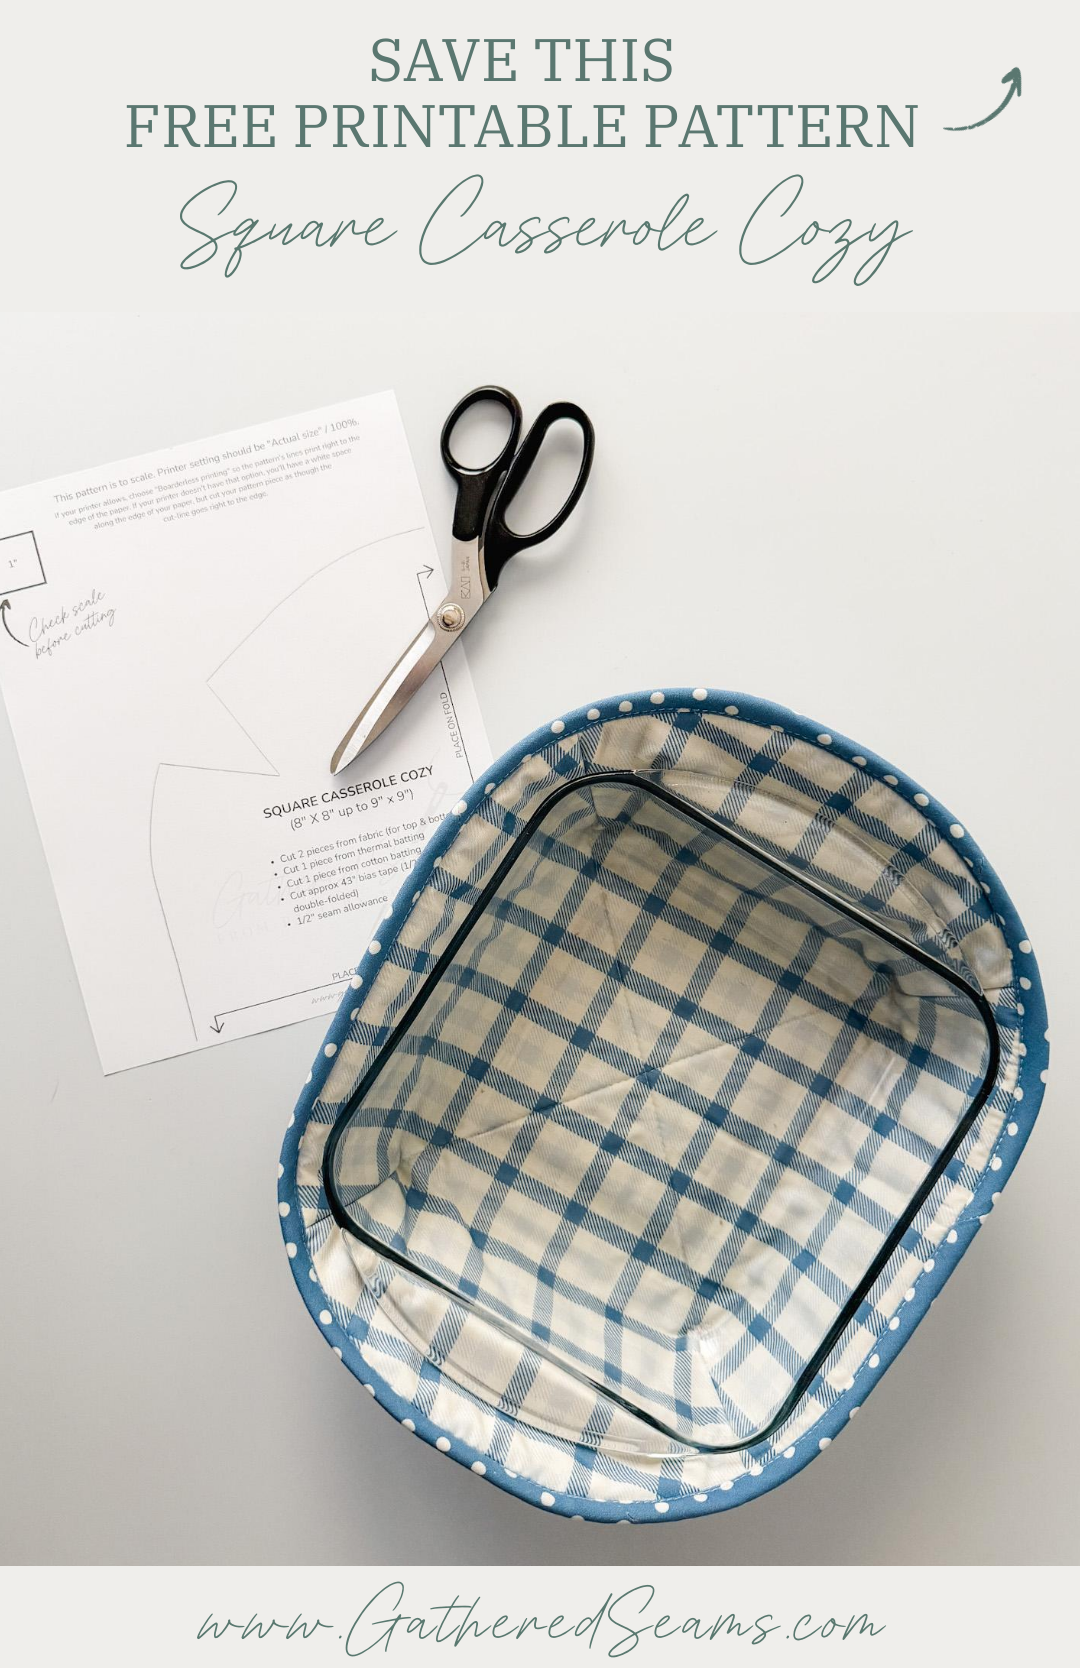
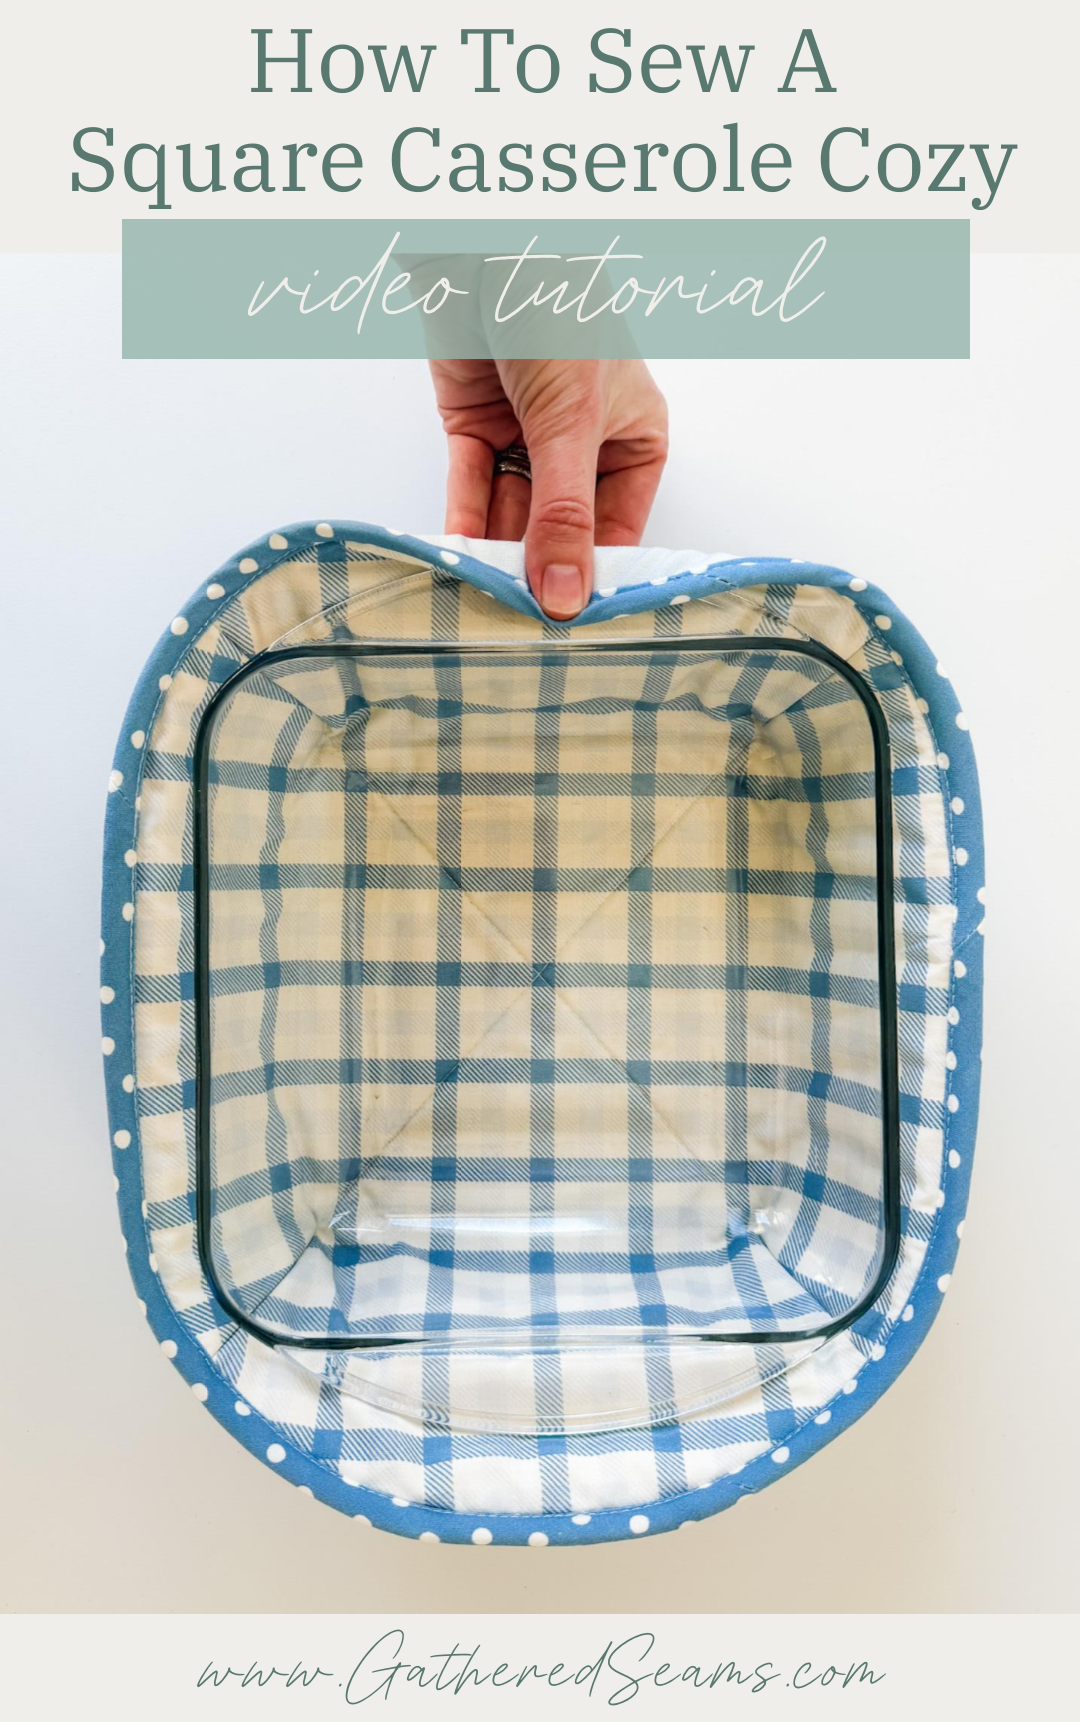
How To Sew a Square Casserole Cozy | Free Pattern
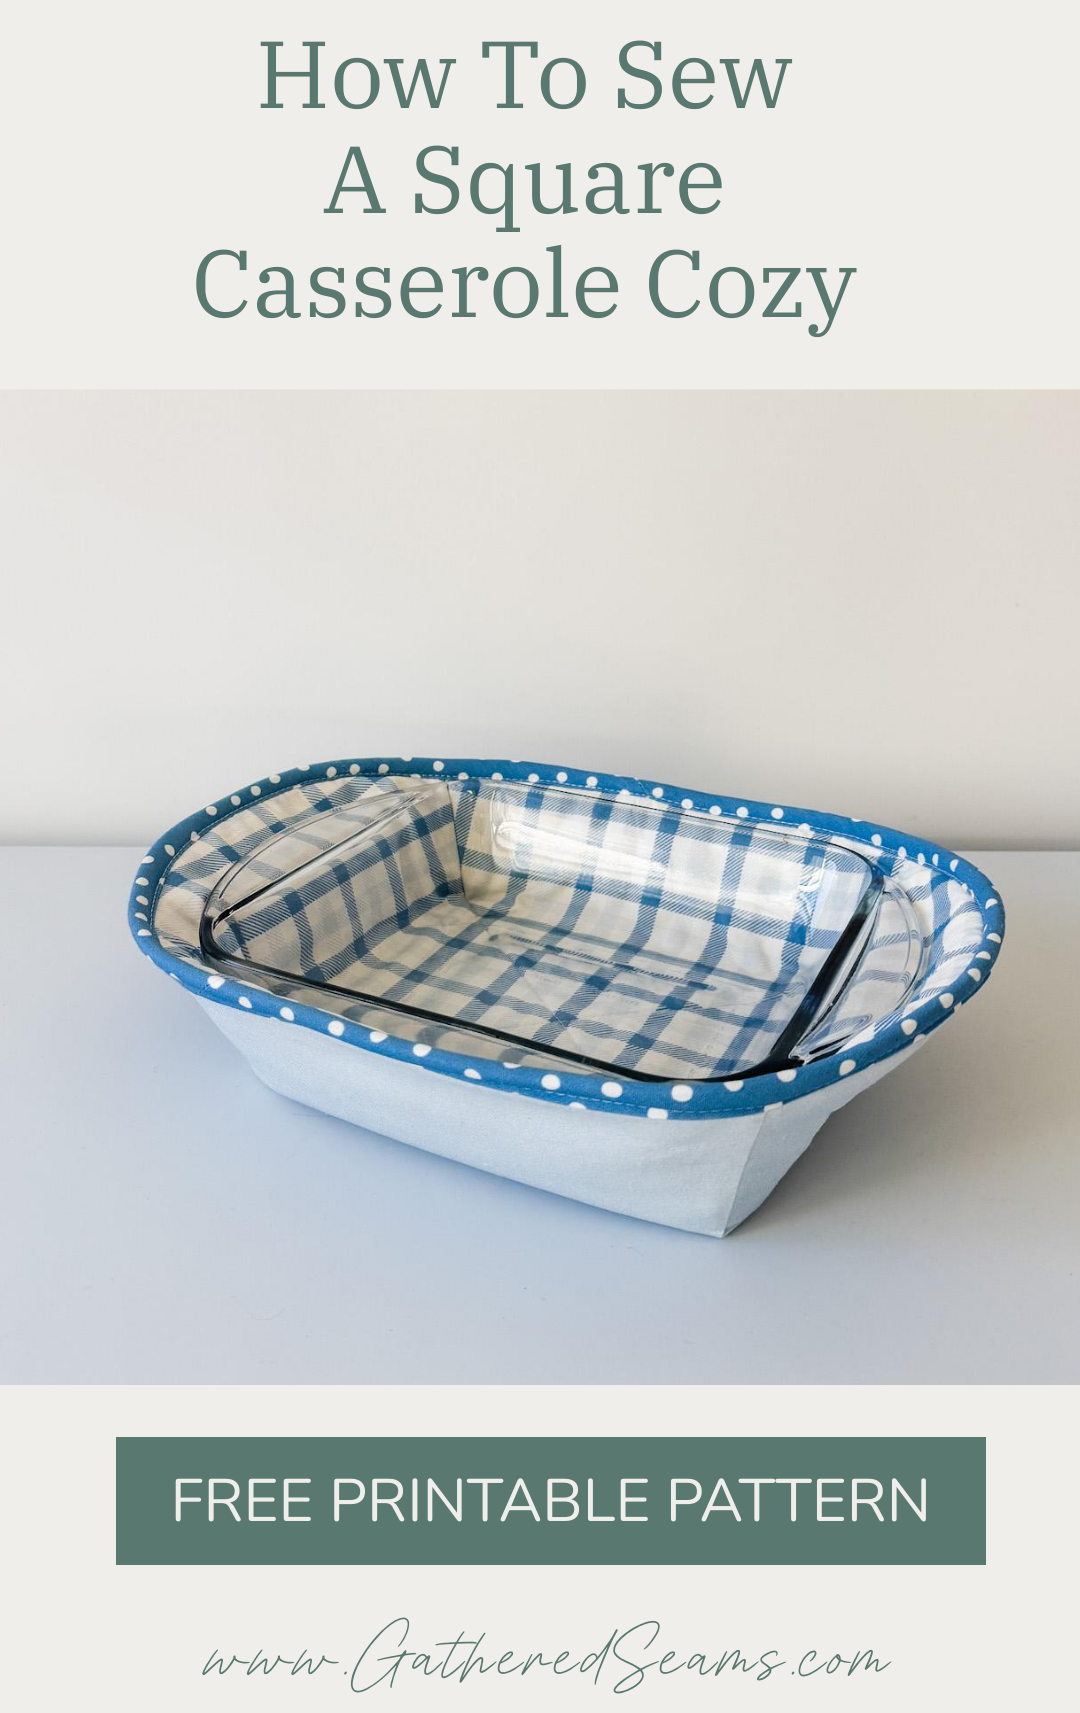
Casserole cozies are so handy because they double as oven mitts and a hot pad. You can take a hot casserole dish out of the oven…using pot holders, pot pinchers, or oven mitts, of course…place it into the casserole cozy and then when it’s time to bring it to the table, you don’t have to worry about setting down a hot pad first or finding a place for bulky oven mitts on the table.
They also make it easy to pass a casserole around the table and will help keep your food a little warmer as everyone dishes up.
My rectangular casserole cozy pattern was so popular that I thought I’d create a square pattern for those smaller dishes. This square casserole dish cozy pattern was designed for an 8″ x 8″ casserole dish, but there’s some extra room around the edges that you should be able to fit up to a 9″ x 9″ dish.
>> Download the free printable pattern for the rectangular casserole cozy here
>> Download the free printable pattern for a pie plate cozy here
>> Download the free printable pattern for a microwavable bowl cozy here
Materials
As an Amazon Associate, I earn from qualifying purchases.
- Fabric for top and bottom (cotton or linen are ideal; no synthetic materials as they can melt/burn/catch fire)
- Thermal batting
- Cotton batting
- Bias tape (I used 1/2″ double-fold bias tape (2″ wide when unfolded))
- Thread
Tools
- Sewing Machine
- Walking foot (highly recommended when working with batting)
- Fabric clips or pins
- Scissors
- Iron
*Please be advised, a cozy is NOT microwave safe unless you use 100% cotton materials for all aspects of the cozy (thread, batting, fabric, bias tape).


Sewing casserole cozies to sell
This item may need a little more explaining to sell, as it’s not as commonly known as other items in the table linen family. However, once people use one, they tend to be hooked. They’re ideal to sell because:
- They make a great gift – it’s a practical item that makes a great housewarming or hosting gift and it’s unlikely someone already has one.
- Serving – it replaces a hot pad on the table and makes it easy to pass a hot casserole dish around the table for serving.
- Upsell item – if someone is looking at a casserole hot pad, this is a good item to upsell them on.
- Bundle – you could sell a rectangular cozy, a square cozy, and a pie plate cozy as a matching set.
- Evergreen – it’s a product that can be sold year-round, but can be updated for each season/holiday (e.g. Christmas-themed casserole cozy).
Before diving into selling too many sizes and styles of cozies, test more popular cozy sizes/shapes first (at a craft show or online) and see how many sales you make.
Perhaps it’s just me, but I use my rectangular casserole dishes more than my square ones, so you may make a few rectangular casserole cozies first, see how they sell, then add a square cozy or pie plate cozy to your product line.
>> Here’s my free pattern for a rectangular casserole cozy
These can be a little more labour-intensive, and with the layers of batting, material costs can also add up. So set a price that ensures you profit and that your target market is willing to pay that price.
How to sew a casserole cozy
Please note
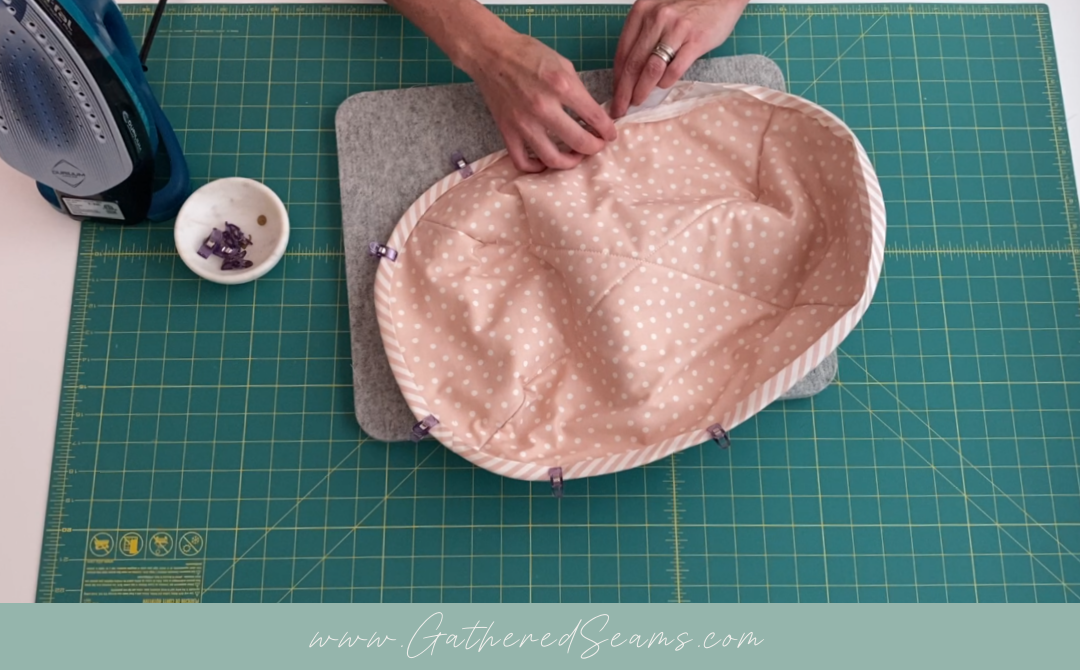
The video and pictures show the rectangular cozy, however, the steps are the same to sew a square casserole cozy.
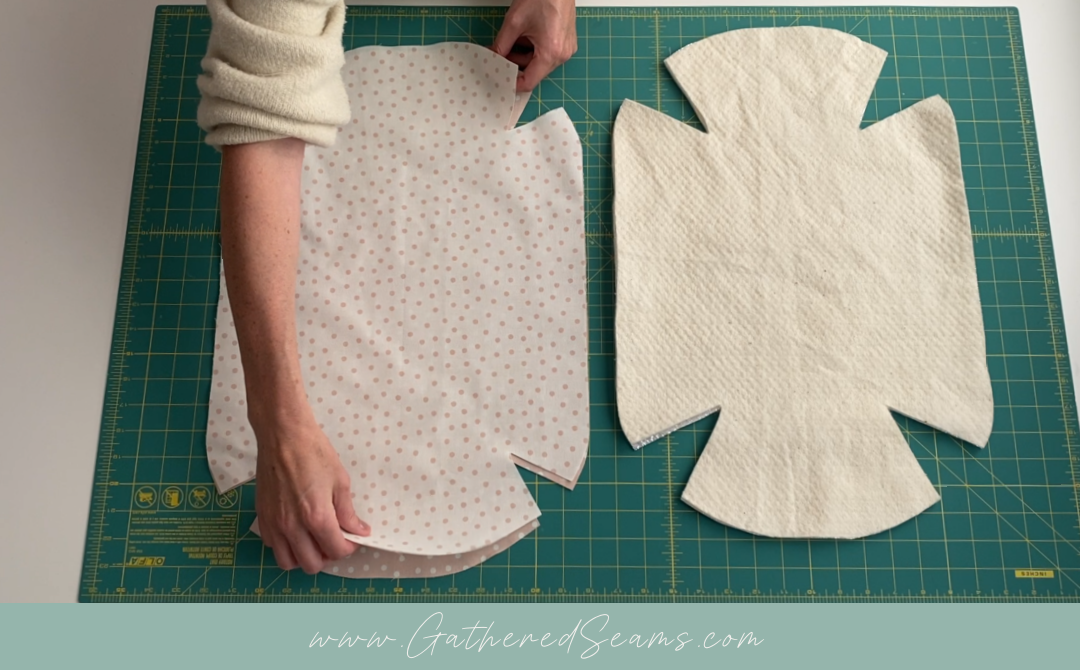
Step 1 – Press fabric & cut out pattern pieces
Print your free pattern and cut it out.
Iron your top and bottom fabric before cutting, to ensure you’re making accurate cuts.
There’s no need to iron your batting.
Your pattern pieces will have a “FOLD” indication along the bottom and side.
This indicates that you must fold your fabric in a way so that those two edges will line up with folds.
Alternatively, you can print the pattern pieces twice, cut them out, and flip one over to mirror the other, then tape the pattern pieces together with no overlap.
You’ll need:
- 1 piece of fabric for the top of your cozy
- 1 piece of fabric for the bottom of your cozy
- 1 piece of thermal batting
- 1 piece of cotton batting
- 1 piece of 1/2″ double-fold bias tape that is approximately 43” long
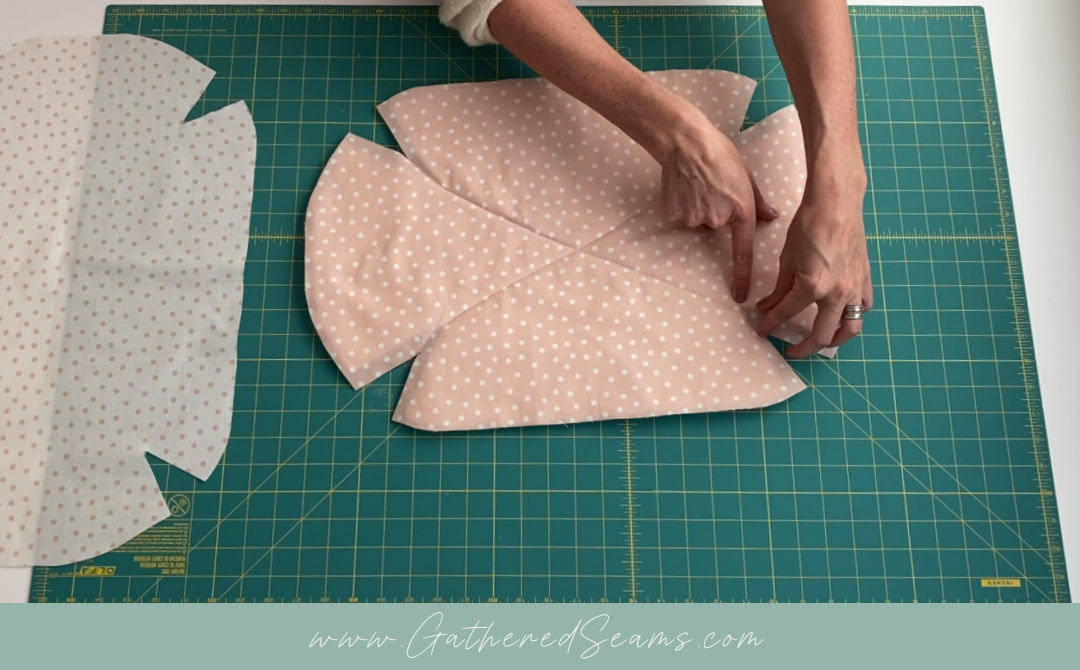
Step 2 – Layer batting and top piece
Start with your thermal batting, reflective side up, then layer your cotton batting on top, followed by your top fabric (right side facing up).
Using a walking foot, stitch all layers together by sewing two diagonal lines.
Step 3 – Sew darts
Using a 1/2” seam allowance, sew your darts on all four corners of the top piece of fabric (with batting).
Trim your batting close to your stitching, on either side of the dart, but don’t cut the fabric. Repeat this to remove the batting bulk from all 4 corners.
Sew darts for your bottom piece of fabric.
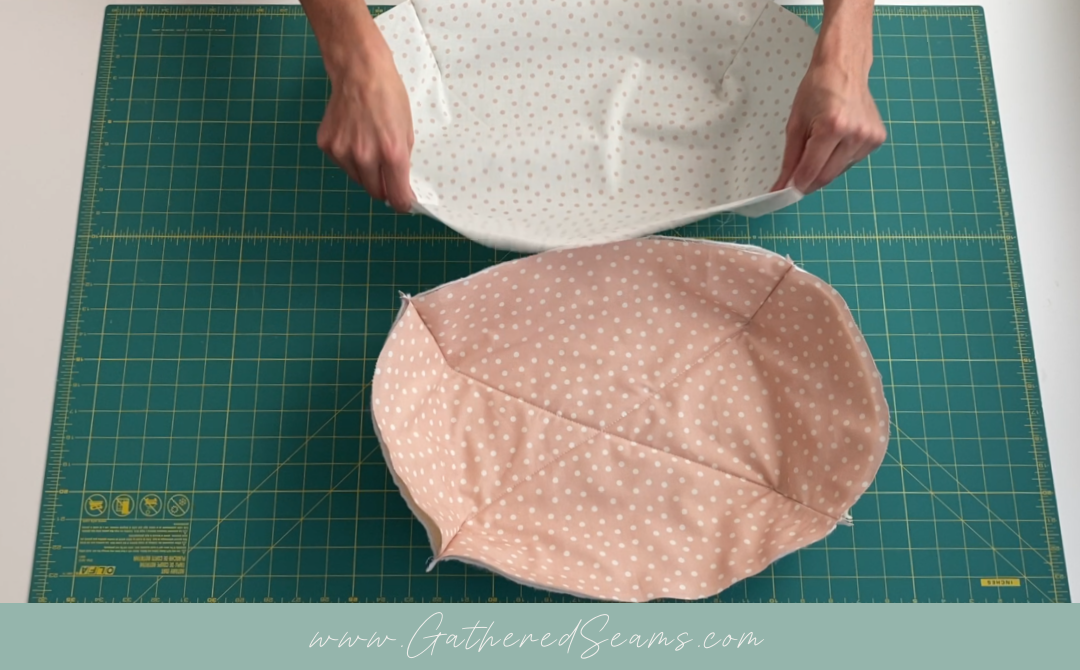
Step 4 – Set top piece into bottom piece
With wrong sides together, set your top piece (fabric and batting) into your bottom piece and line up all four corners/darts.
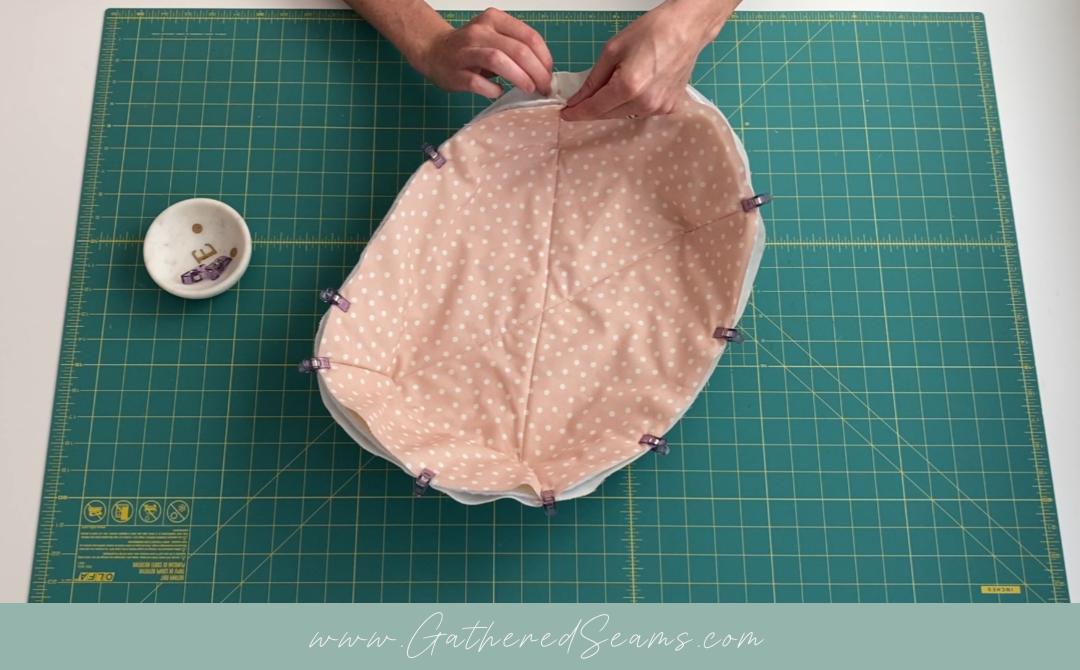
Step 5 – Sew first fold of bias tape
Start sewing your bias tape to your cozy about 2.5″ – 3” in from the end of your bias tape. We need this fabric loose to sew the ends of the bias tape together.
It’s also helpful to make sure the start and end of your bias tape will be on a straight edge of your cozy, and not a curve.
Sew in the crease/fold of the bias tape and ensure the raw edge of the bias tape just slightly covers the raw edges of the cozy.
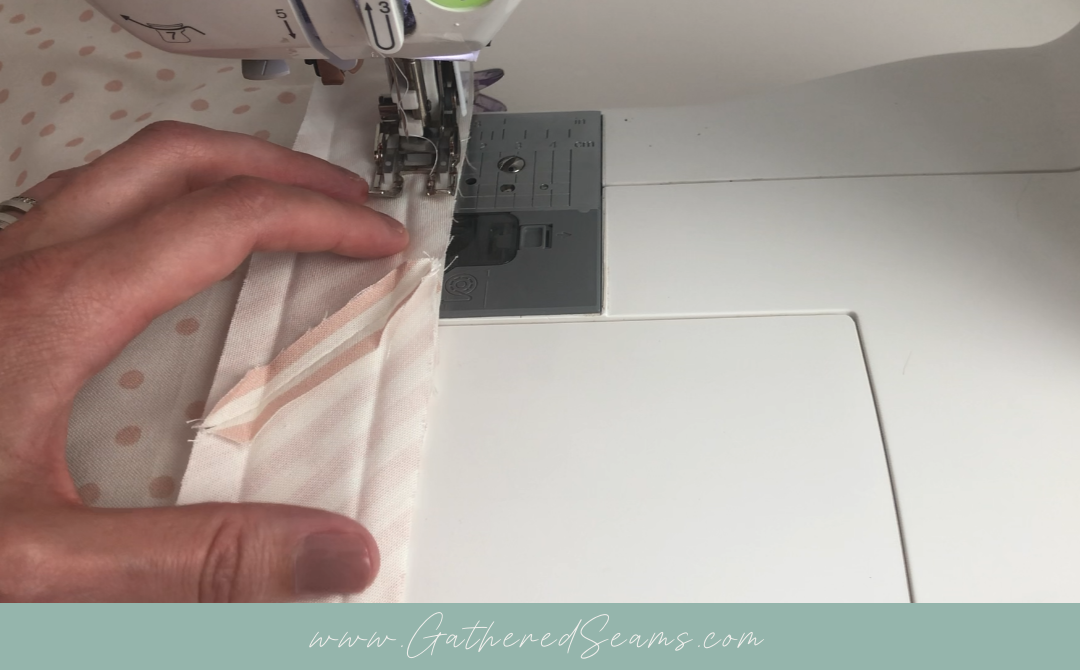
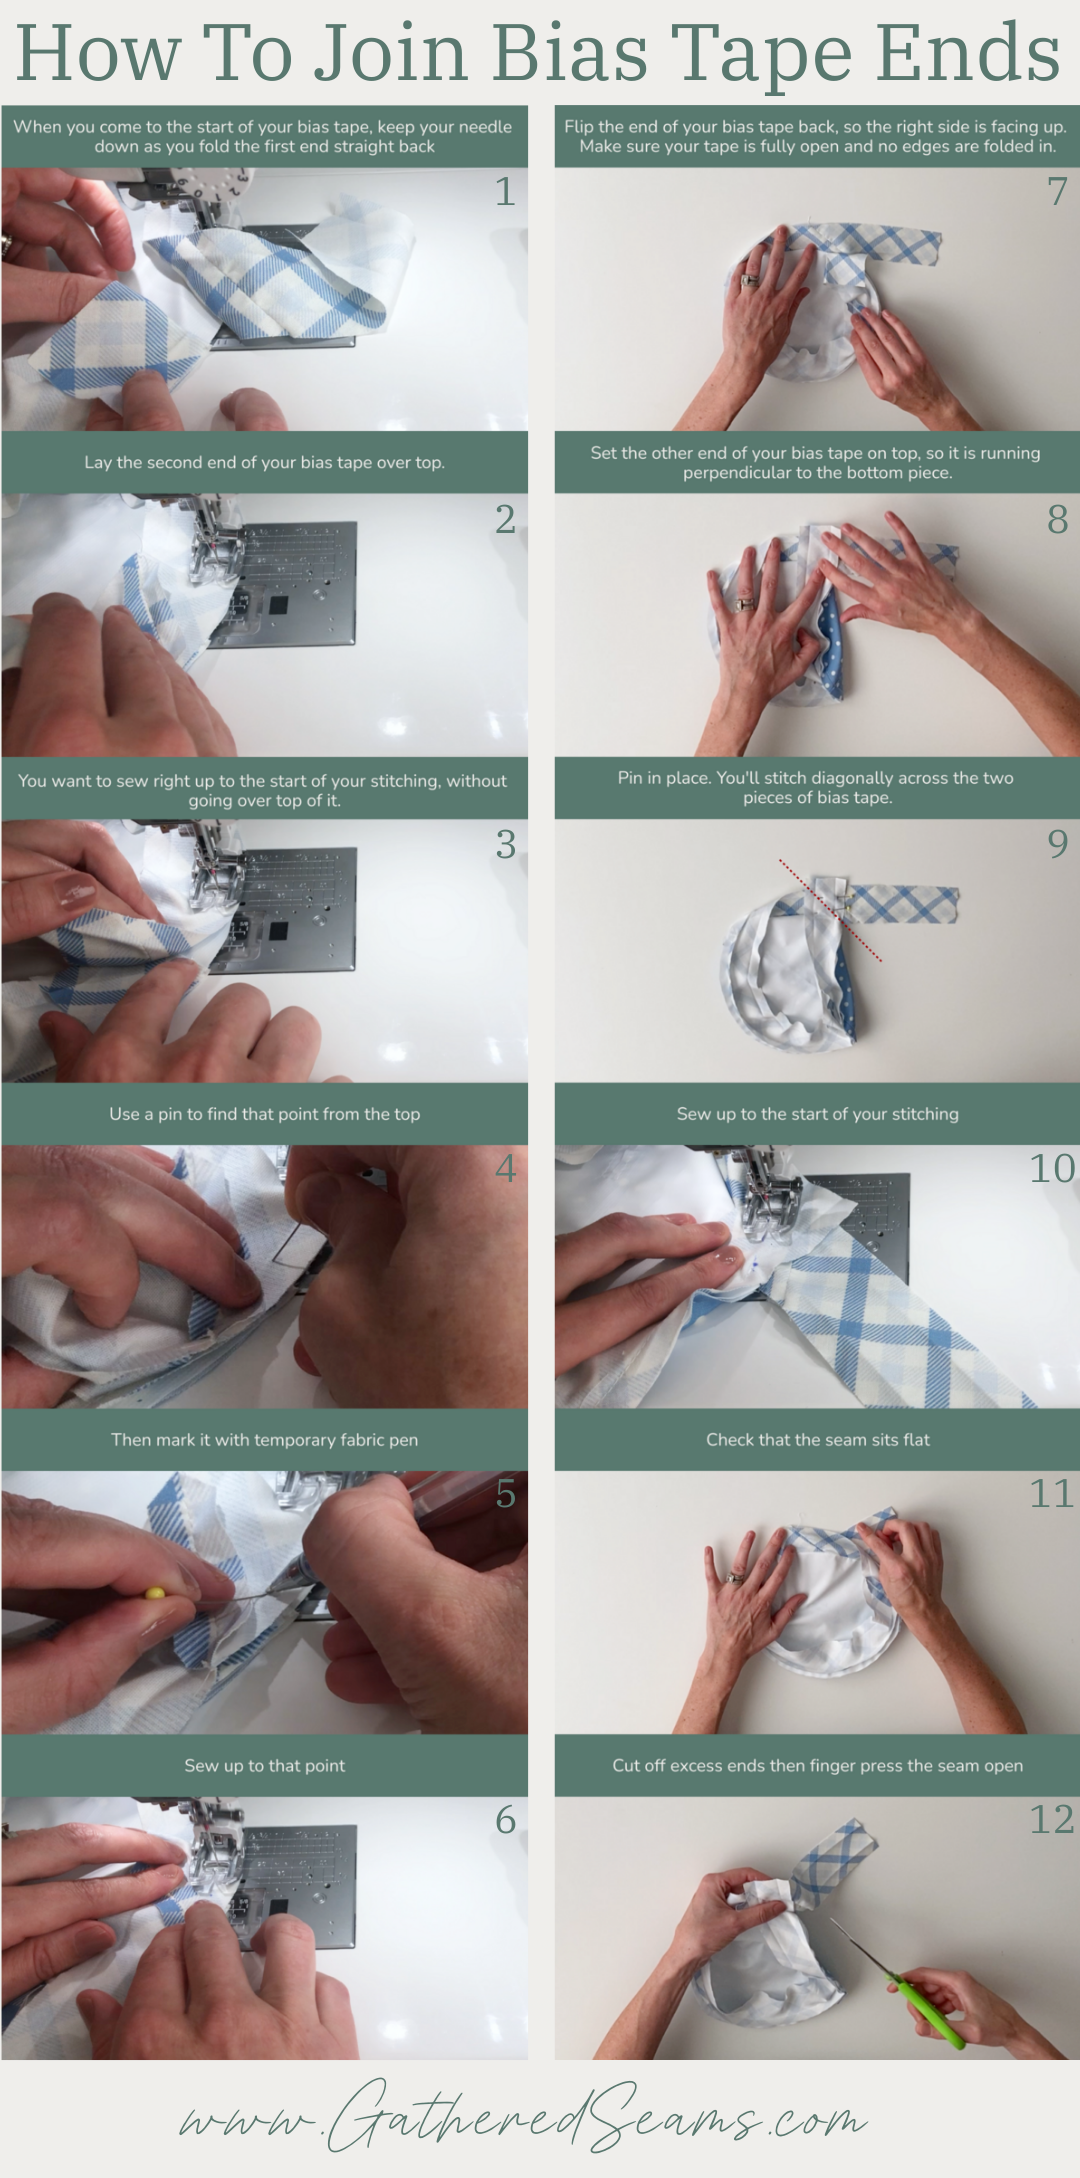
Step 6 – Join bias tape ends
There are many ways to join the ends of your bias tape. Use your preferred method, or please watch the video for clear instructions. Here are the steps I follow:
Step 7 – Fold bias tape to the front and press
Fold your bias tape over to the other side of the cozy and press it into place, ensuring the folded edge just slightly covers the stitching from the other side of the bias tape.
Clip your bias tape into place, ensuring it’s covering your line of stitching.
Step 8 – Sew second side of bias tape
Top-stitch your bias tape into place, sewing about 1/8” in from the inside edge of the bias tape’s folded edge.
As you sew, ensure your bias tape continues to cover the line of stitching from the back side of your bias tape.