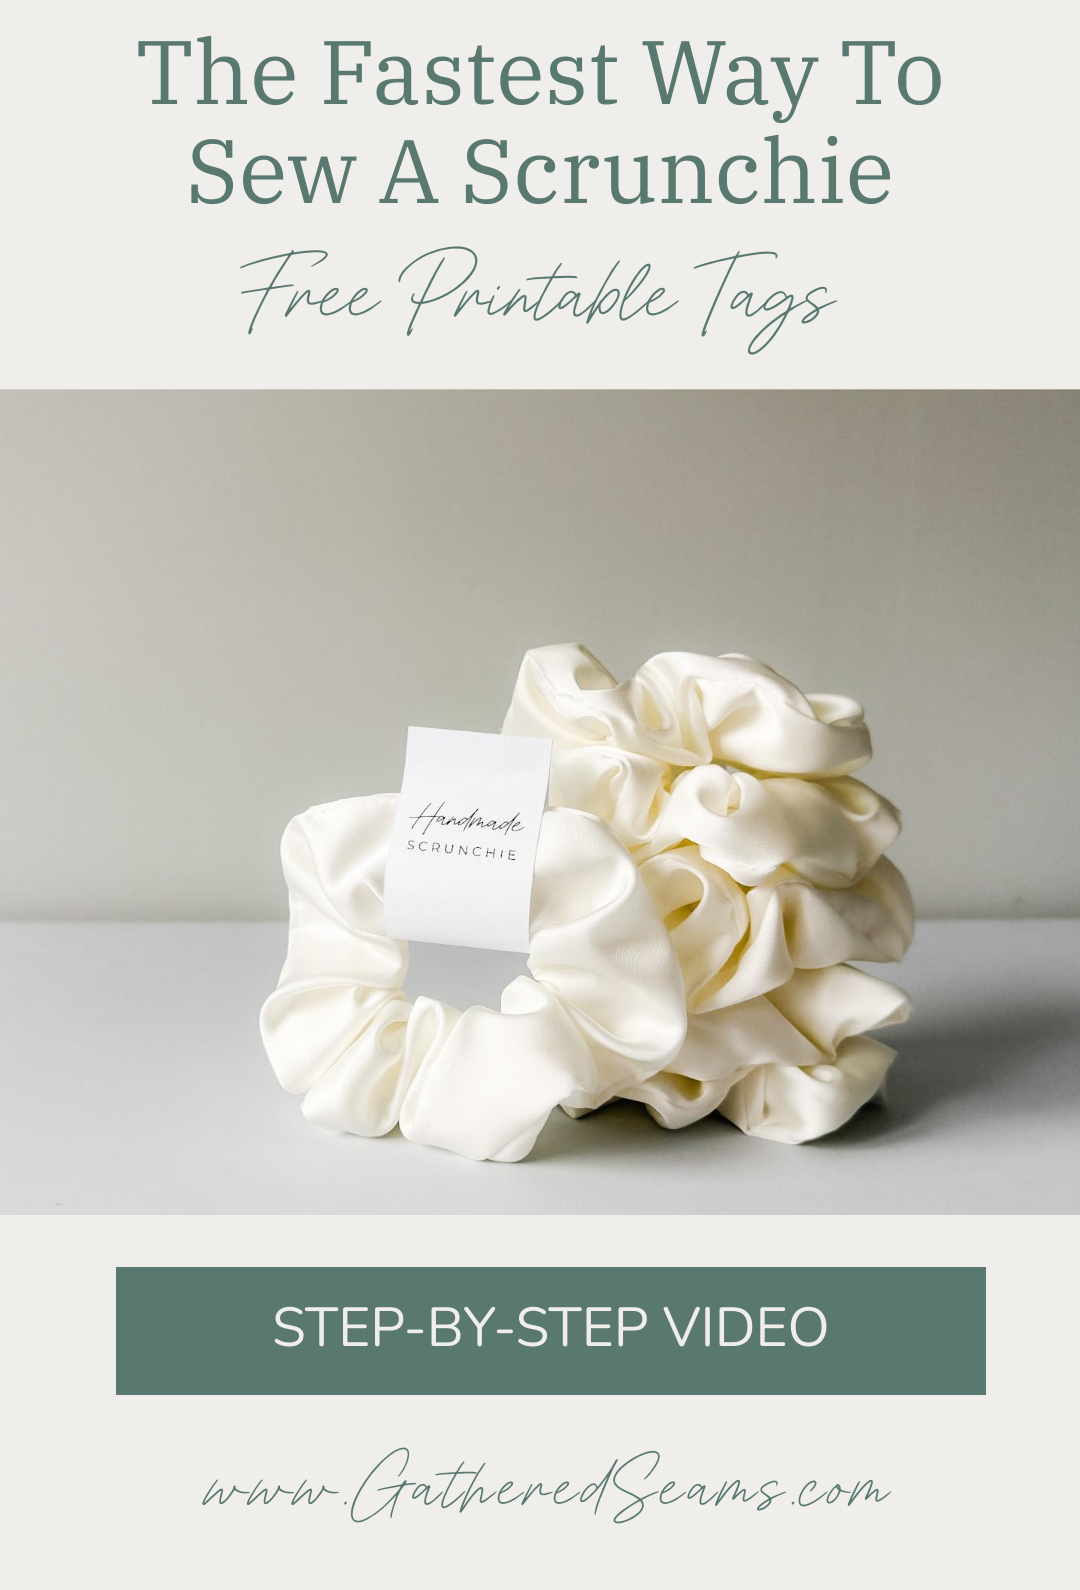
The Fastest Way To Sew A Scrunchie (To Sell)
Scrunchies remain a popular item, making them a suitable gift or product to sell at craft shows.
If you’re sewing to sell, you want to be able to make them quickly so you can keep your profit margins high.
I’ve tested several methods of making scrunchies and timed myself.
The burrito method (or “hotdog and bun” method, as I like to call it), is the fastest that I’ve found.
Please watch the step-by-step video below for clear instructions.
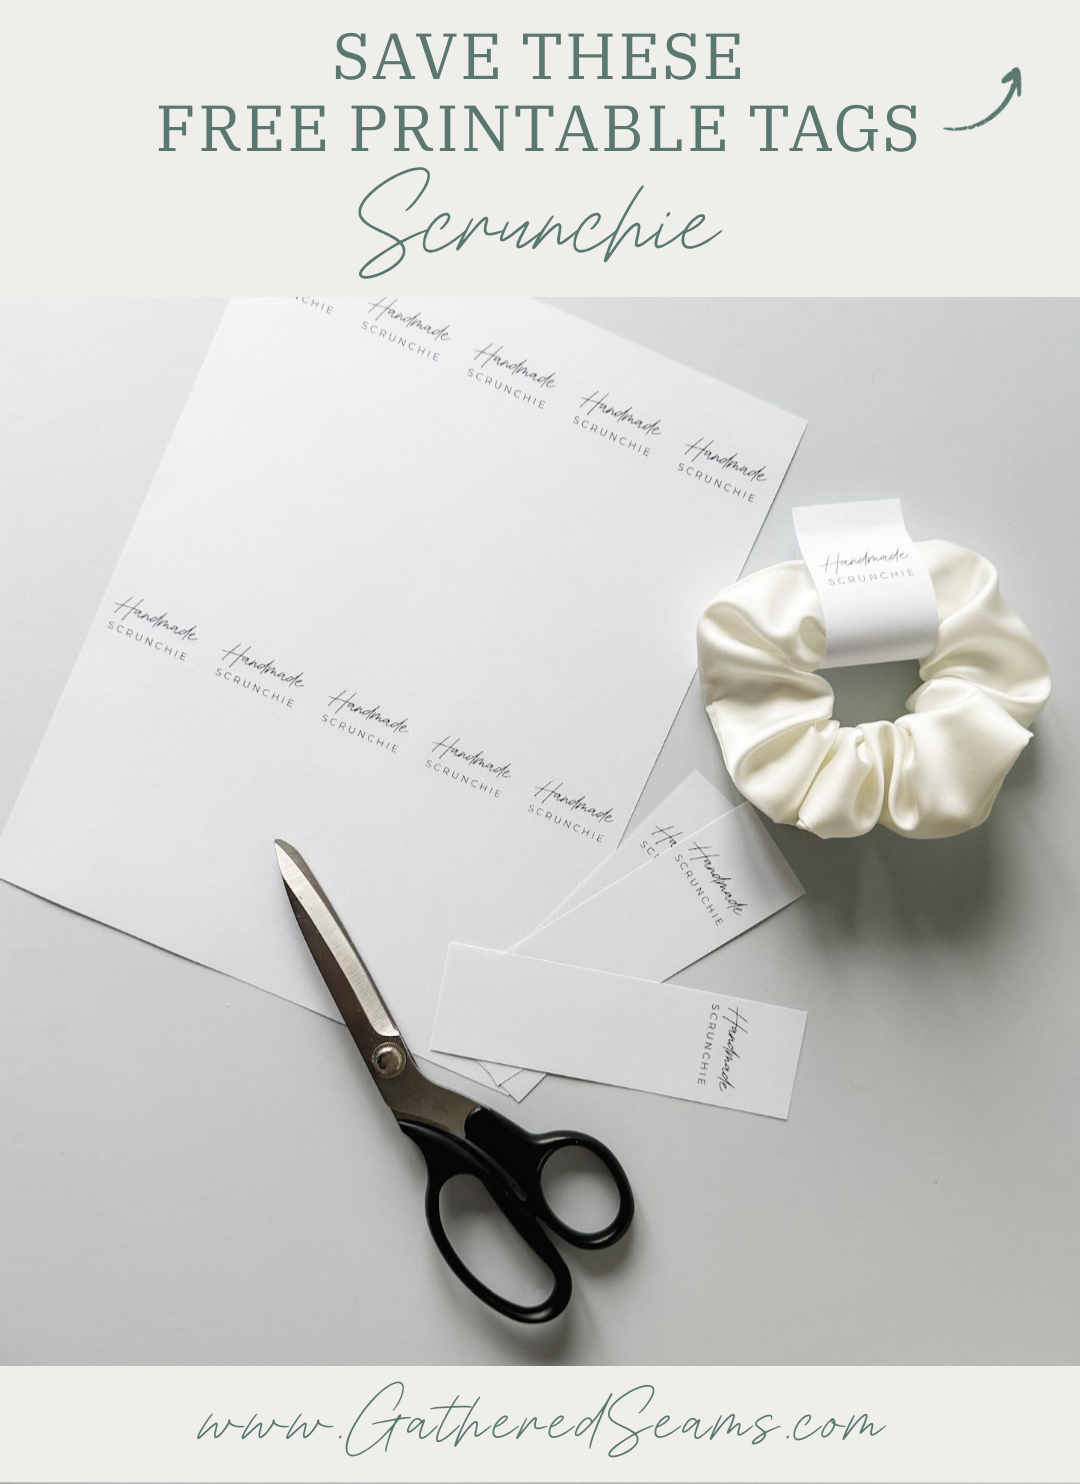
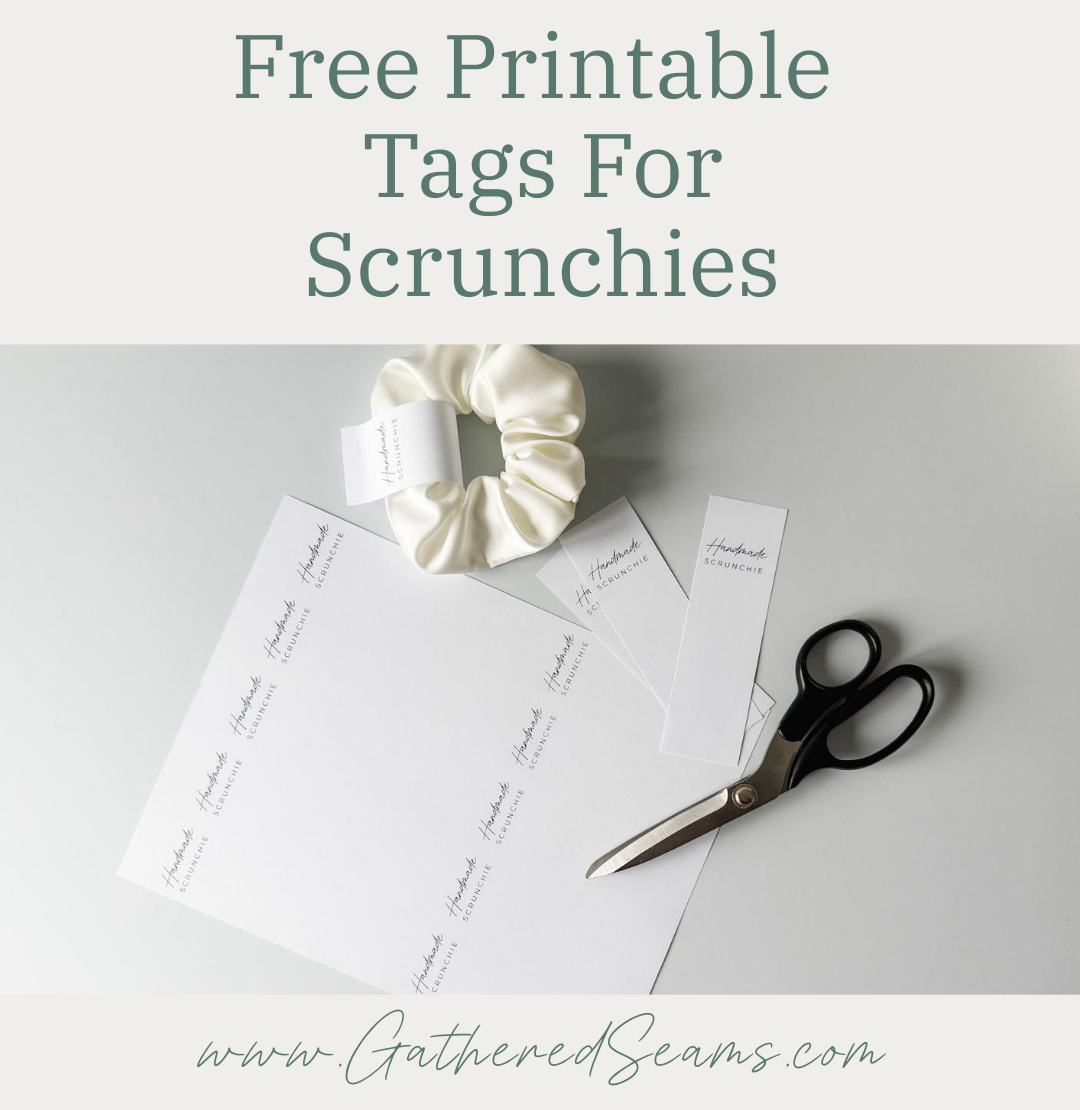
If you’re sewing scrunchies as a gift, you may want to use my free printable tags.

Materials
- Fabric
- Elastic
- Thread
Tools
- Sewing machine
- Scissors
- Safety pin or bodkin
Other time-saving tips
When sewing to sell, every second counts and can increase or decrease your profit margins. Here are more time-saving tips.
1) Batch your steps
If you’re sewing to sell and are making dozens of scrunchies, batching your work will save you even more time. For example, let’s say I needed to make 20 scrunchies, I would do the following:
- Step 1 – Cut 20 pieces of fabric
- Step 2 – Cut 20 pieces of elastic
- Step 3 – Sew the ends together x20
- Step 4 – Sew length of scrunchie x20
- Step 5 – Flip 20 scrunchies right side out
- Step 6 – Feed elastics through 20 scrunchies (and tie ends)
- Step 7 – Sew opening closed x20
2) Create templates
Instead of measuring your piece of fabric each time, use a (22” x 5”) template made out of heavy paper or cardboard so you can simply cut around it without having to measure.
A piece of cardboard cut to 7” long (or the length you prefer to use for your elastic) and 3” wide acts as a template for the elastic. Wrap the elastic around the cardboard template (lengthwise) multiple times, then use scissors to cut the elastic at both ends of the template.
3) Layer fabric
Stack several layers of fabric and then cut, to cut multiple scrunchie pieces at once.
4) Invest in tools
Weights, a rotary cutter, and a cutting mat make cutting fabric pieces much faster than scissors.
A bodkin can be faster than a safety pin.
5) Adjust sewing machine settings
Because you’re sewing straight lines, you can sew fast. Make sure your sewing machine speed setting is set to the fastest.
You can also use a longer stitch length. This allows you to cover more fabric per needle cycle, and it’s easier to keep your line straight.
6) Continuous sewing
For the first step (sewing the ends together, instead of lifting your presser foot, cutting the threads, setting up the next scrunchie, lowering presser foot, etc., simply keep your presser foot down, sew just off the end of one of your scrunchies, then feed the next scrunchie through. Continue this until you’ve sewn all your scrunchie ends together, then snip threads to cut them apart.
7) Choose fabric wisely
Having to change your thread color will slow you down. If you build collections and stick to a color scheme, you may be able to use the same thread color and won’t have to stop to change your sewing thread.
Also, think about how easy a fabric is to work with.
>>Slippery and stretchy fabrics can be more difficult to work with
>>Sheer fabric may require you to serge the edges before sewing, which will add time to your process.
8) Use a serger
If you’re using sheer fabric and want finished edges (or using fabric that frays a lot), simply use a serger instead of a sewing machine so you can finish edges and sew seams at the same time.
How to sew a scrunchie fast
Step 1
Cut your pattern pieces:
- 1 piece of fabric that is 22” x 5”
- 1 piece of (1/4” wide or smaller) elastic that is 7” long
Step 2
Fold your strip of fabric in half lengthwise, right sides together and matching the ends.
Sew the two ends together using 1/4” – 1/2” seam allowance.
Step 3
Finger-press your seam open.
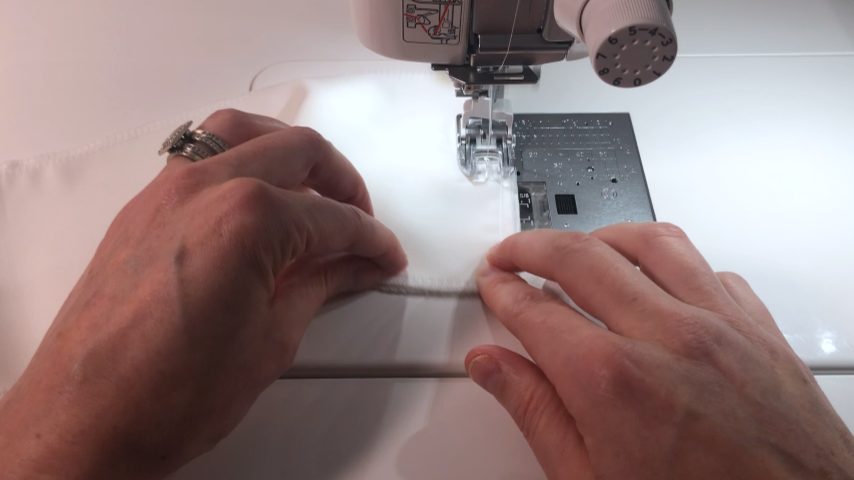
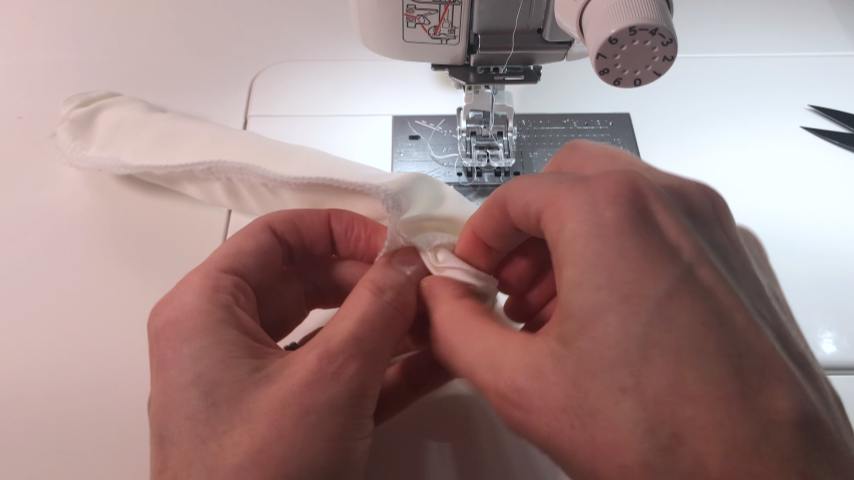
Fold the top layer of your loop over a couple of times to create the “hot dog”.
Then wrap the bottom layer (the “bun”) around the “hot dog”, matching the edges (right sides of fabric together).
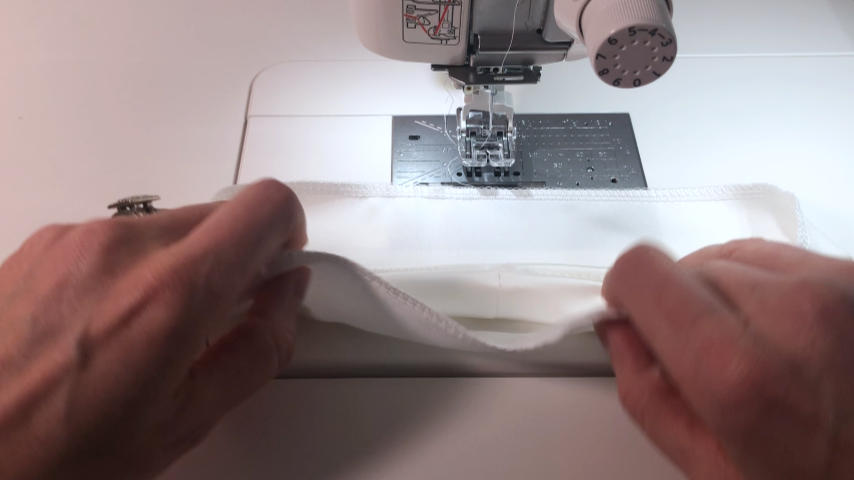
Start sewing the top of the bun together, backstitching at the start.

Step 4
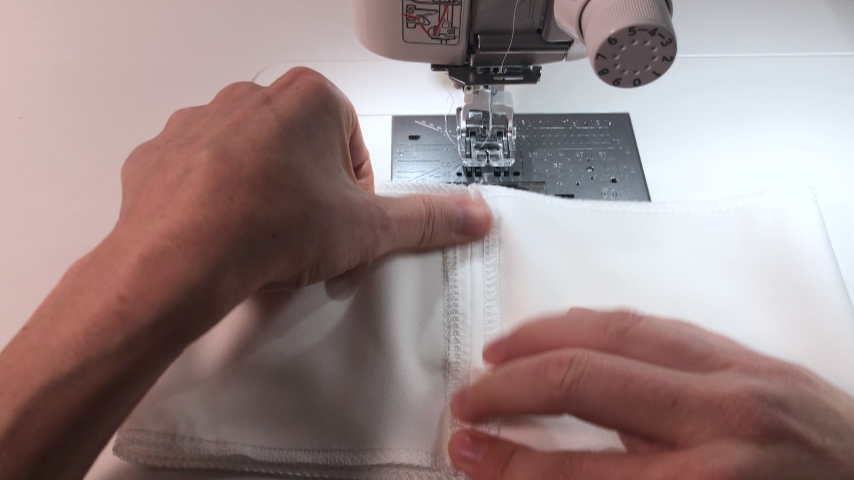
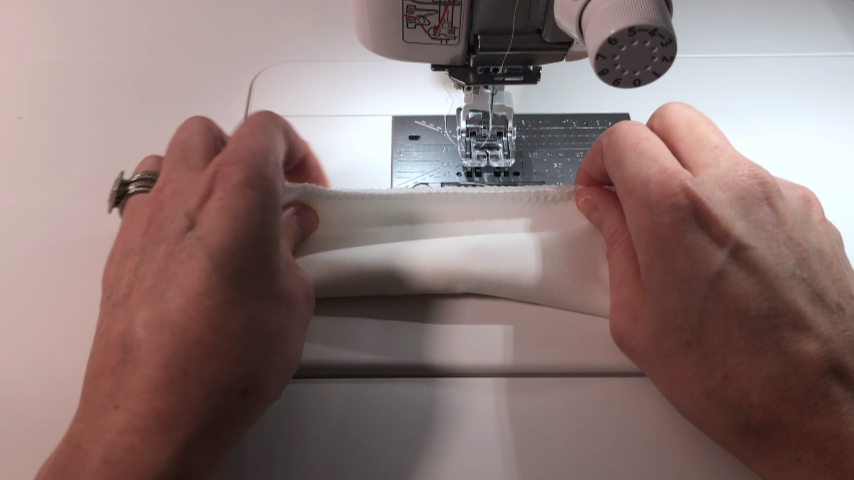
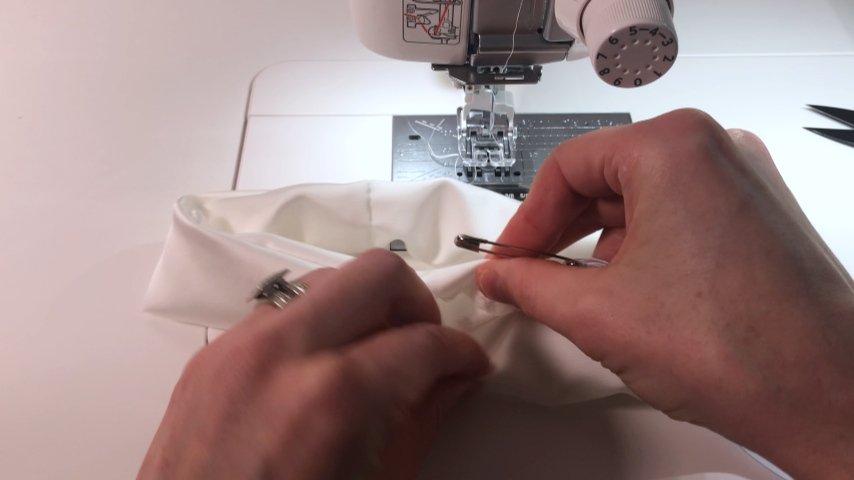
As you get to the end of the fabric, grab the “bun” from behind your sewing machine, and the “hot dog” from the front of your sewing machine and pull the “hot dog” towards you, while keeping the bun in place.
Reposition your fabric to line up the top edges of the bun and continue sewing.
Repeat this until you get close to the start of your stitching.
Leave about 1” – 1.5” opening between the start and finish of your stitching.
Backstitch at the end.

Step 5
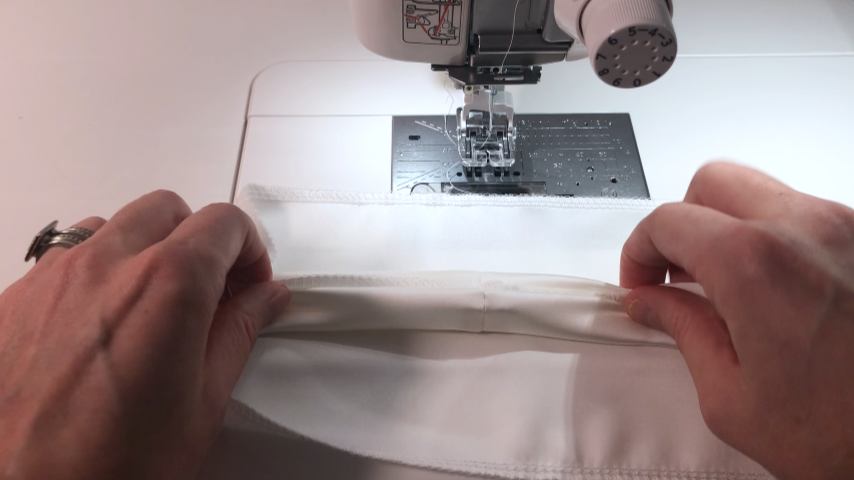
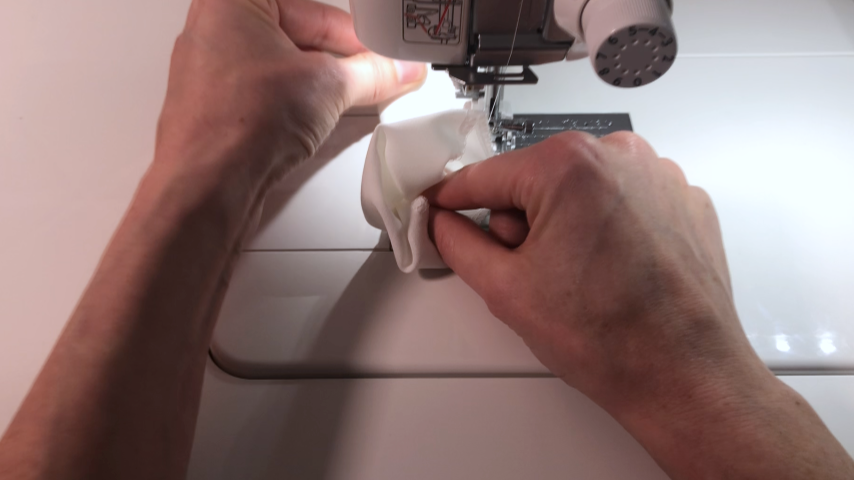
Through the opening, grab the “hot dog” and pull it through the opening to turn the scrunchie right side out.
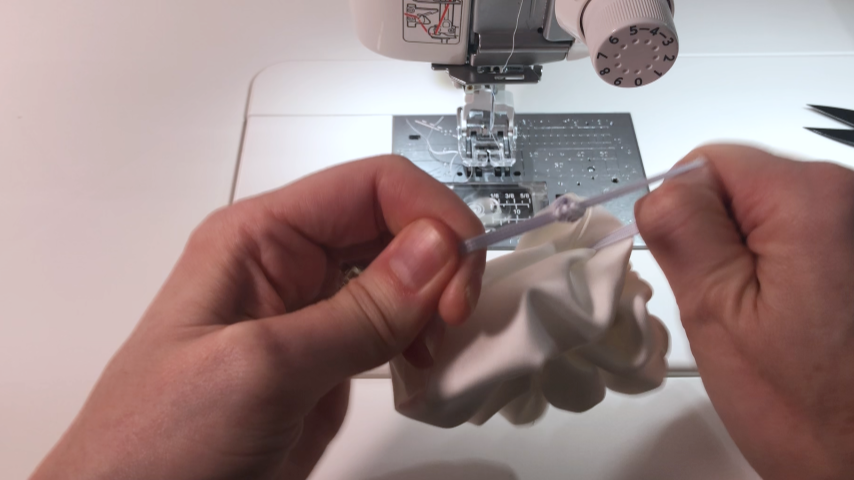
Step 6
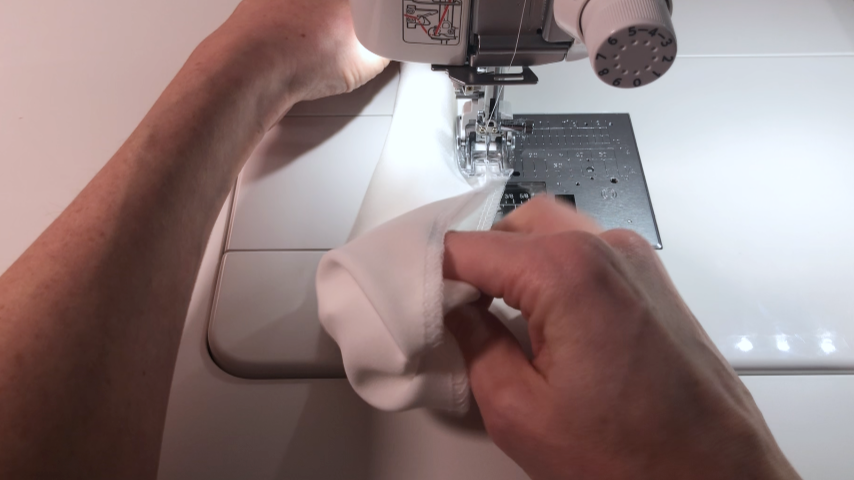
Feed your elastic through the tube and stitch or tie the ends together (I use a balloon knot).
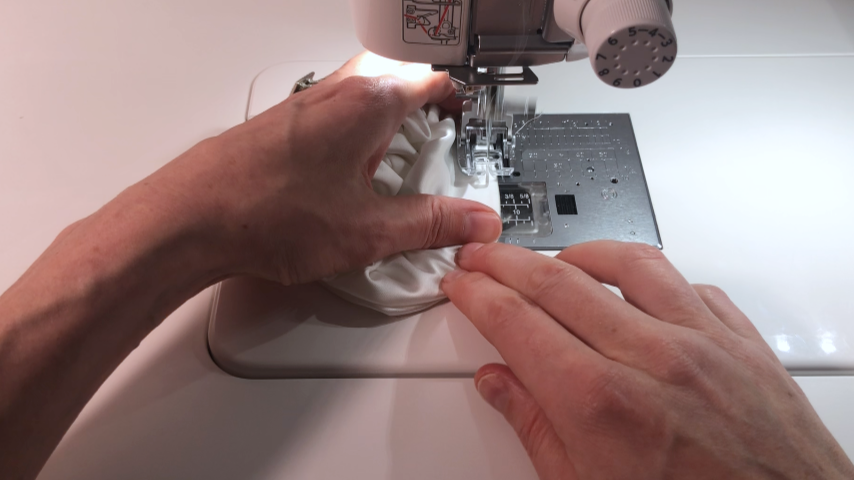
Step 7
Close the opening by stitching as close to the edge as possible.
You can use my free printable tags to add a tag to your scrunchies. Download the PDF here.