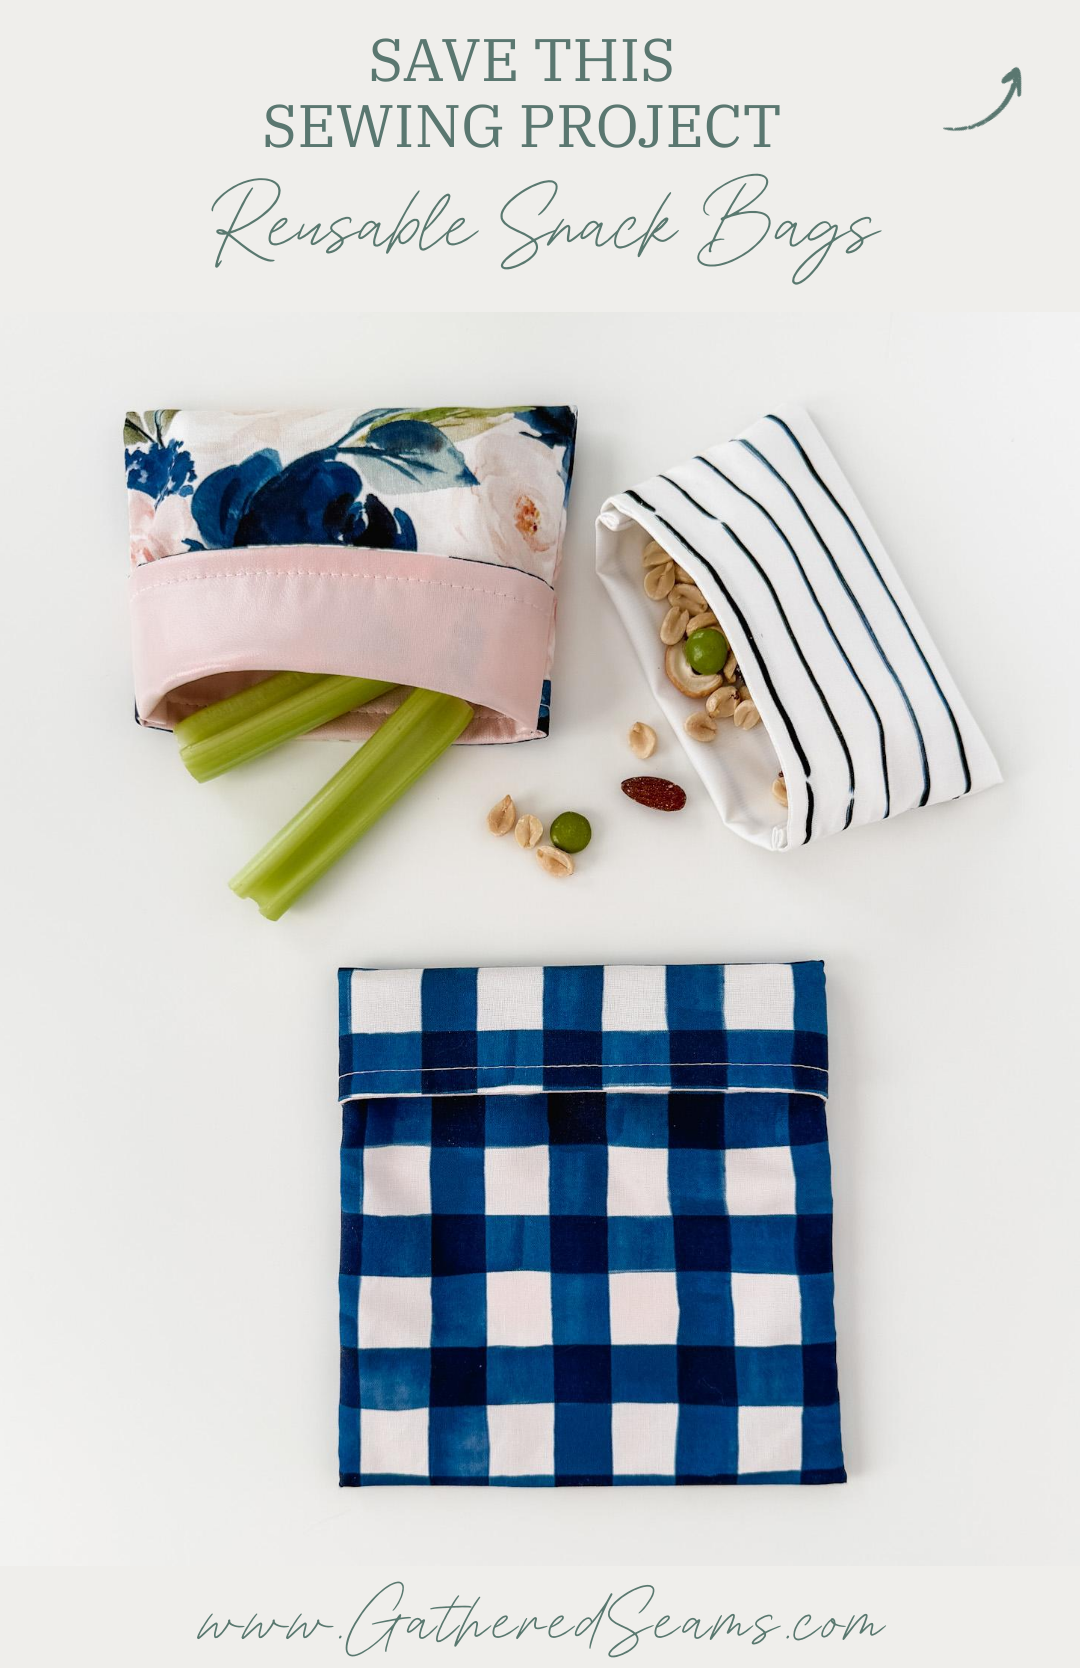
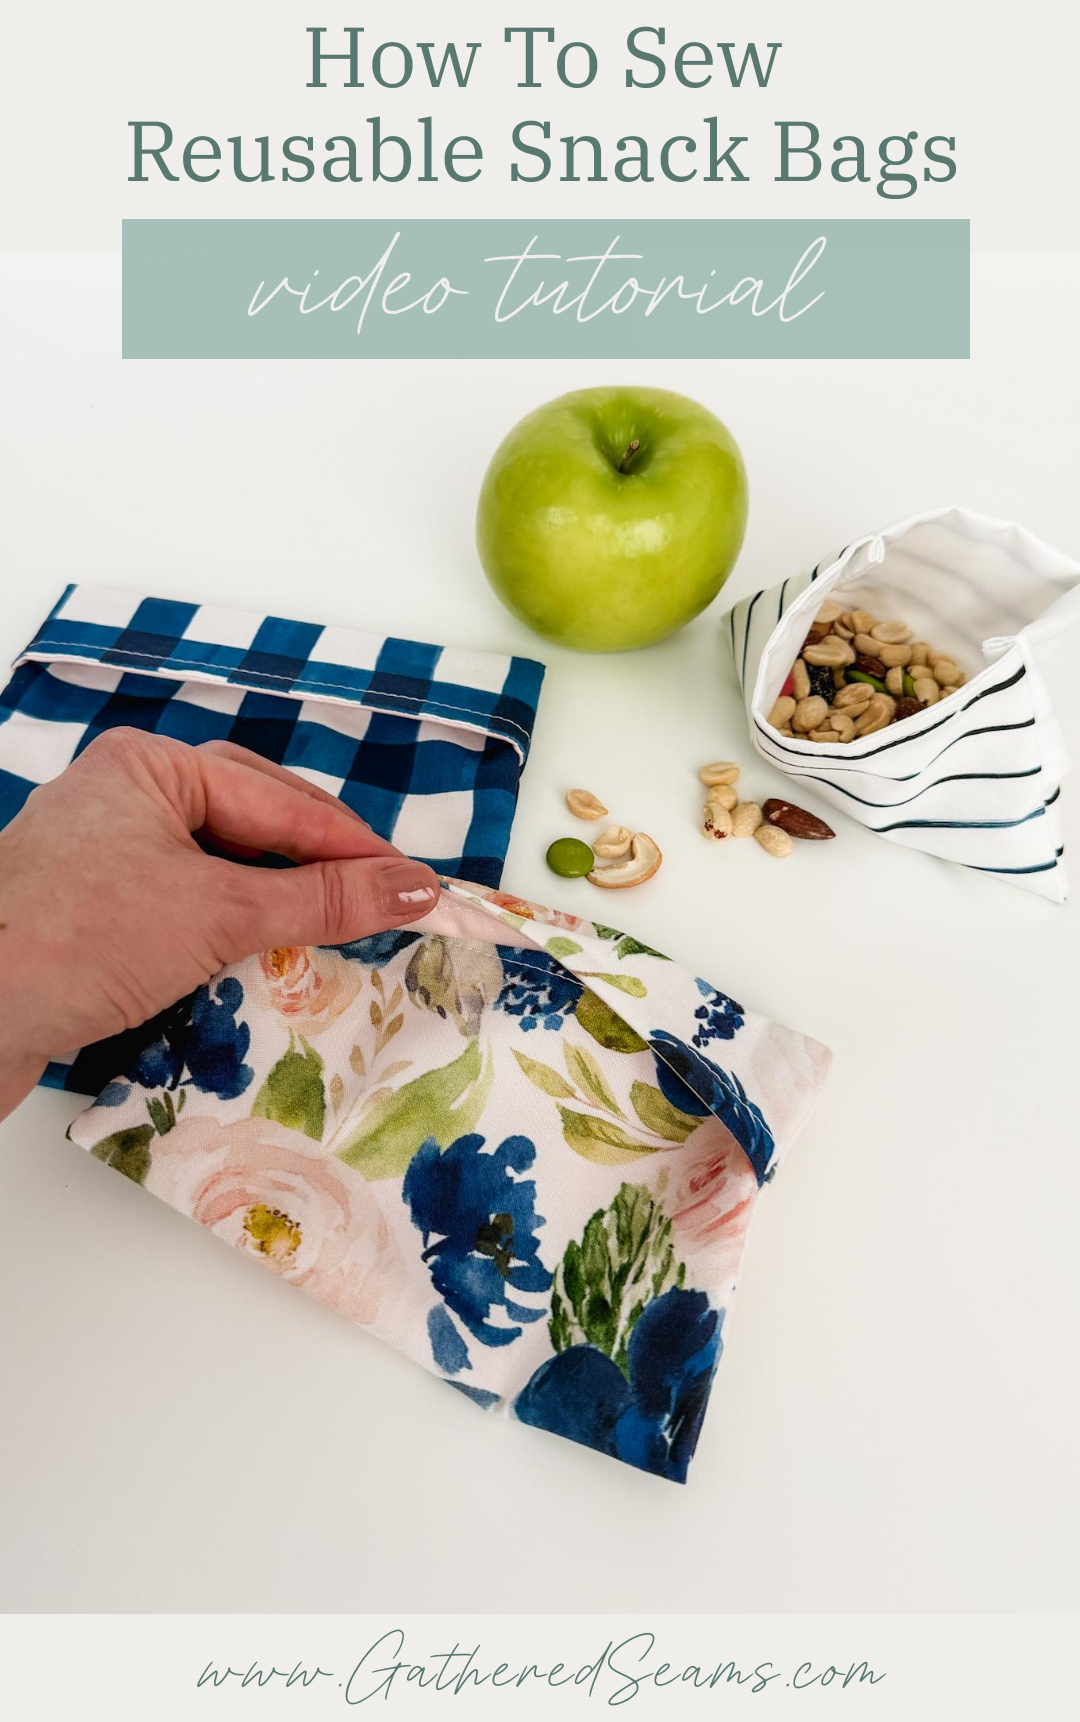
How To Sew Reusable Snack Bags | Free Pattern

In my last article, I shared how to sew a reusable lunch bag. So it makes sense to also share the pattern and steps to sew reusable snack bags.
I kept this pattern really simple; no zippers, snaps, or velcro.
It’s a great beginner sewing project and perfect for fat quarters.
Sewing reusable snack bags to sell
If you’re selling reusable lunch bags, these snack bags are the perfect item to add to your product line as an add-on product.
They’re also quick and easy to sew and don’t require much fabric. So if you sew these in bulk and use scrap/leftover fabric, you can get healthy profit margins.
To help ensure more lunch bag customers purchase snack bags too, consider:
- Offering the snack bags in matching or coordinating colors to your lunch bag
- Offering (slightly) discounted bundles of a lunch bag and a snack bag or set of snack bags
- Display/photograph the lunch bag and snack bags together so shoppers notice them, understand the purpose of the snack bags, and can imagine using them together.
Other items you may consider selling in your product line are:
- Reusable lunch bags
- Reusable napkins
- Cutlery rolls
- Cutlery bags
- Beeswax wraps
Depending on your target market, you may also branch into other types of products. For example, if you’re making lunch bags for students, you may also sew and sell:
- Backpacks
- Pencil cases
- Notebook covers
- Etc.
As a small handmade business, it’s important that all your products make sense together. Displaying snack bags next to hair accessories won’t help your sales.
Build a product line full of items customers are likely to use together. That will encourage each customer to buy more than one item and keep them returning to your business.
Materials
As an Amazon Associate, I earn from qualifying purchases.
- Fabric for the outside of the bag (something lighter weight and washable. I used quilting cotton)
- Waterproof fabric for the lining (I used food-safe PUL)
- Thread
Tools
- Sewing machine
- Walking foot or Teflon foot (optional but it makes working with PUL/vinyl easier. Alternatively, you can add a piece of Scotch tape to the bottom of your sewing machine foot to help it glide along the fabric.
- Fabric scissors or rotary cutter and mat
- Seam roller (optional but ideal when working with vinyl since you can’t iron it)
How to sew reusable snack bags
Step 1
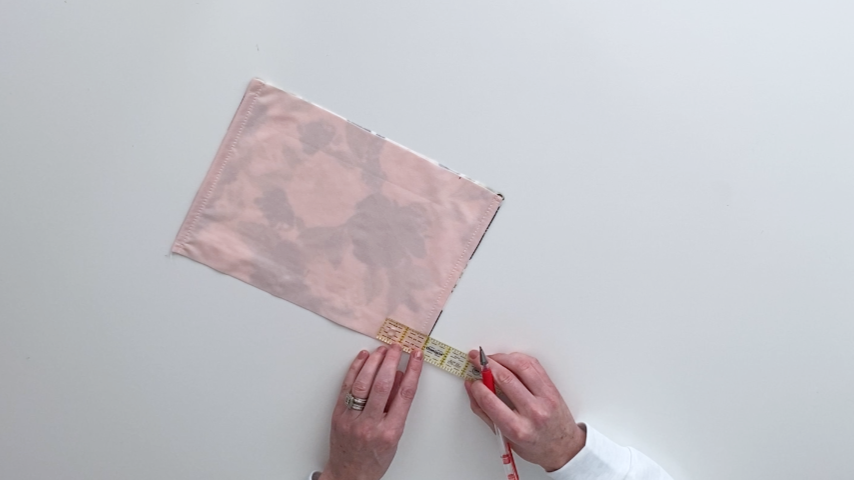
Cut out your outer fabric and your food-safe waterproof lining. They will both be the same size.
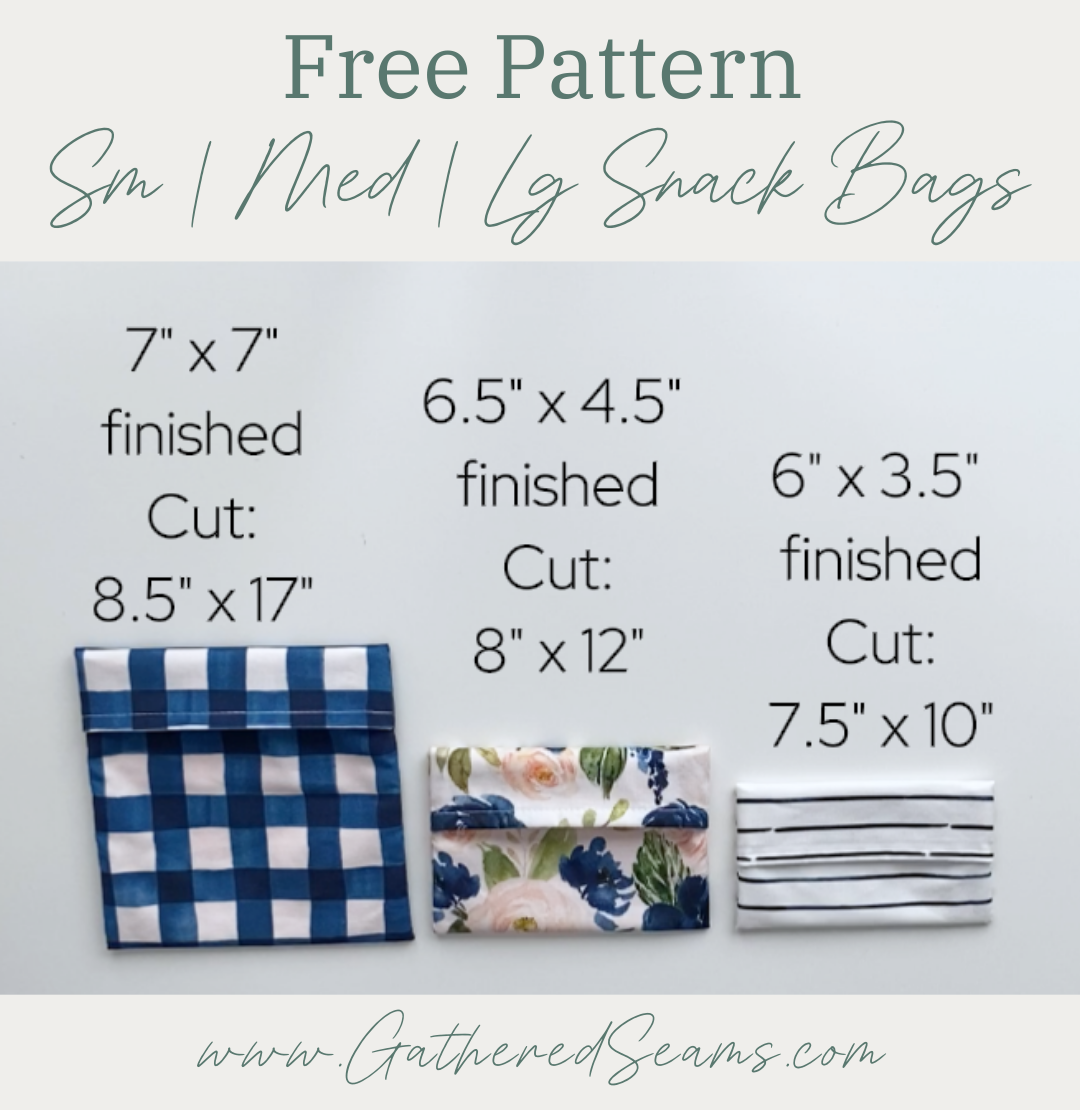
Large
- Finished size: 7″ x 7″
- Cut in outer fabric & lining: 8.5″ x 17″
Medium
- Finished size: 6.5″ x 4.5″
- Cut in outer fabric & lining: 8″ x 12″
Small
- Finished size: 6″ x 3.5″
- Cut in outer fabric & lining: 7.5″ x 10″
Custom size
If you’d like a different size snack bag than the sizes listed above, simply decide on the finished size you’d like, then add 1.5″ to the width. Multiply your desired length by 2, then add 3″.
For example, if I want a 5″ x 5″ snack bag, I would cut my fabric to 6.5″ wide (5 + 1.5) by 13″ long (5 x 2 = 10, 10 + 3 = 13).

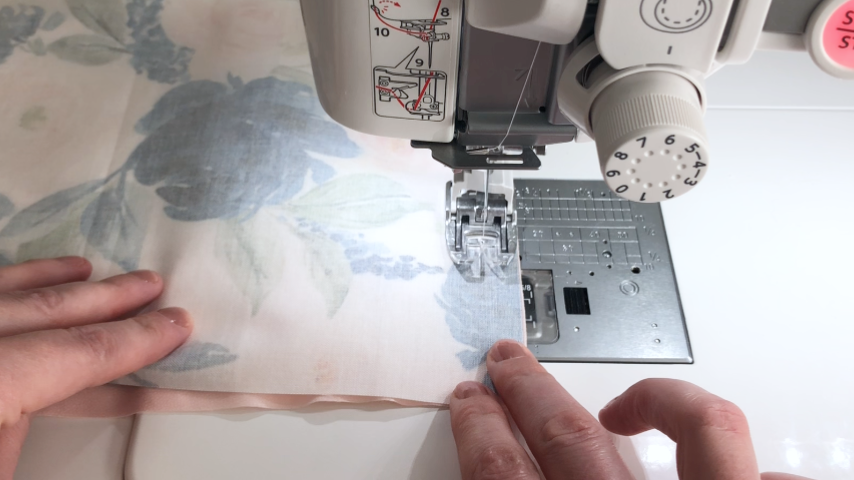
Step 2
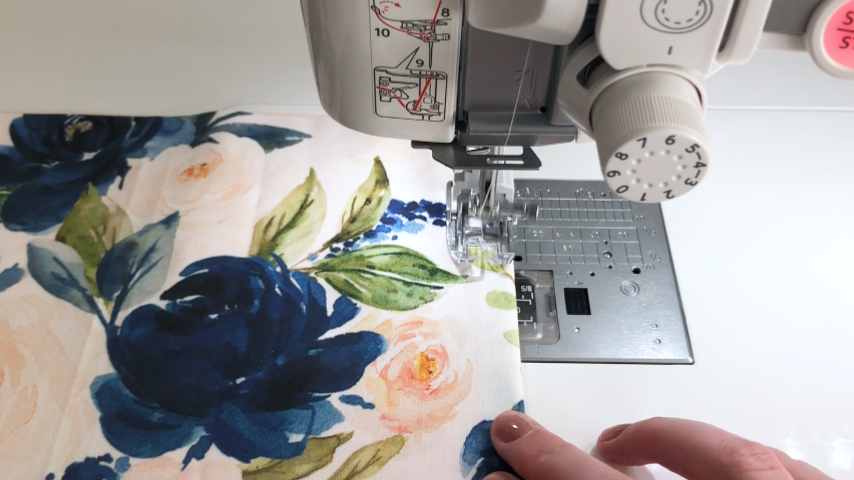
Place your outer fabric and lining right sides together. Make sure that’s the shiny/smooth side of your lining if using waterproof fabric.

Then sew along the top and bottom (the two shorter sides), using a 1/2″ seam allowance.
Step 3
Use a seam roller or your fingers to press the seams open. If you’re not using a waterproof/plastic lining, you can use an iron for this step.
Flip the bag right side out and use a seam roller to press the top and bottom seam again.
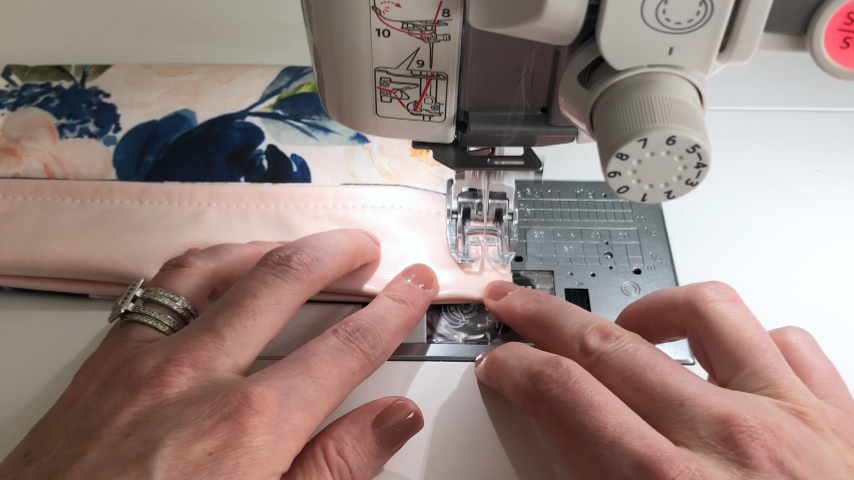
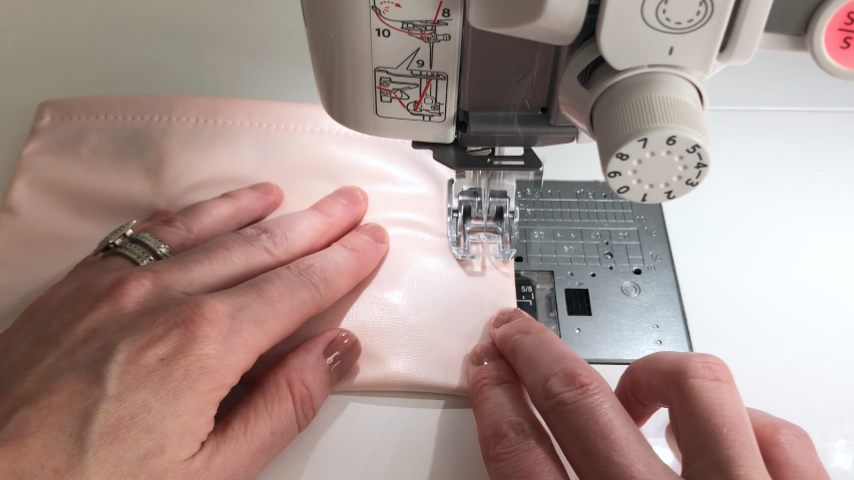
Then top stitch along the top and bottom edge.
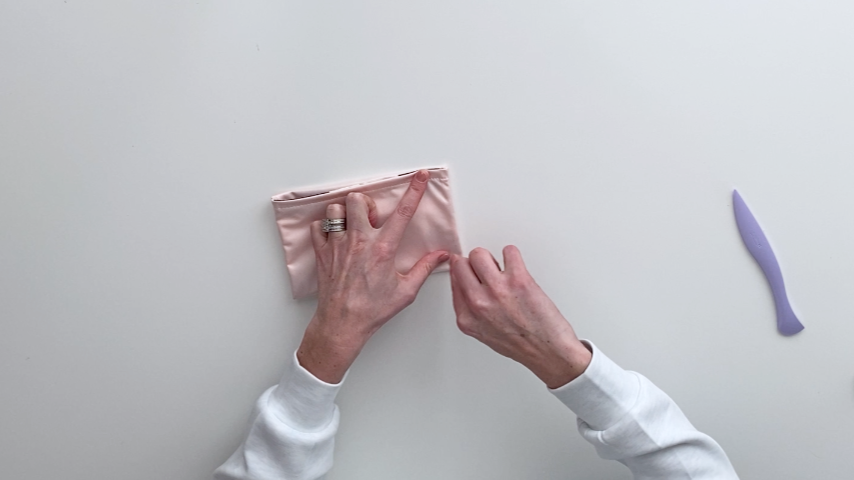
Step 4
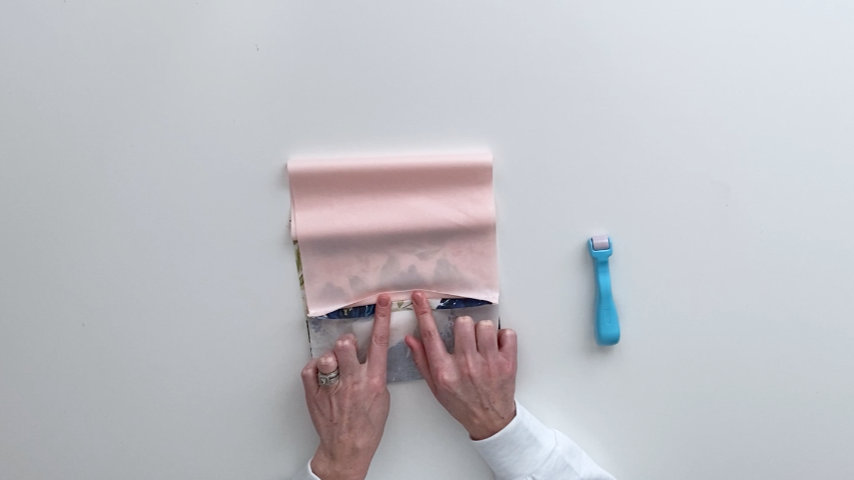
On the lining side, on each side, mark a short line 2″ from the top.
Fold the bottom up to those lines.
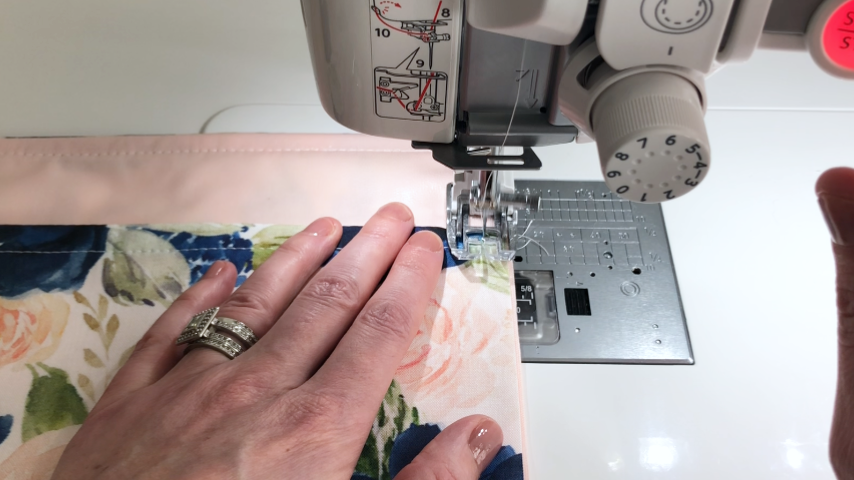
Sew the two sides in place using a 3/8″ seam allowance.
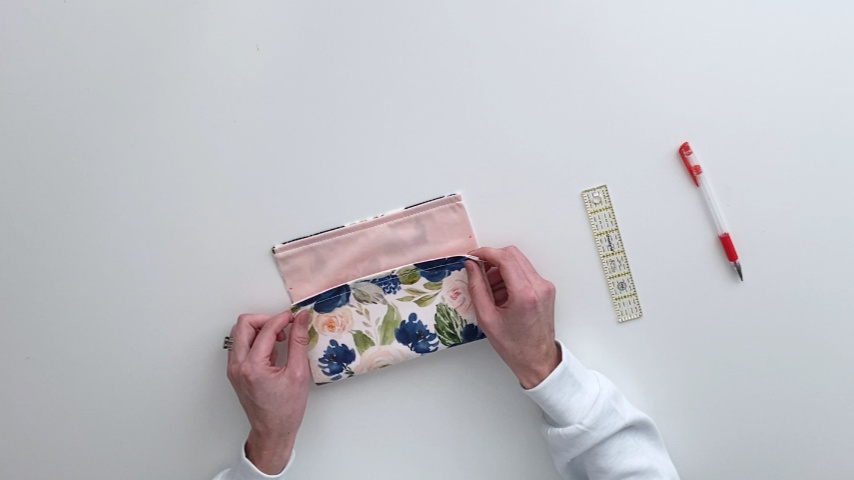
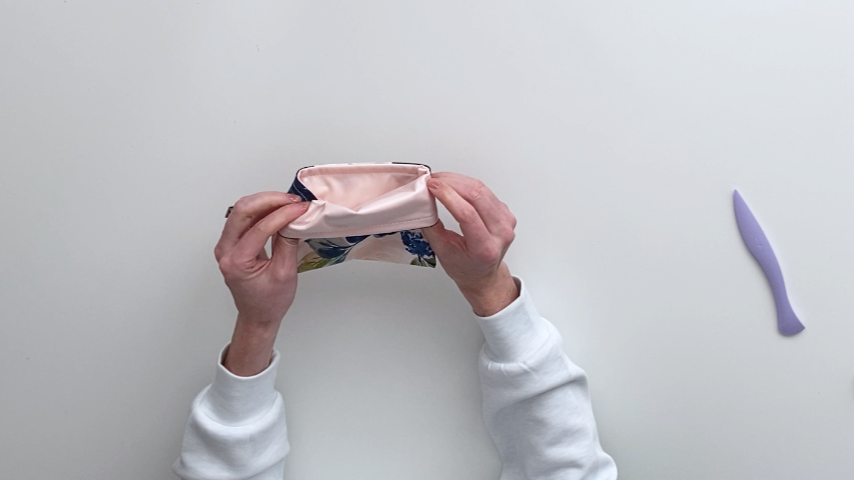
Step 5
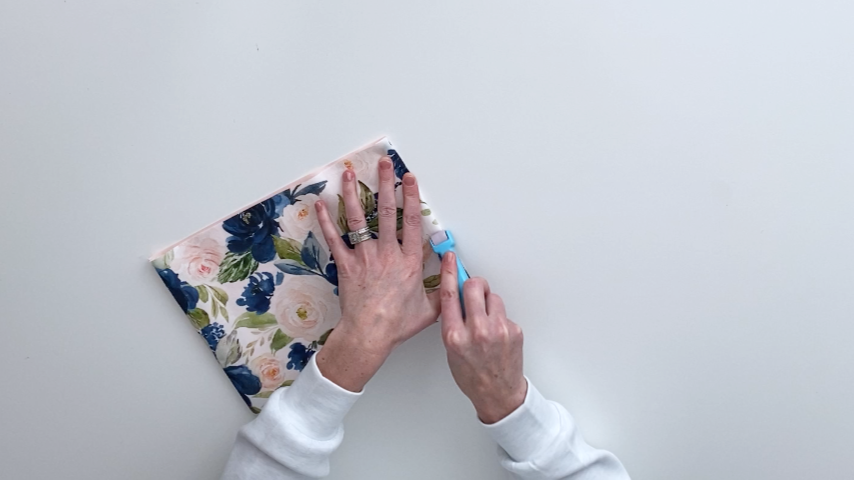
Fold the top flap back.
Then sew each side of it using a 3/8″ seam allowance.
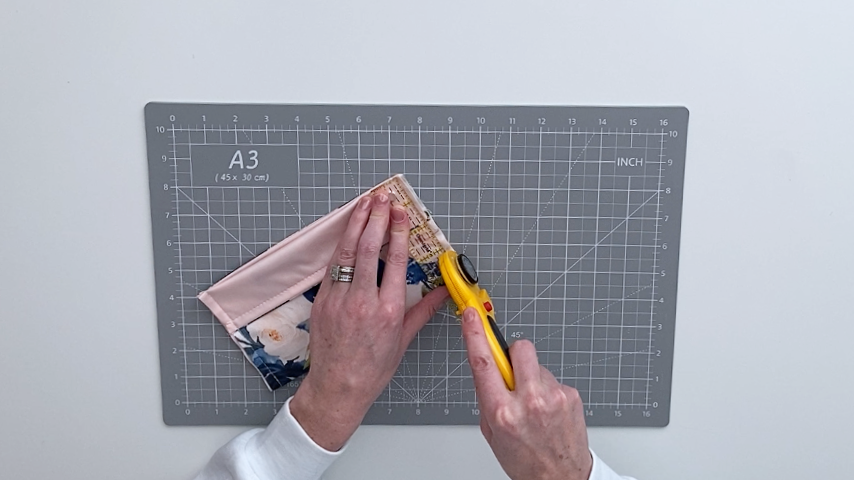
Step 6
Trim the seam allowance on both sides to 1/8″.
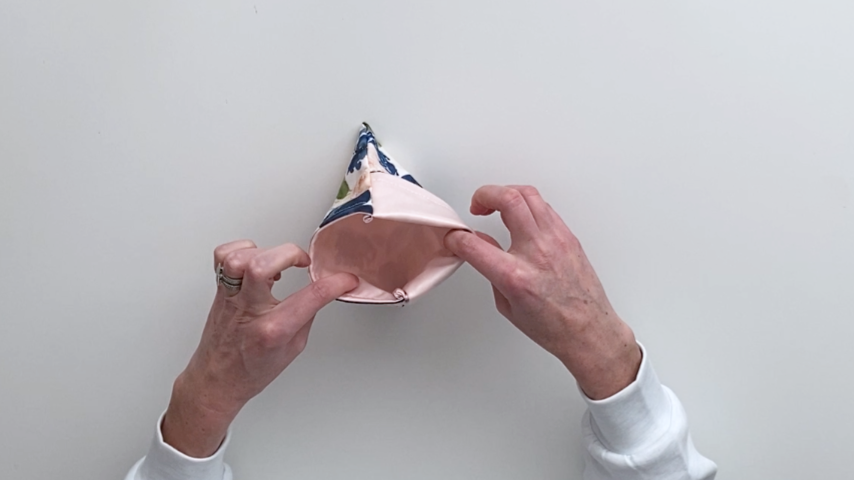
Step 7
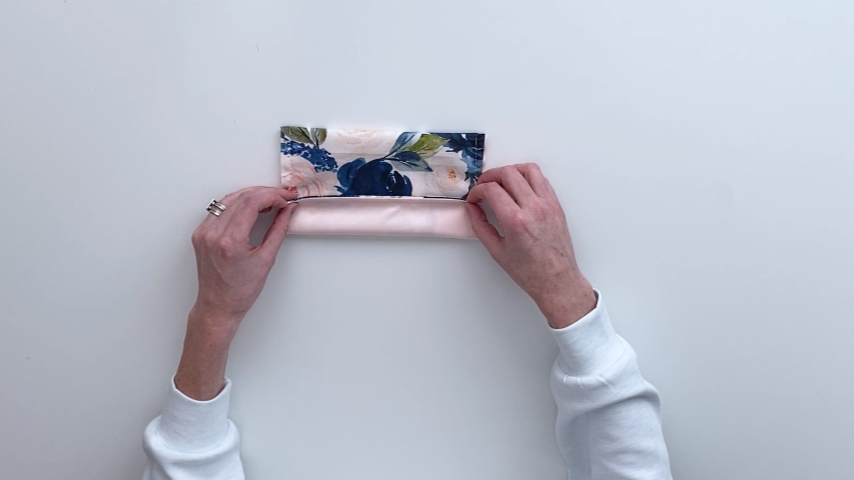
Leave the flap in place and simply push the two bottom corners out so the bag is lining side out.
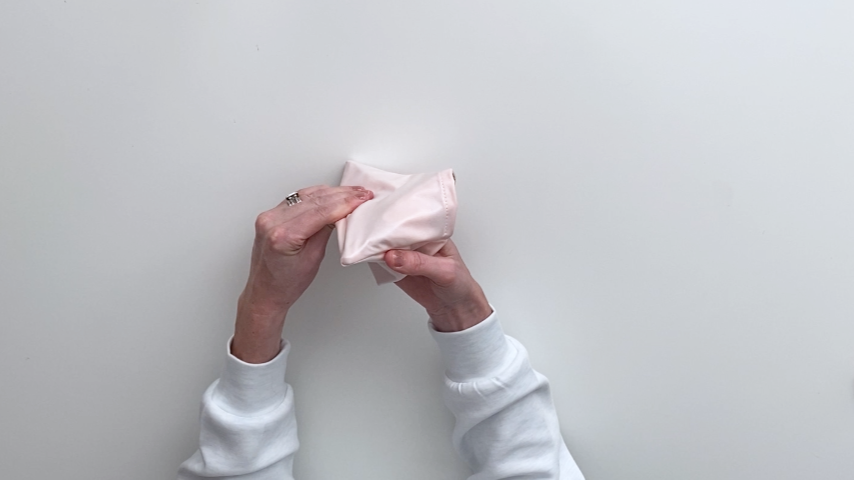
Step 8
Sew along the side seams again, using a 3/8″ seam allowance.
Step 9
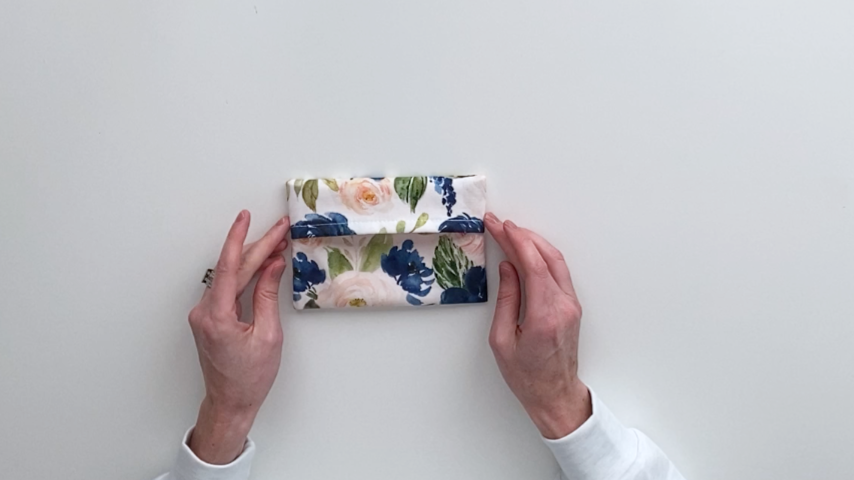
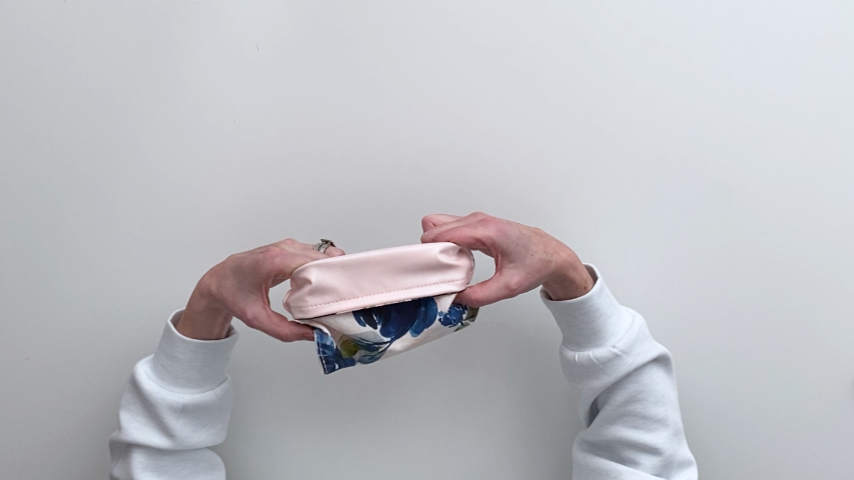
Turn your bag right side out.
Fold the flap back when filling the bag or snacking from it.
And fold the flap forward to close the bag.