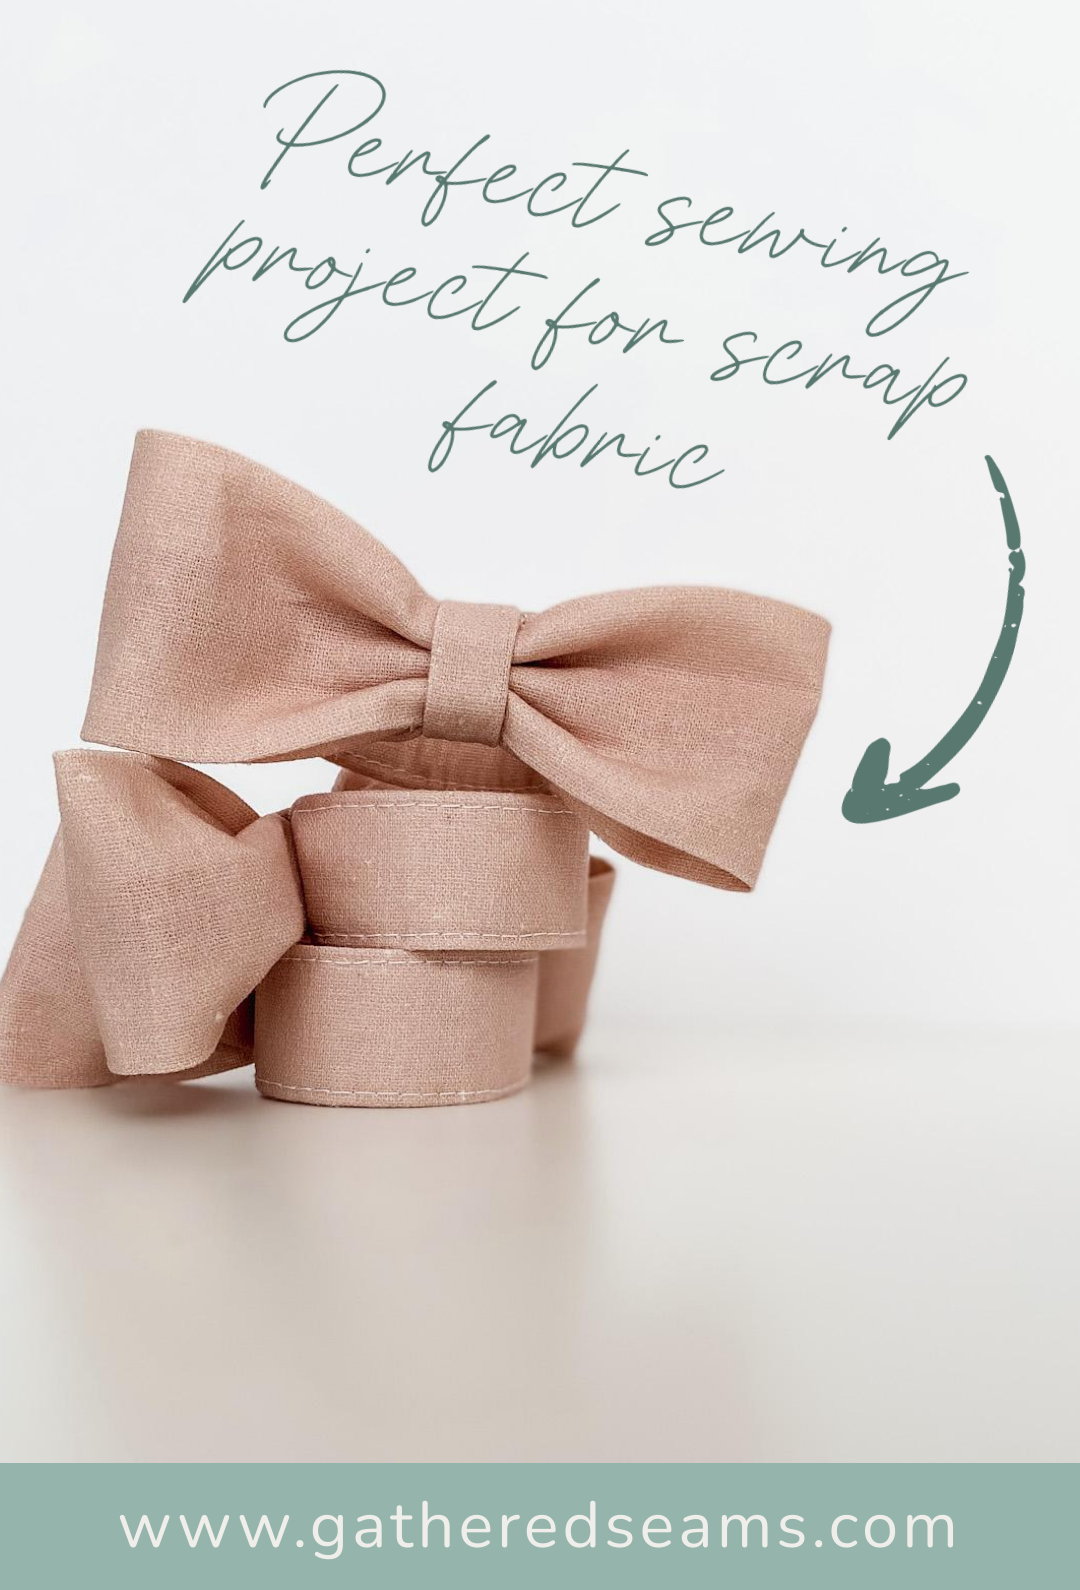
How To Sew Napkin Rings to Sell
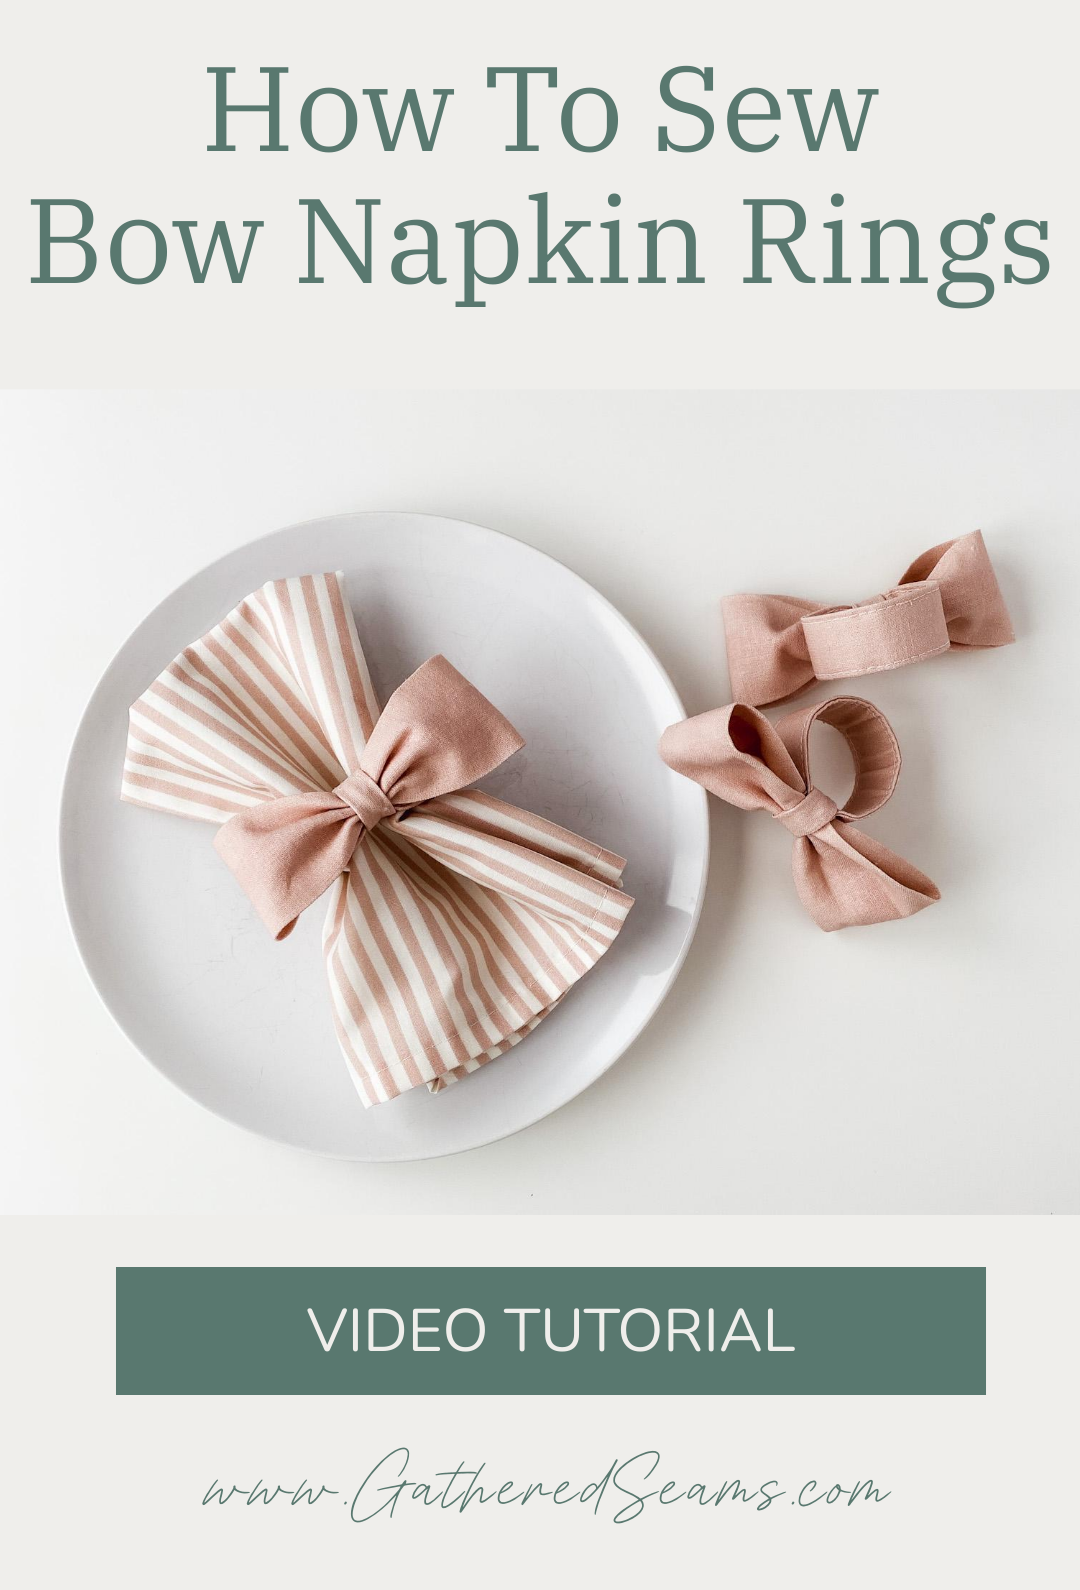
This is a simple pattern for napkin rings that don’t require hardware and only use smaller pieces of fabric. So it’s perfect for turning your scraps of fabric into profitable products.
Sewing napkin rings to sell
Napkin rings aren’t used or purchased as commonly as napkins. So this likely won’t be a core product or a bestseller in your product line. However, they’re a great add-on product to offer if you’re selling fabric napkins. Here are a few things to keep in mind:
- Coordinating – choose fabrics, prints, and colors that work well with your napkin fabrics/prints/colors.
- Sets – whatever quantity of sets you sell your napkins in (e.g. sets of 4, 6, or 8), your napkin ring sets should match those quantities.
- Packaging – your napkin rings should be packaged together in their sets. A box with a clear lid is ideal, however that may add too much cost. Another option is to use cellophane bags and/or cardboard display cards with holes that twist ties can go through to secure the napkin rings to the card.
- Add-on item – this is a great add-on item to fabric napkins, to increase your units and value per transaction (UPT & VPT).
Materials
As an Amazon Associate, I earn from qualifying purchases.
- Cotton or linen fabric
- Fusible interfacing (this is used to add structure to the ring)
Tools
- Sewing machine
- Thread and needle for hand-sewing
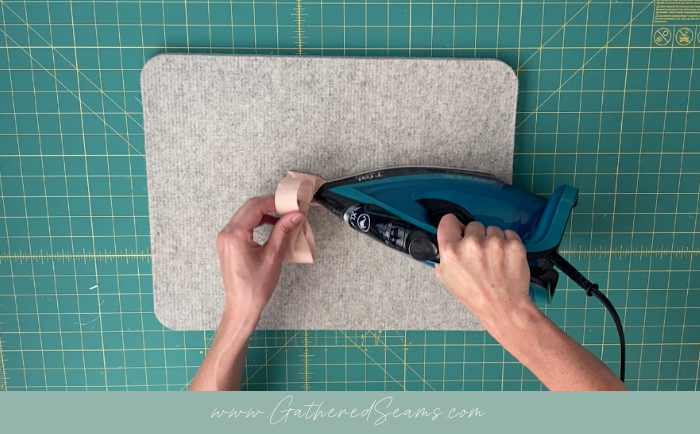
- Iron
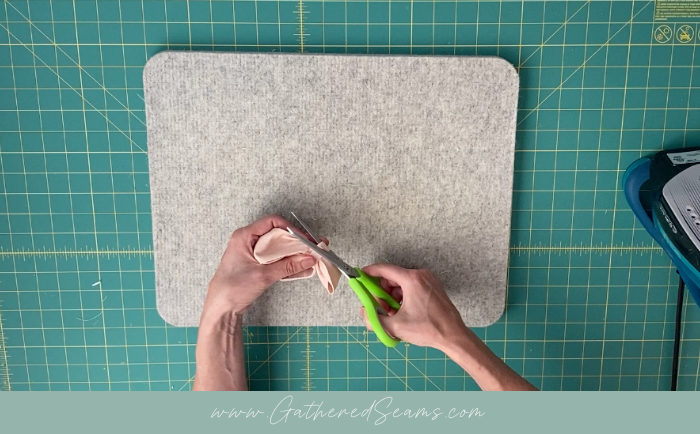
- Scissors
How to sew bow napkin rings
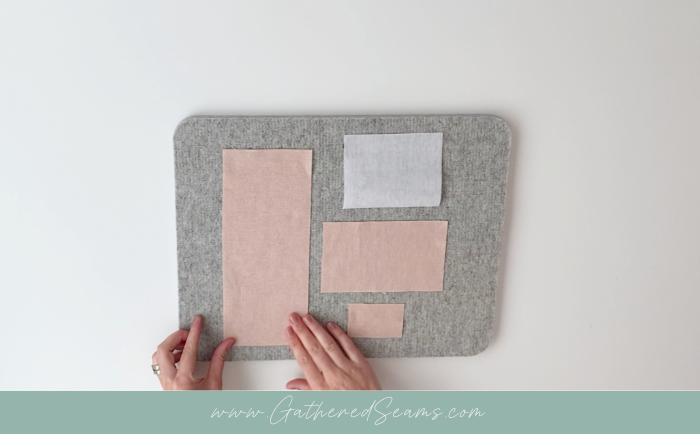
Step 1 – Press & cut pattern pieces
Press your cotton or linen fabric before cutting and cut out:
- 6.5″ x 4″ (for the ring)
- 11″ x 4.5″ (for the bow)
- 3″ x 2″ (for the bow’s middle loop)
In your fusible interfacing, cut one piece that is:
- 5″ x 4″
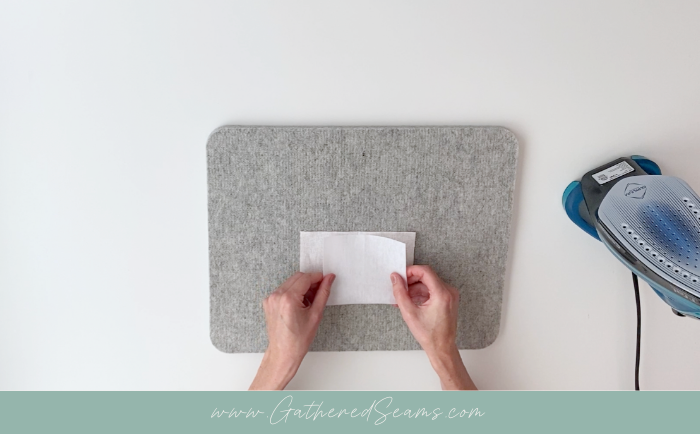
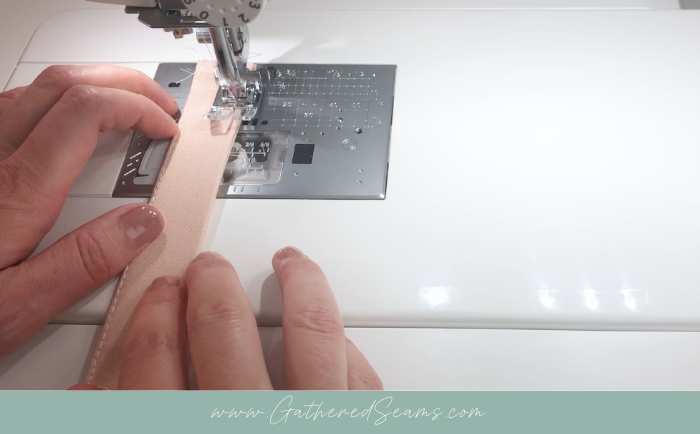
Step 2 – Fold, press and sew ring
Fold your 6.5″ x 4″ rectangle and fusible interfacing in half width wise to crease the center. Match up the center creases and use your iron to fuse the interfacing to your fabric.
Fold your ring piece in half lengthwise, placing wrong sides together, and press with your iron.
Then fold each edge in to meet that center crease and press.
Finally, fold in half again, lengthwise, and press.
Top-stitch on each side of the strip.
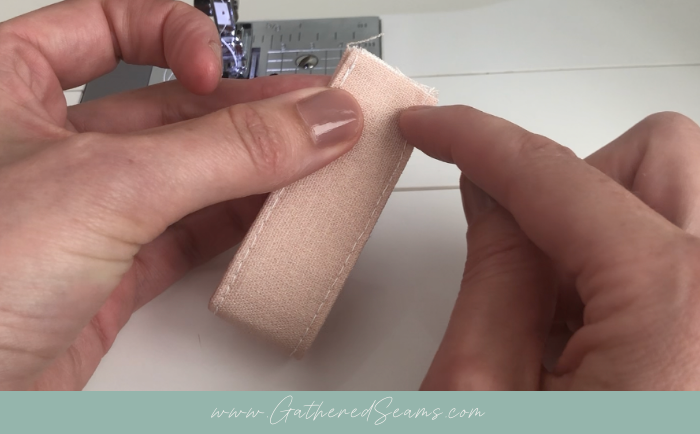
Step 3 – Form ring
Line up the two ends of your strip and sew together using a 1/4″ seam allowance.
Set aside.
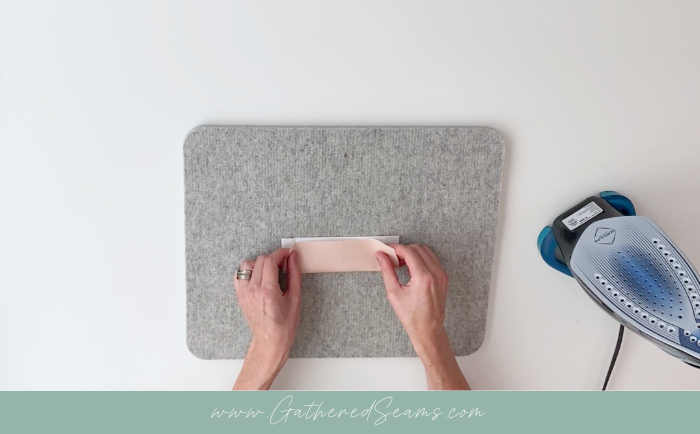
Step 4 – Sew the bow
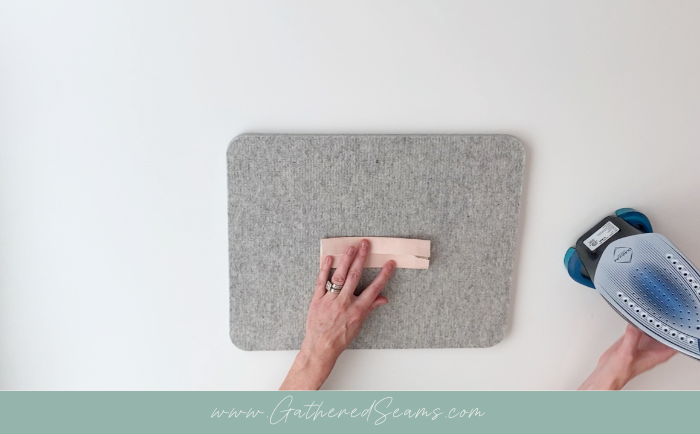
Fold your 11″ x 4.5″ strip of fabric in half lengthwise, with right sides of fabric together, and sew along the edge using 1/4″ seam allowance.
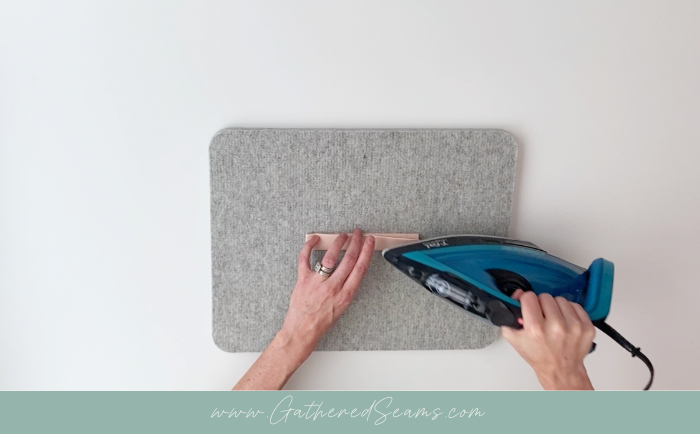
Press your seam open, then turn right side out.
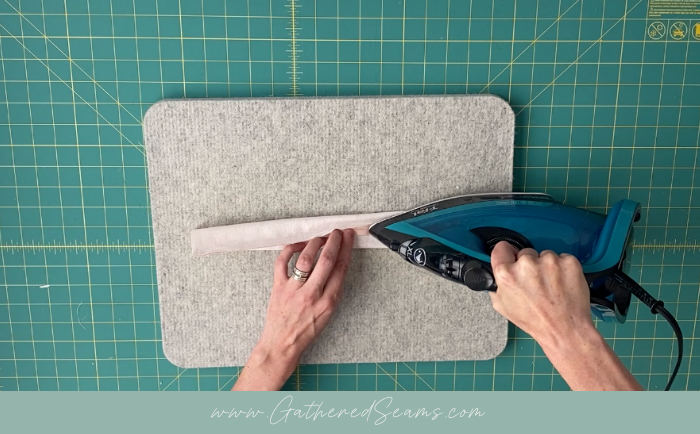
With your seam in the center, press your strip of fabric.

Step 5 – Attach bow to ring
Center one end of your bow with the top of the ring, right sides together.
Loop the bow strip around your ring (so you have a smaller ring inside a larger ring) and center the other end of the bow strip on the other side of the ring.
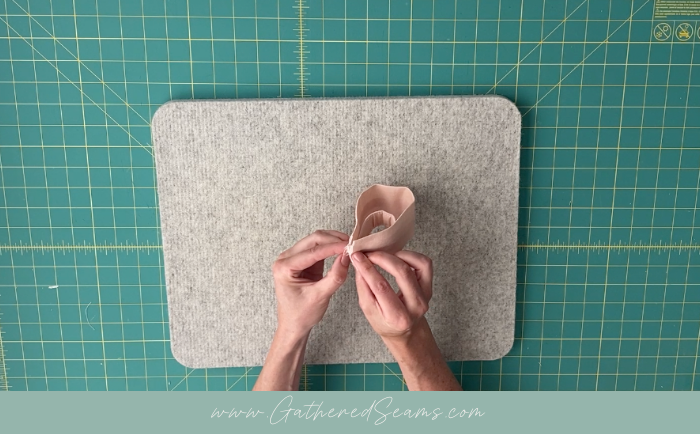
Sew all 4 ends together using 1/4″ seam allowance.
Trim the excess ends of the ring (but not the bow).
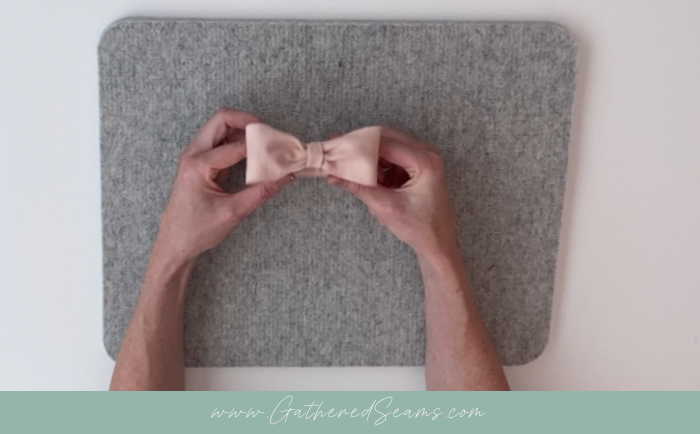
Step 6 – Hand-sew bow
Flip your bow right side out so you have a larger ring sitting on top of a smaller ring.
Fold in the edges of your bow base and hand sew into place.
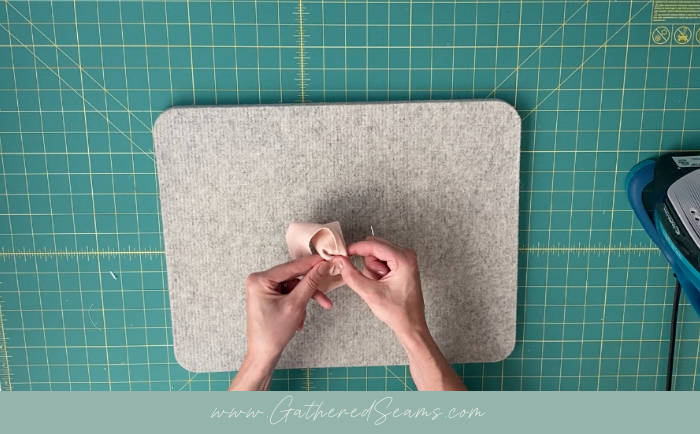
Find the center of your bow strip and gather the material to form a bow and hand sew into place.
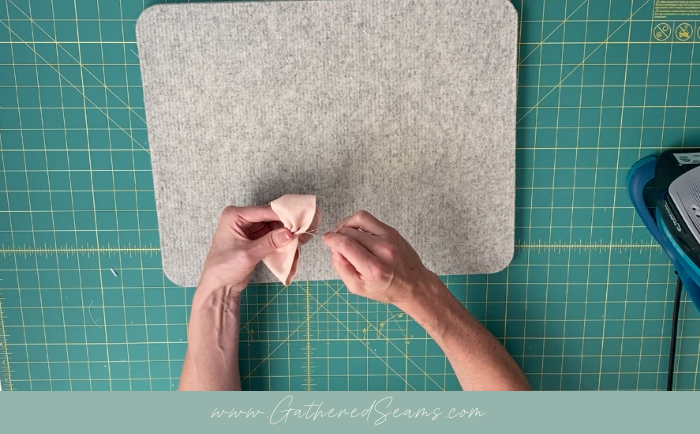
Step 7 – Fold and press center loop
Follow the same steps to fold the center loop of the bow using the 3″ x 2″ piece of fabric.
Instead of top-stitching along each edge, you can use fabric glue to seal the folded edges together.
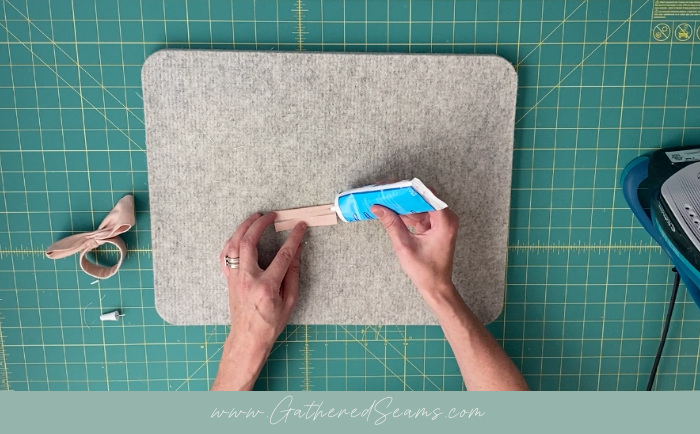
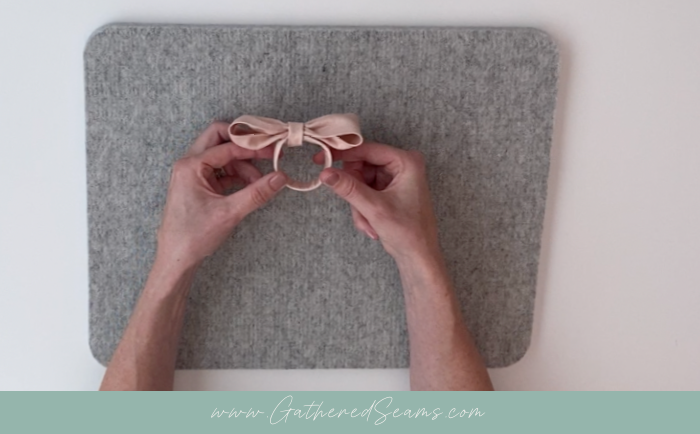
Step 8 – Sew center loop
Wrap the center loop around the center of the bow, then slide it slightly off center so you’re not dealing with as much bulk when sewing the ends together.
Sew the two ends together as close to the bow as you can, without catching the bow.
Cut off the excess ends, then flip your center loop so the raw ends of the seam are hidden.
Use a drop of glue on the bottom of the bow to keep the center loop in place. You can do the same along the top of the bow if your center loop is a little loose.

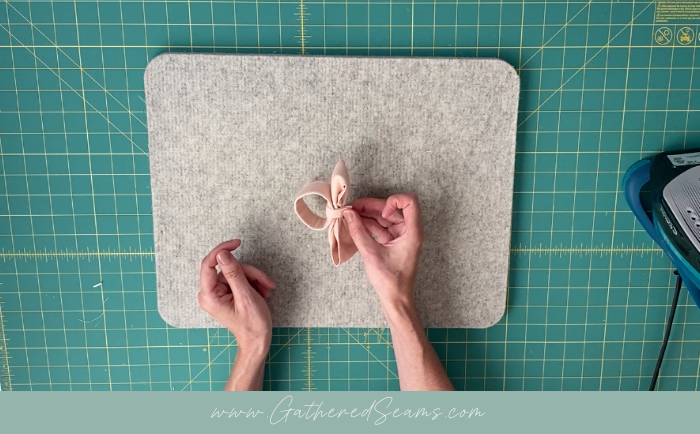
If your bow is creased, use the tip of your iron to press out any wrinkles.
Now it’s time to sell your napkin rings! Next steps: