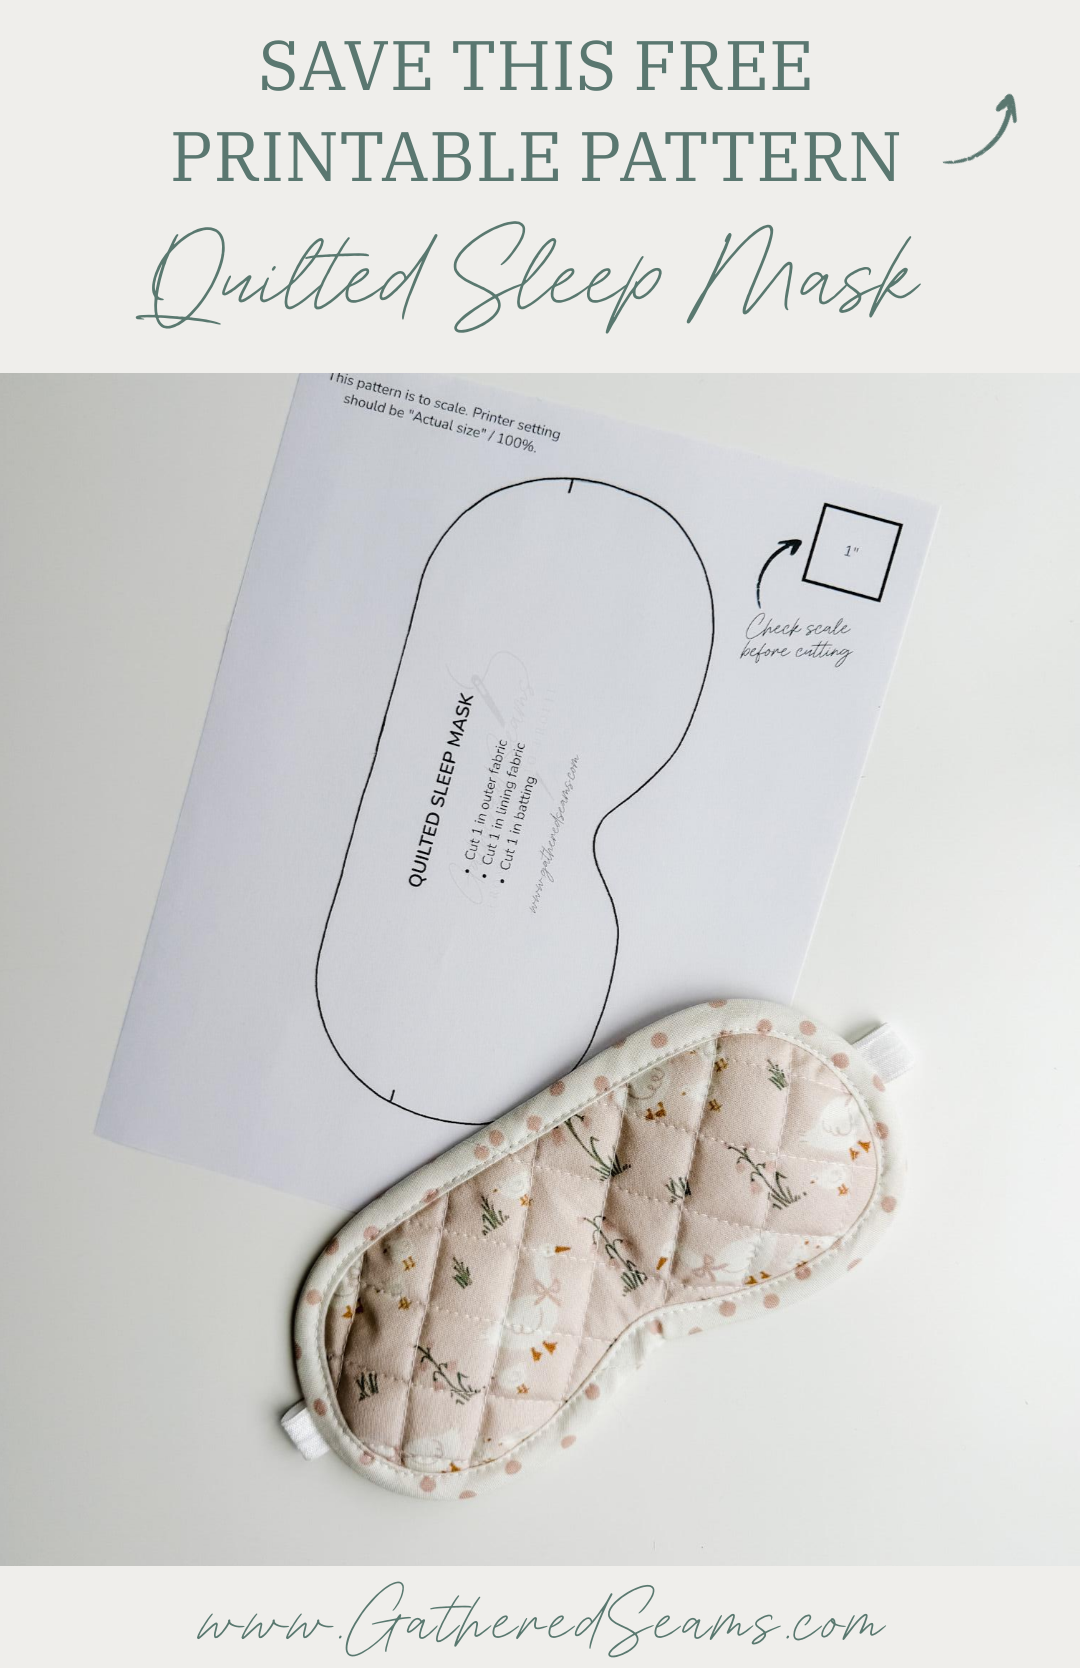
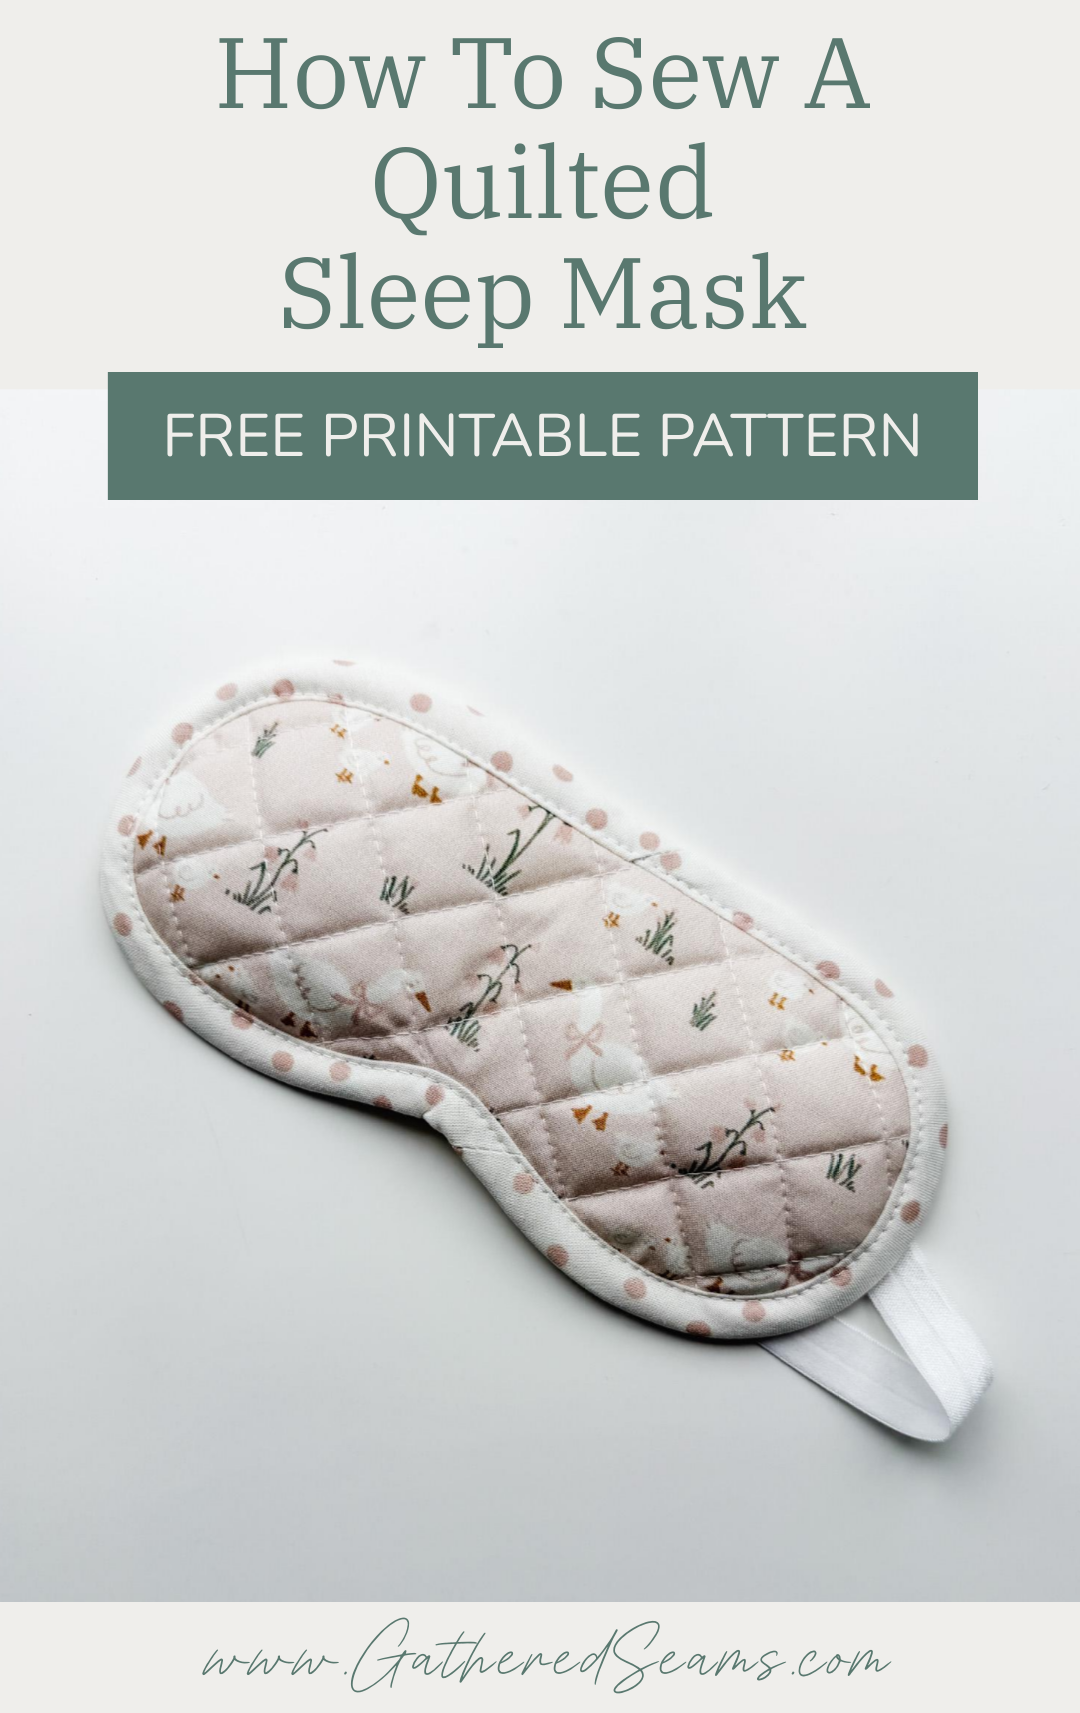
How To Sew A Quilted Sleep Mask | Free Printable Pattern
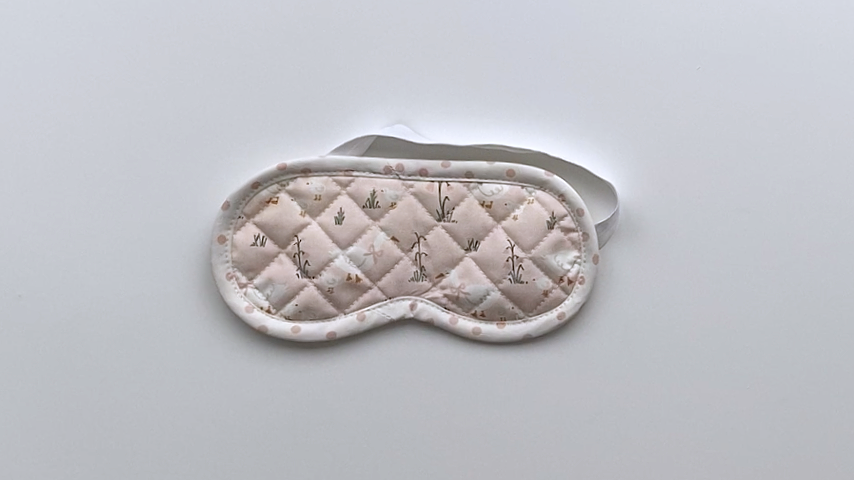
A quilted sleep mask is a perfect sewing project for personal use or for a gift. You can alter the fabric based on its purpose and who it’s for.
For example, you may sew a sleep mask for travel and could choose a travel-themed print.
Or use darker colored fabric for the outside and lining to block more light and create a blackout sleep mask.
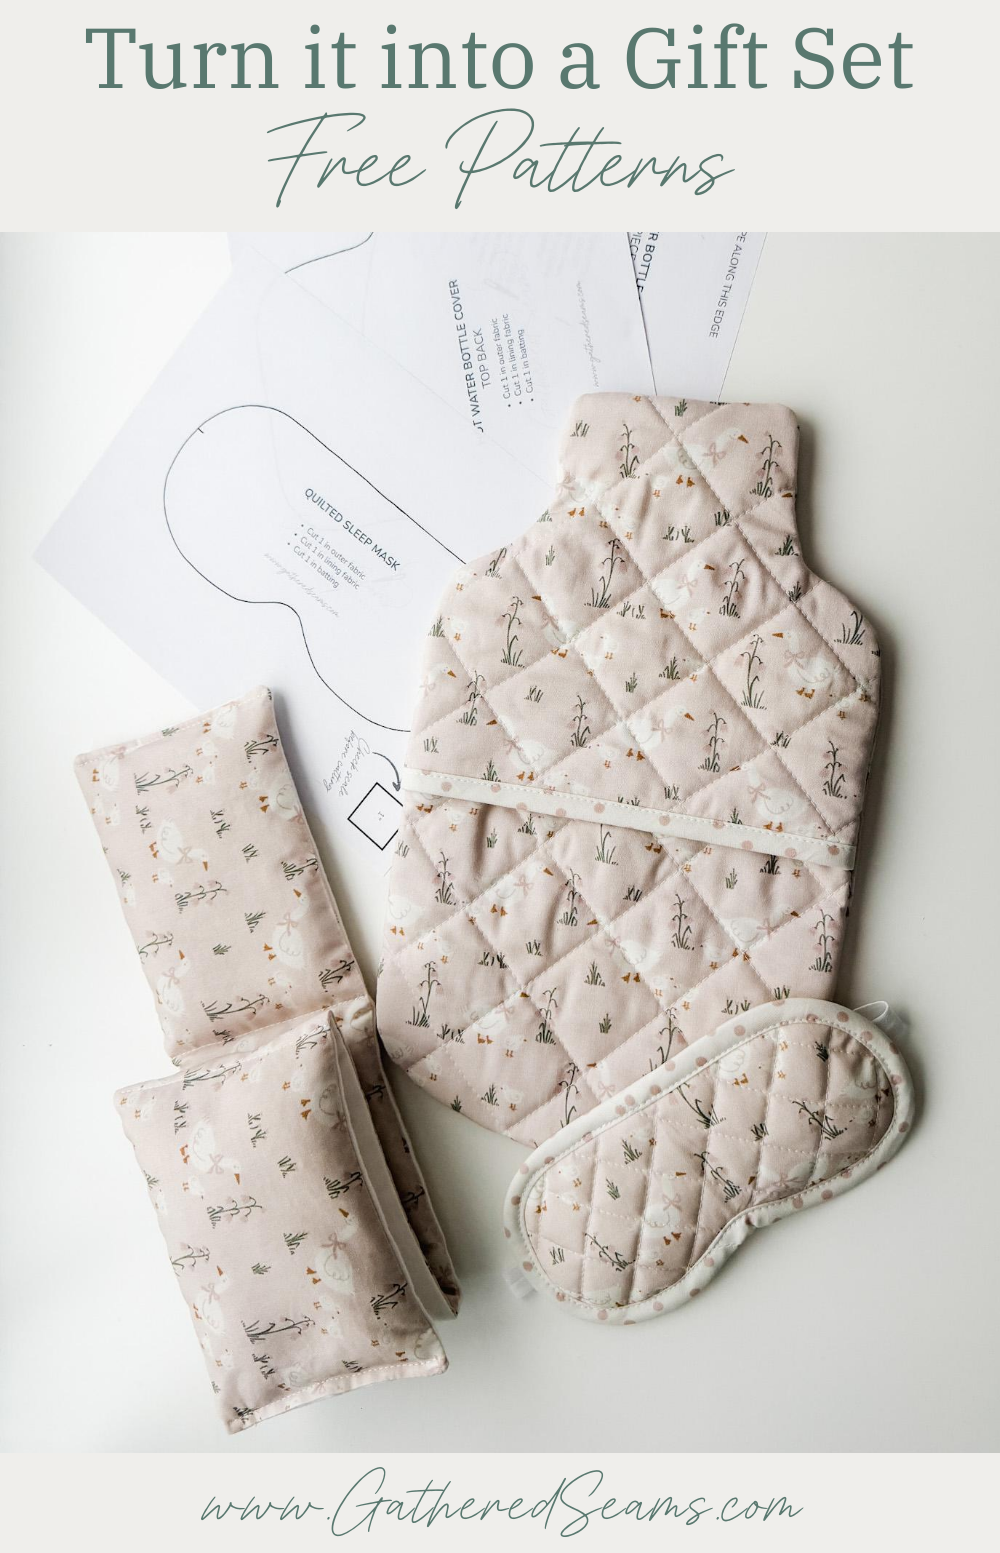
Other items to sew & gift with the mask
You can create gift sets by bundling more than one item together.
Gift for a traveller:
- Neck pillow
- Blanket scarf
- Travel cases and bags
Gift for relaxation:
- Hot water bottle cover (free pattern here)
- Rice heating pad (for the neck)
Gift for her:
- Sleep scrunchie (made from satin to reduce hair breakage)
- Satin pillowcase
- Pajama pants or shorts
Here’s a gift set with free patterns: Comfort Gift Set To Sew | Free Printable Patterns
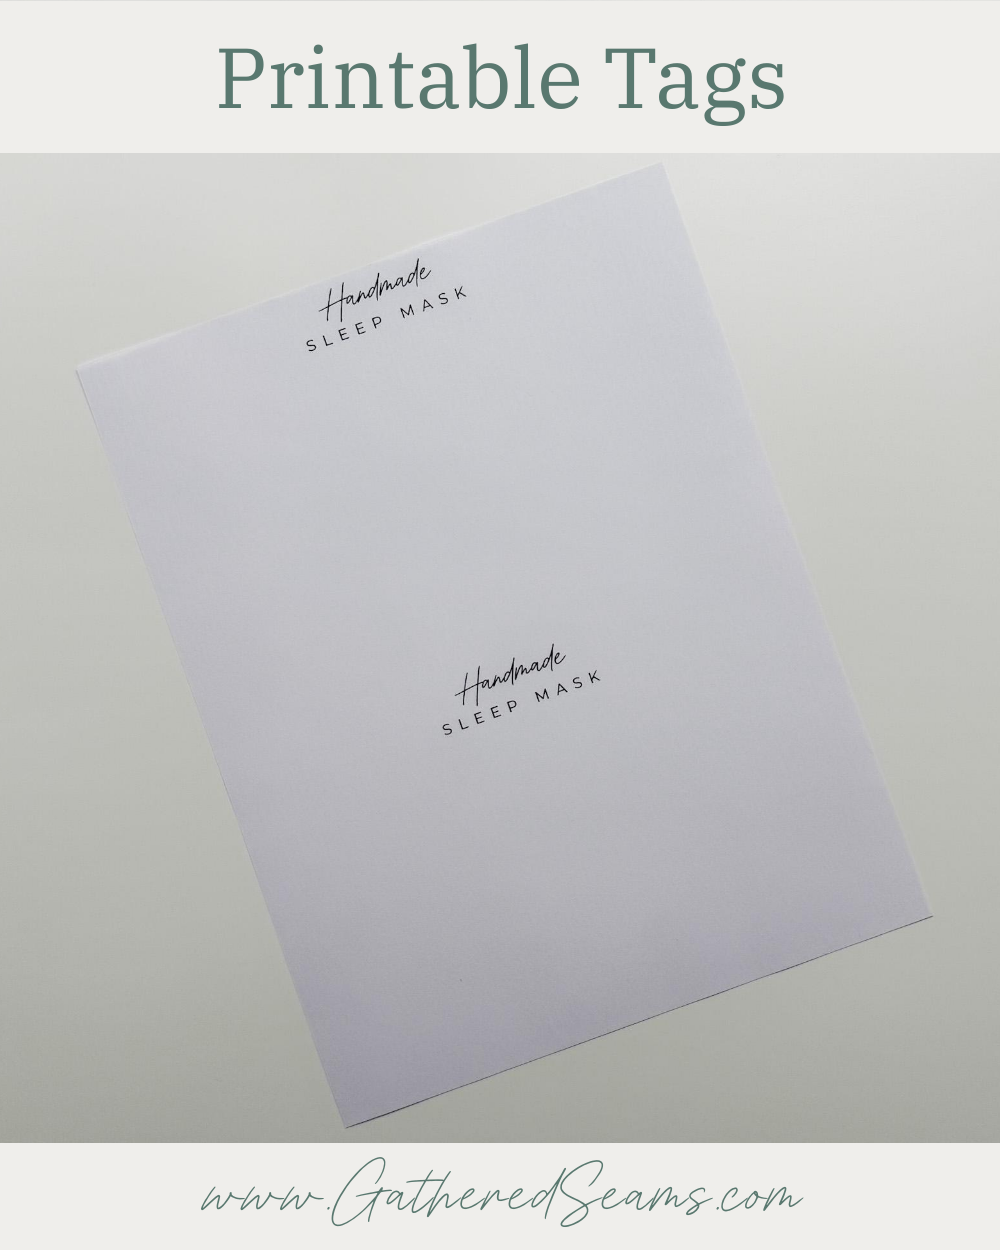
Printable Tags
You can download the free printable tags below.
To create the tags, I print them on heavier paper, then cut the sheet in half (top/bottom). I wrap the sleep mask’s elastic around the back of the tag, fold the elastic so it tightens around the tag, then use a piece of tape to hold the elastic in place.


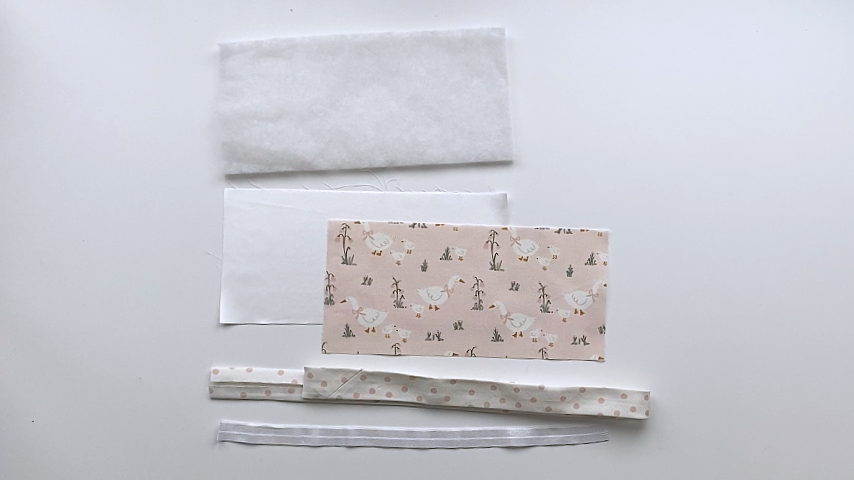
Materials
As an Amazon Associate, I earn from qualifying purchases (see full disclosure here).
- Outer material
- Lining – choose a material that is soft and breathable, such as cotton, silk, modal, or bamboo.
- Batting – the batting you choose will depend on the look you want to create and functionality.
- Higher loft for a more quilted look
- Wool or cotton for breathability and/or to block more light
- Fusible fleece for an easier time sewing quilting stitches (although it’s less breathable)
- 1/2” double-fold bias tape (2” wide when unfolded), approximately 26” long
- 1/2” – 1” wide elastic cut to 12” – 15” long (I used foldover elastic)
- Thread
Tools
- Sewing machine
- Walking foot (highly recommended if you’re sewing quilting stitches. This is the universal one I purchased for my Baby Lock, which is a different machine than what’s shown in the photos)
- Hera marker (for marking quilting lines)(this is the one I use)
- Ruler (for marking quilting lines)
- Clips
- Temporary fabric marker (these are the ones I use)
- Scissors
- Iron

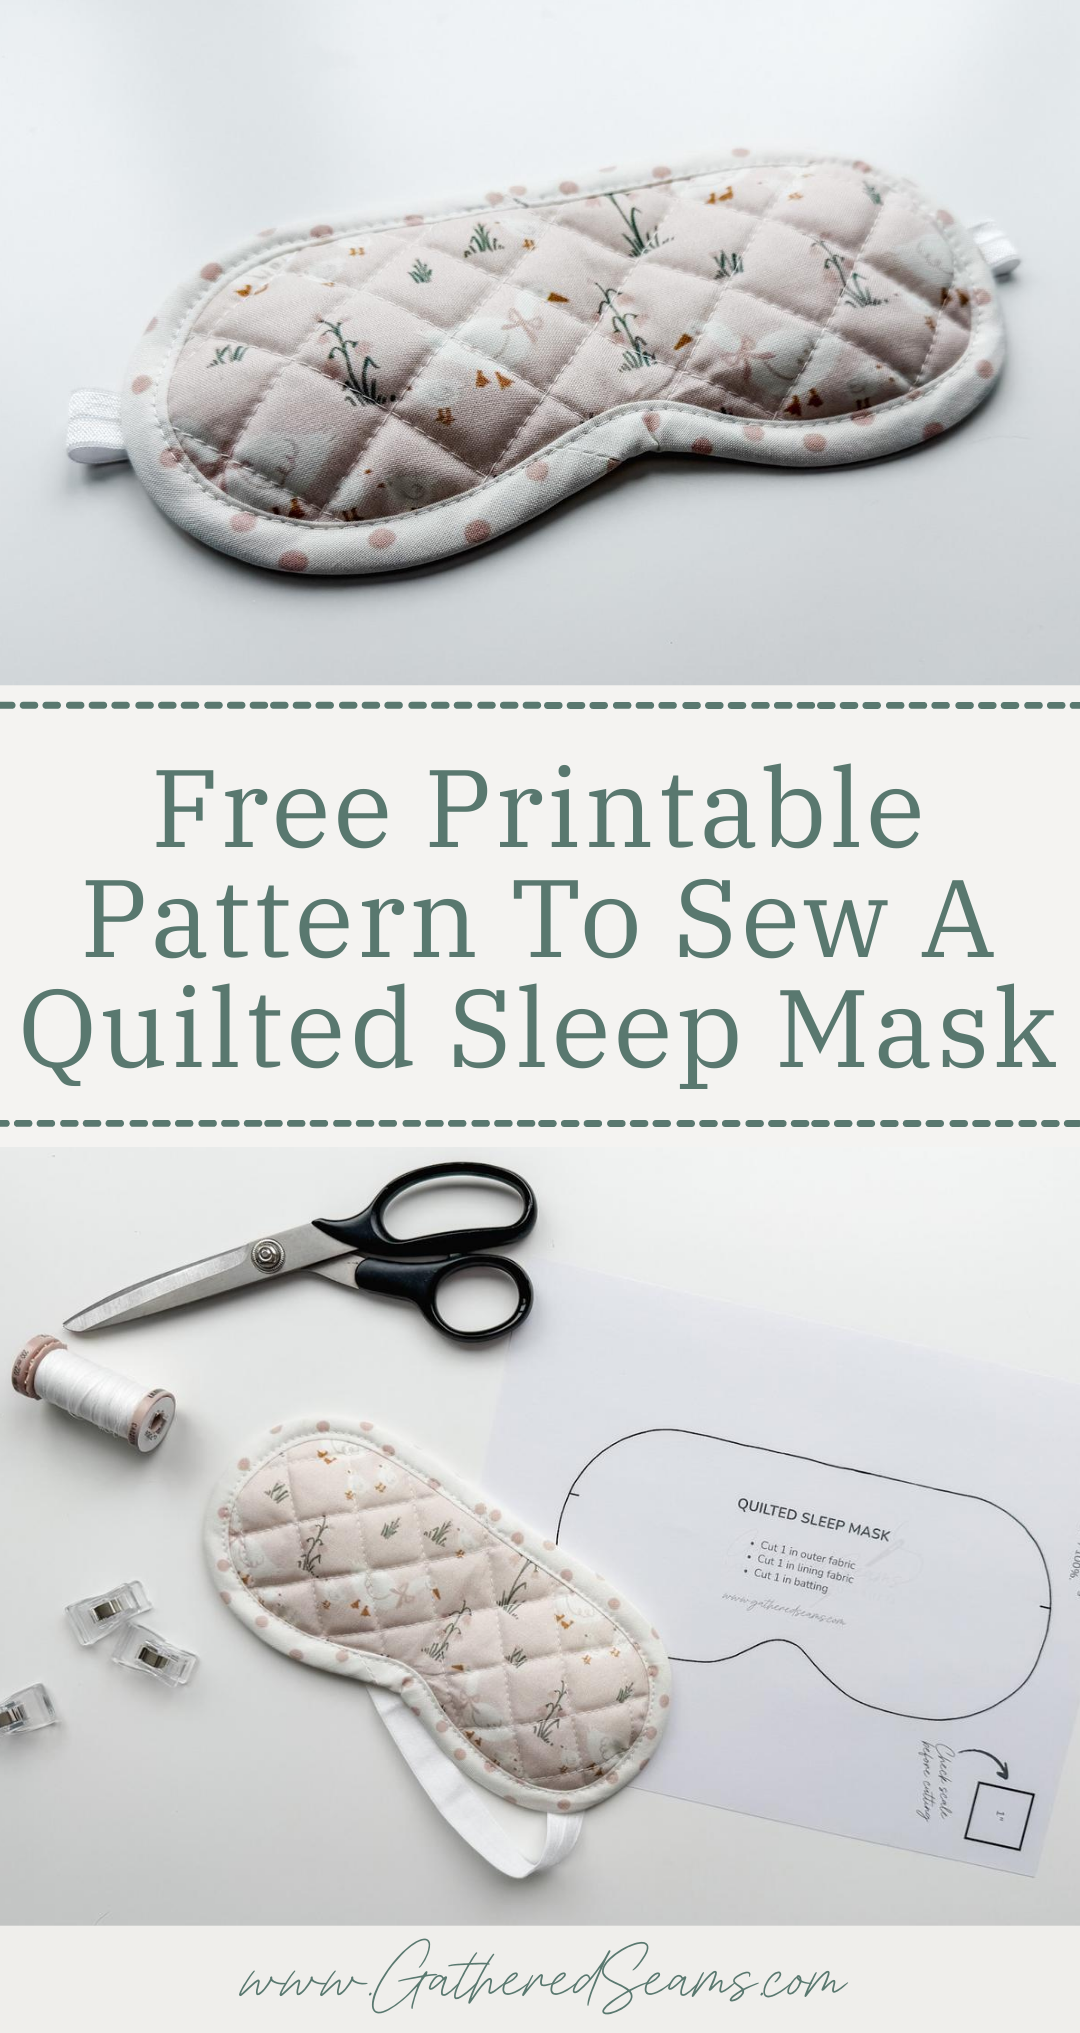
Steps to sew a quilted sleep mask
Step 1
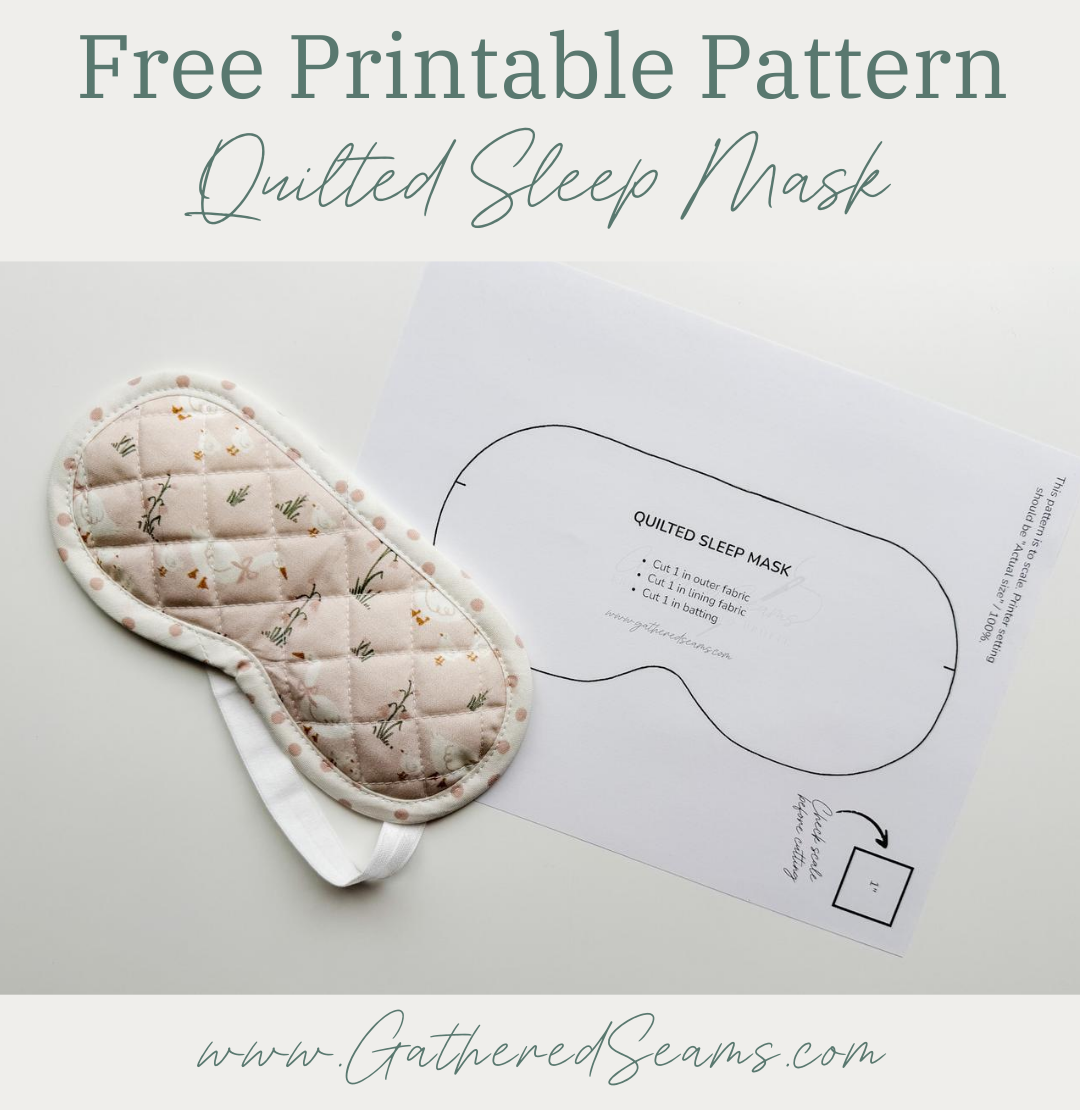
Download your free pattern, print it, and cut it out.
Before cutting your fabric to the shape of the pattern piece, you’ll complete your quilting stitches first.
To account for shifting and shrinking when adding quilting stitches, you’ll cut your fabric and batting slightly larger than the pattern piece.
Cut a 9.5” x 4.5” rectangle in:
- Outer fabric
- Lining
- Batting
As well as:
- 26” piece of 1/2” double-fold bias tape
- 12” – 15” piece of elastic (the length will depend on who you’re sewing the mask for)
Step 2
Place your outer fabric wrong side together with the batting, then add quilting stitches. You can use any design you like for stitches.
I created lines at 45-degree angles going in two directions.
You can use a ruler and Hera marker (here’s a similar tool) to simply crease the lines you want to follow.
Step 3
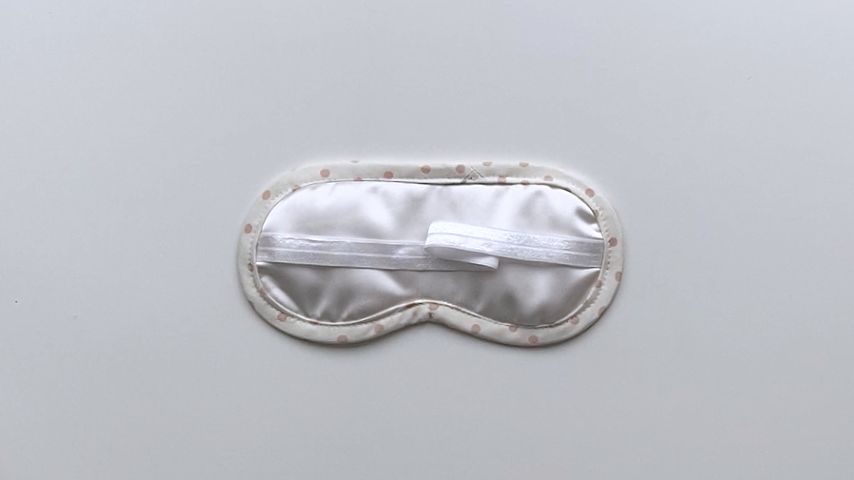
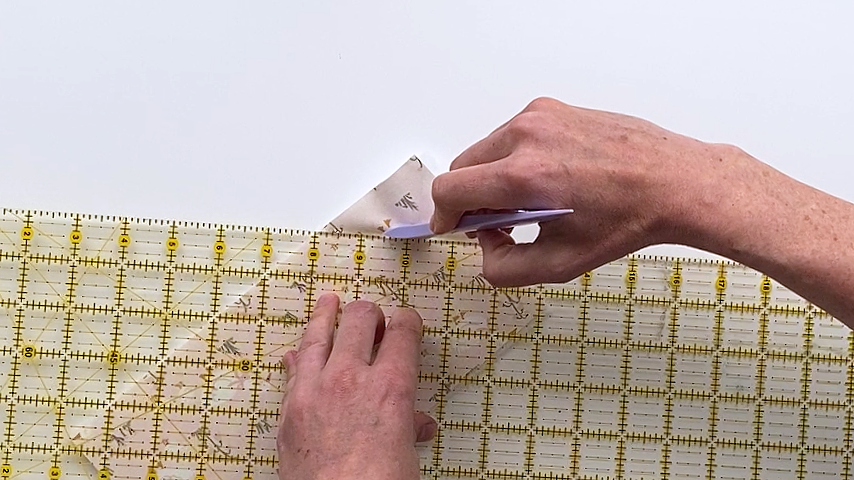
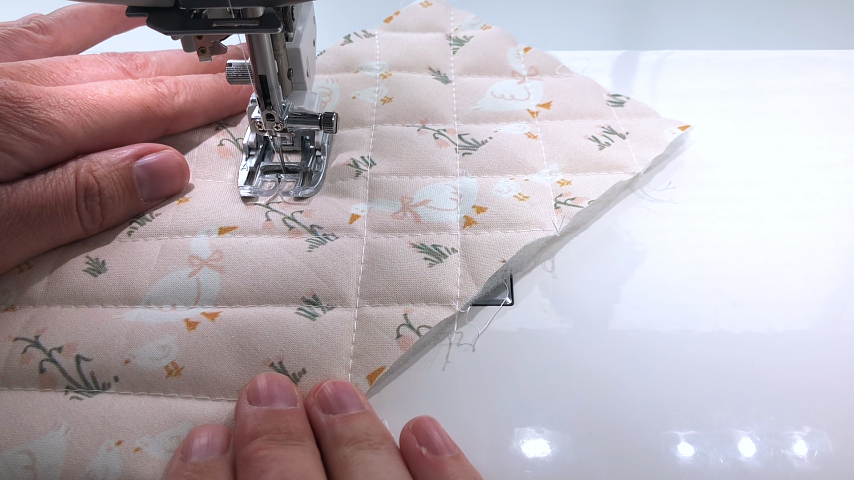
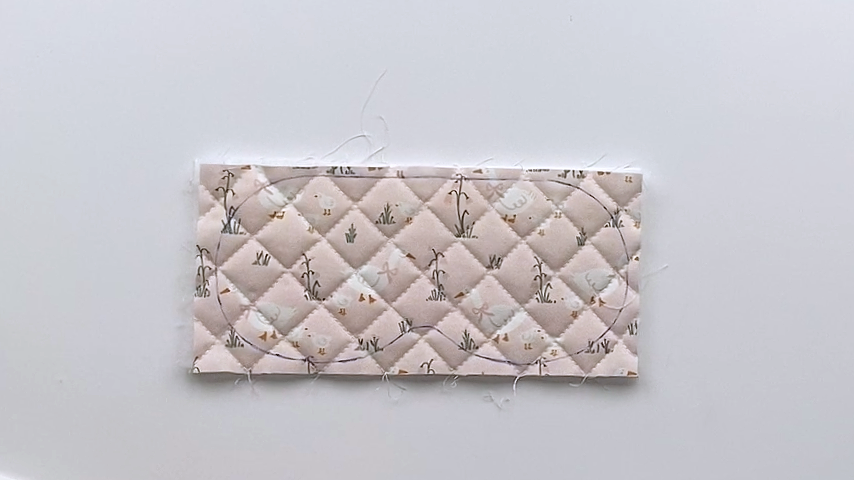
Place your quilted piece of fabric on your lining fabric, wrong sides together.
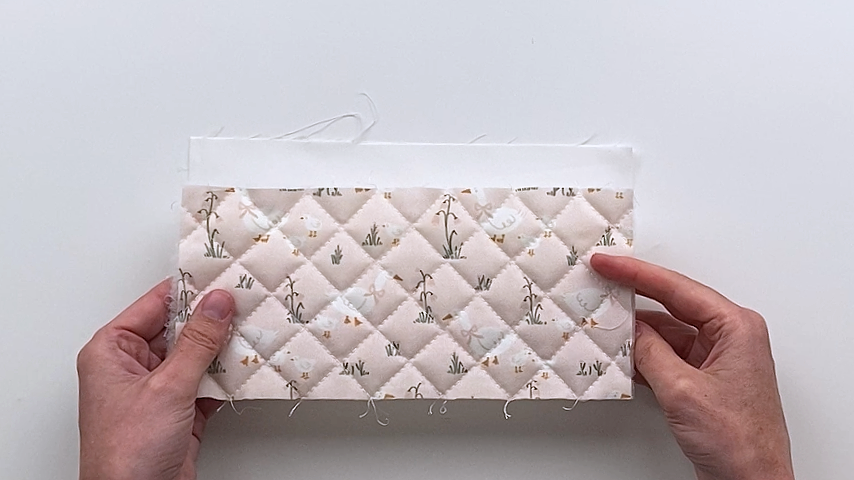
Using a temporary fabric marker, trace your pattern piece onto the quilted fabric, and clip the layers together.
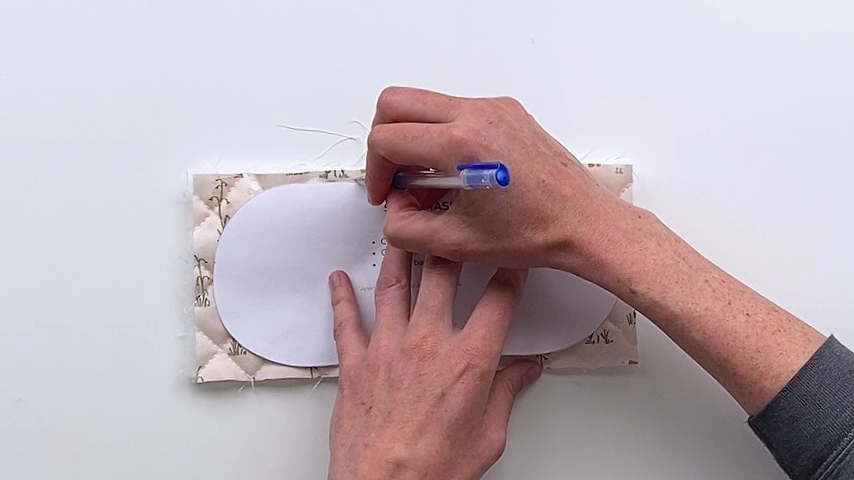
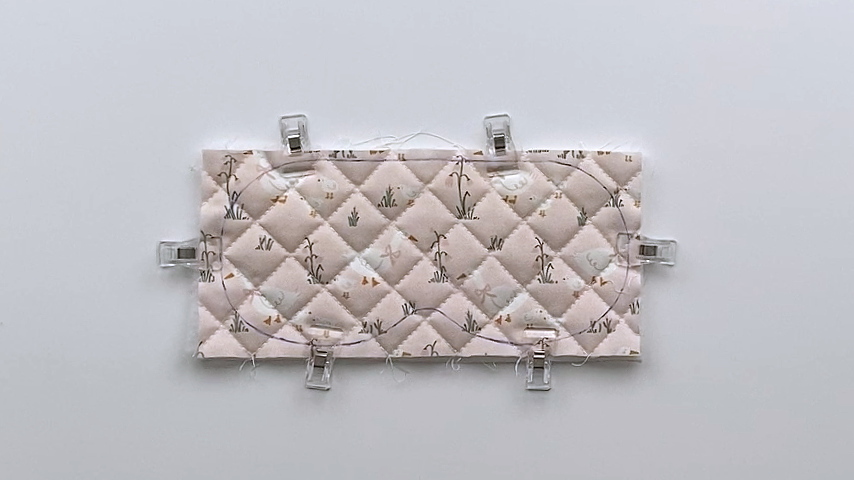
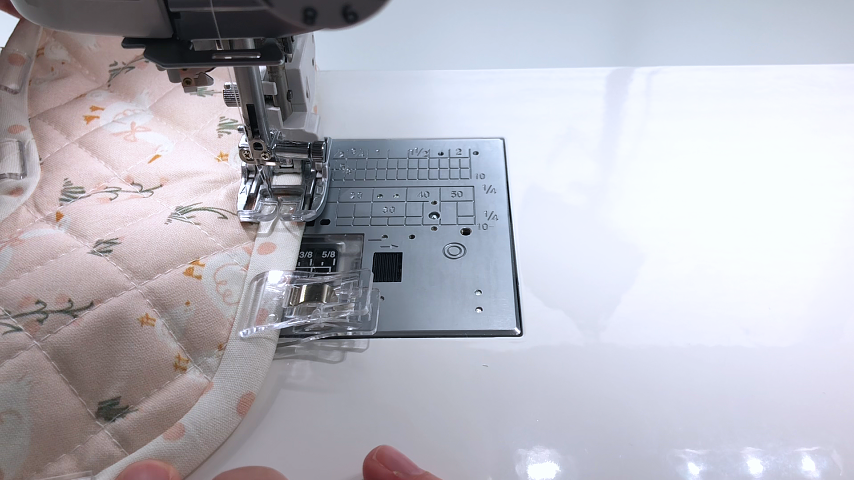
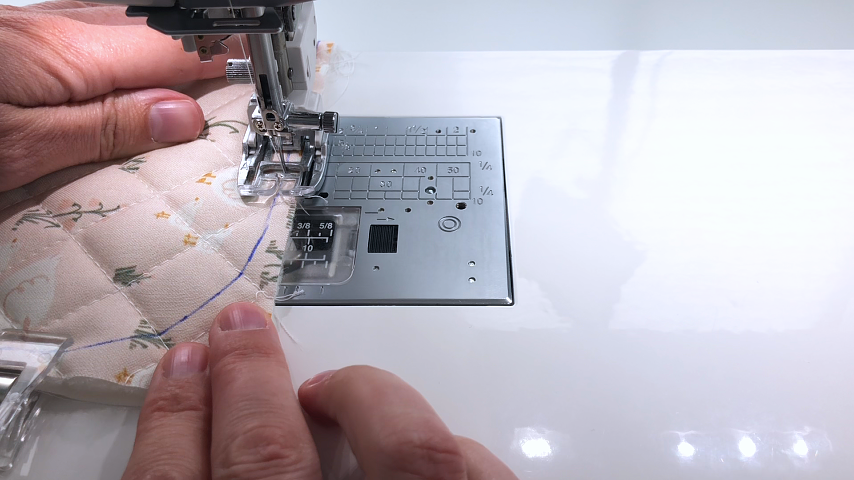
Sew along the line you traced.
Use a shorter stitch length (I set mine to 3mm), as it makes it easier to go around the curves.
Step 4
Cut around the line you just completed sewing, leaving about 1/4” seam allowance.
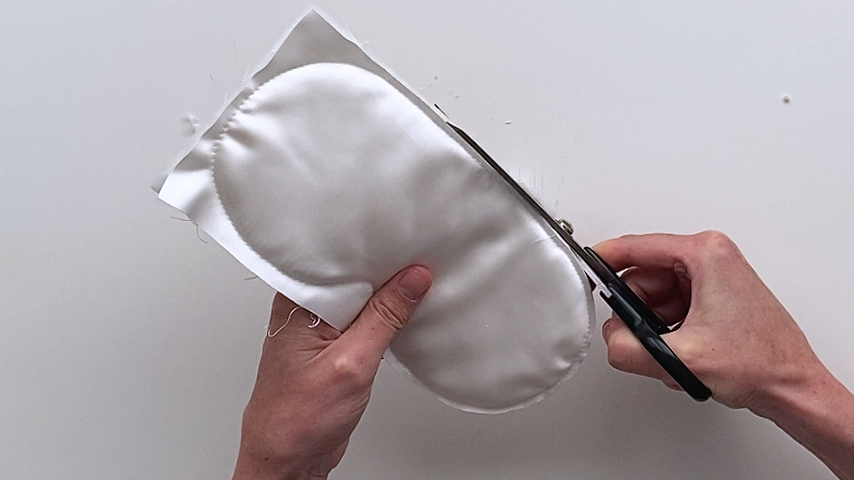
Step 5
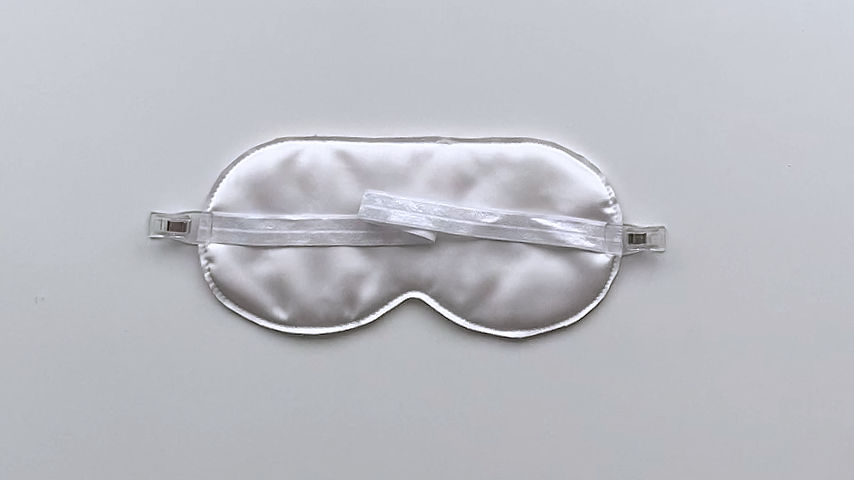
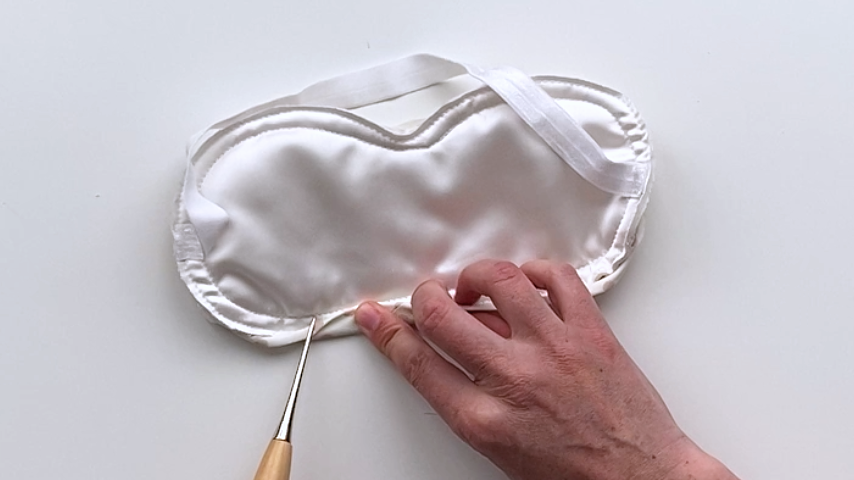
Use a temporary fabric marker to mark two lines for the elastic placement (as indicated on the pattern piece).
Clip the elastic into place, then sew into place.
Step 6
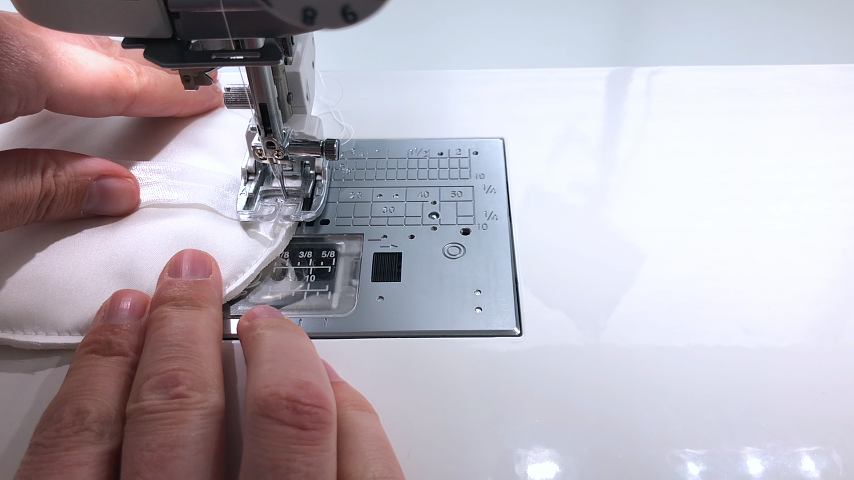
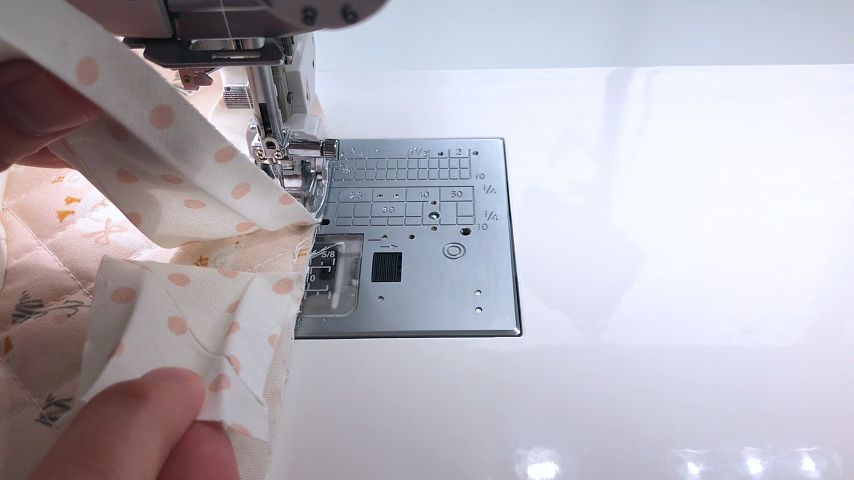
Unfold your bias tape. Mark a line 2” away from one end of the bias tape, then line that point up with the top centre on the outside of your mask.

You’ll start sewing at that 2” mark, in the folded crease.
Don’t stretch the bias tape as you sew, simply guide it into place.
Go slow around the bridge of the nose. I sew to the top of the bridge, then, with my needle down, I lift the presser foot and adjust my bias tape.
Also be mindful of the elastic to ensure you don’t catch it as you sew (aside from the elastic ends).
When you come back to the start of the bias tape, fold the loose 2” towards you, then place the end of the bias tape on top.
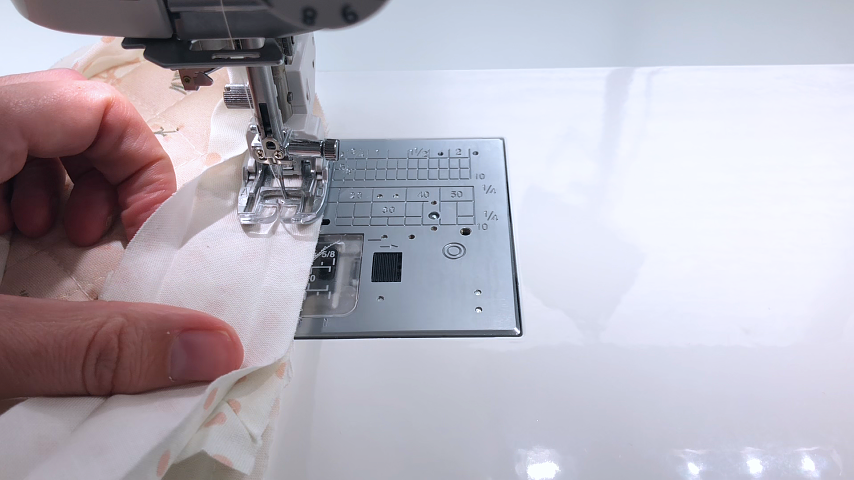
You’ll sew right up to the (folded back) start of your bias tape, backstitching at the end.
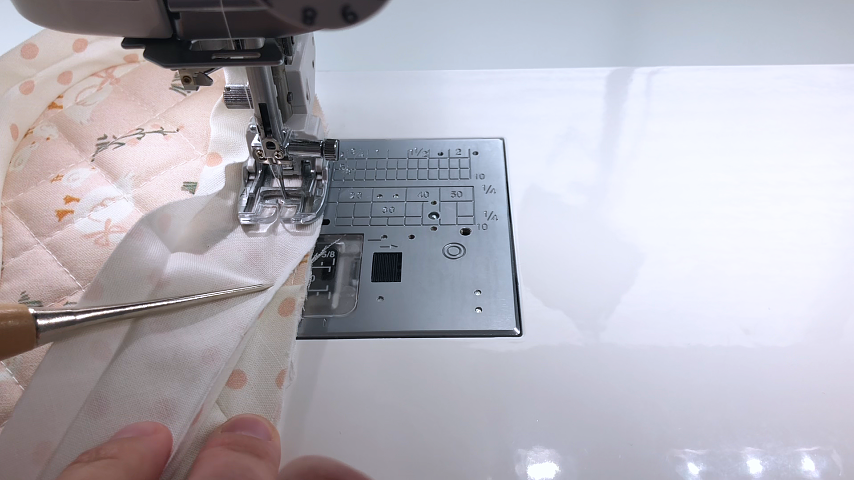
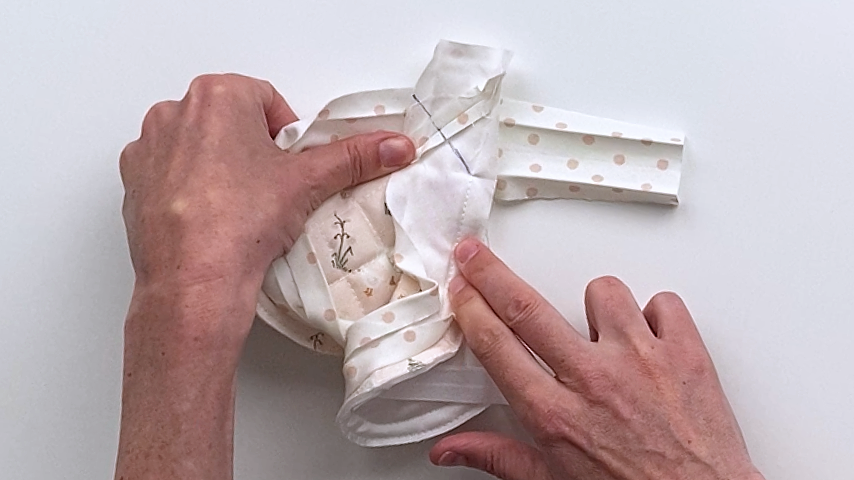
This is how the ends of your bias tape should look:
Unfold the ends of your bias tape fully. Fold the mask at an angle so you can place the start of your bias tape at a 90-degree angle to the end of your bias tape.
(Ignore the bias tape seam…it ended up in an unfortunate place). The blue line is the line you’ll stitch along:
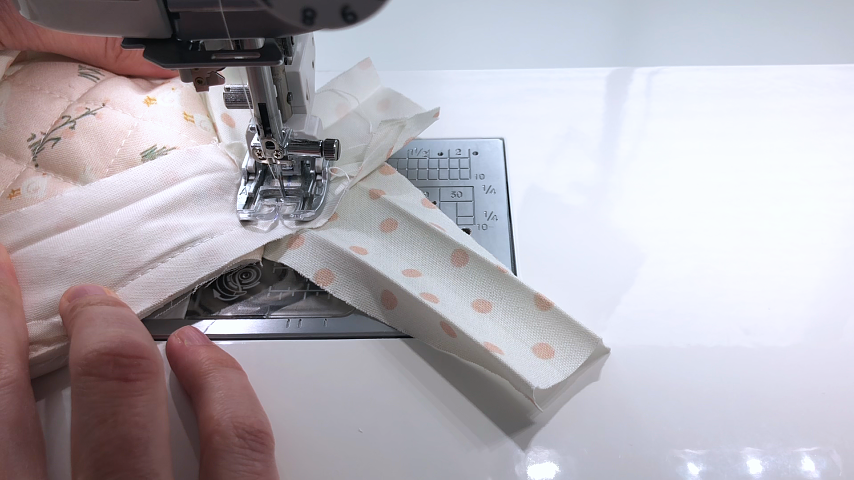
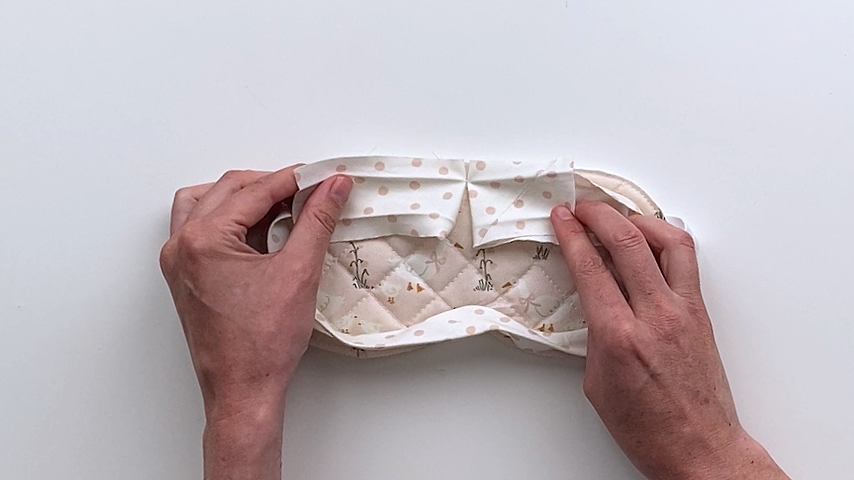
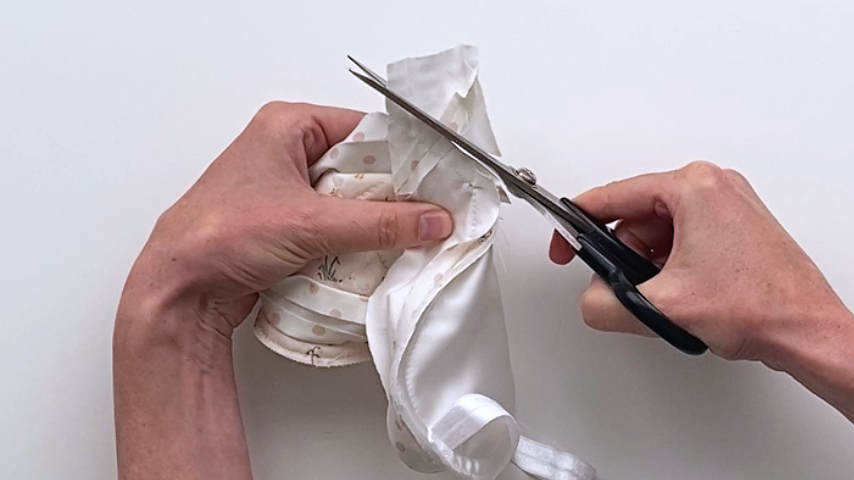
Check to make sure the seam is clean, then trim off the excess bias tape and finger-press the seam allowance open.
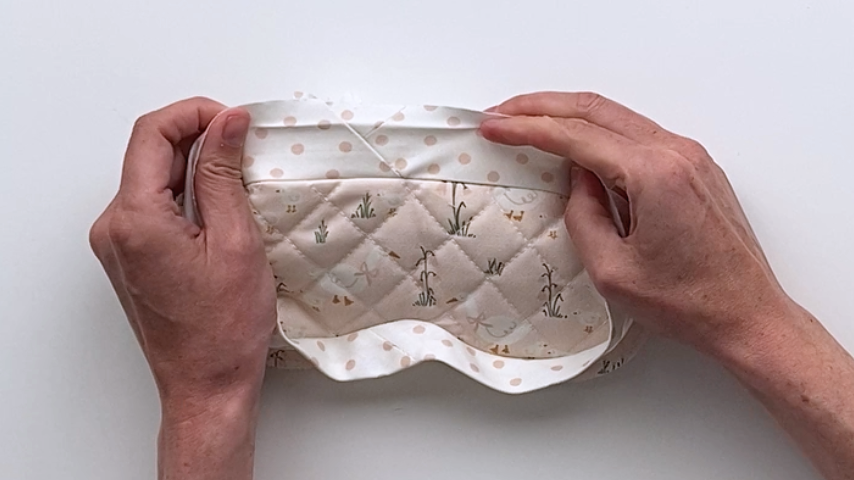
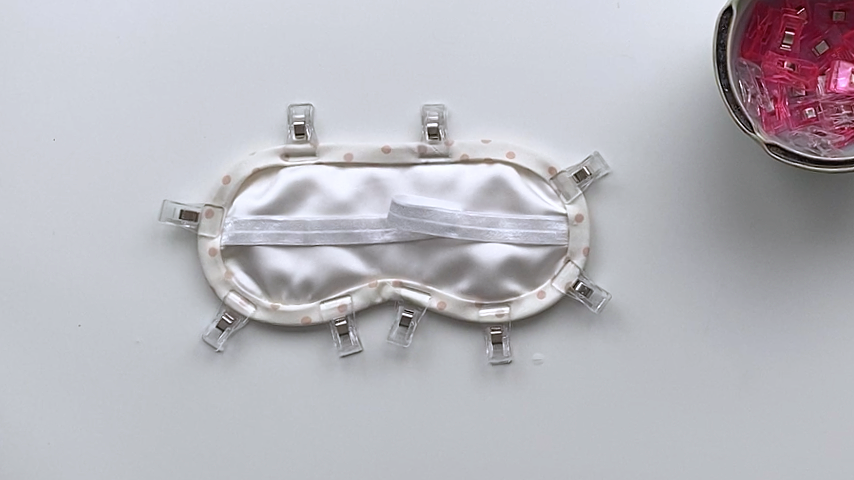
Fold the bias tape to the back side and clip into place, making sure the bias tape is covering the line of stitching.
I also like to run the tip of my iron over the bias tape to help it form around the curves and re-crease the double-fold.
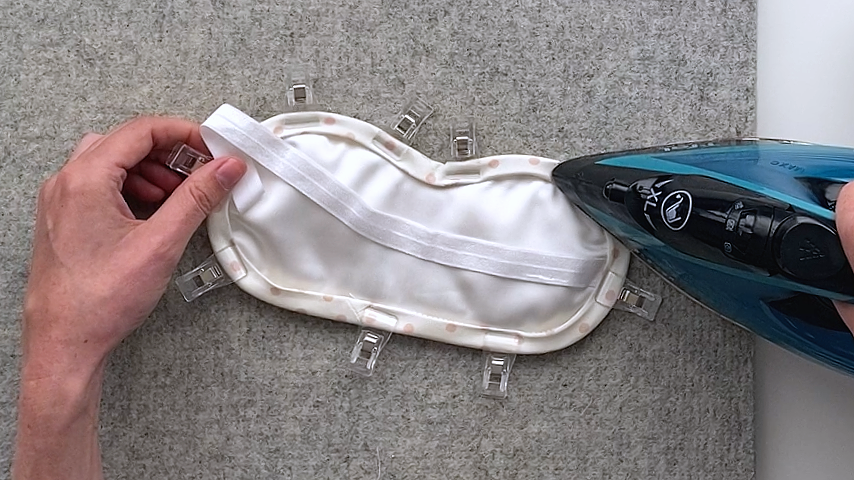
Top-stitch the bias tape from the outside/right side of the mask, about 1/8” in from the inside edge of the bias tape.
As long as you clipped the backside of the bias tape accurately into place (to cover the stitching), you’ll catch the second side of the bias tape as you go.
Be mindful of the elastic to ensure you don’t catch it as you sew (aside from the elastic ends).