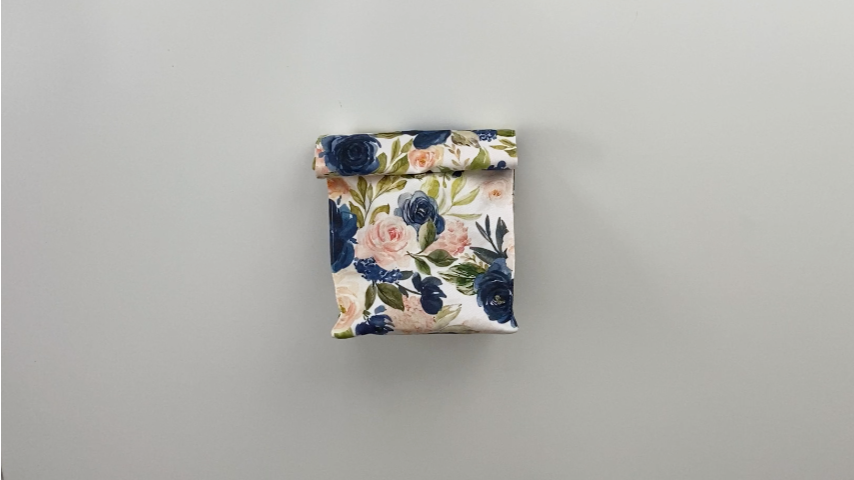
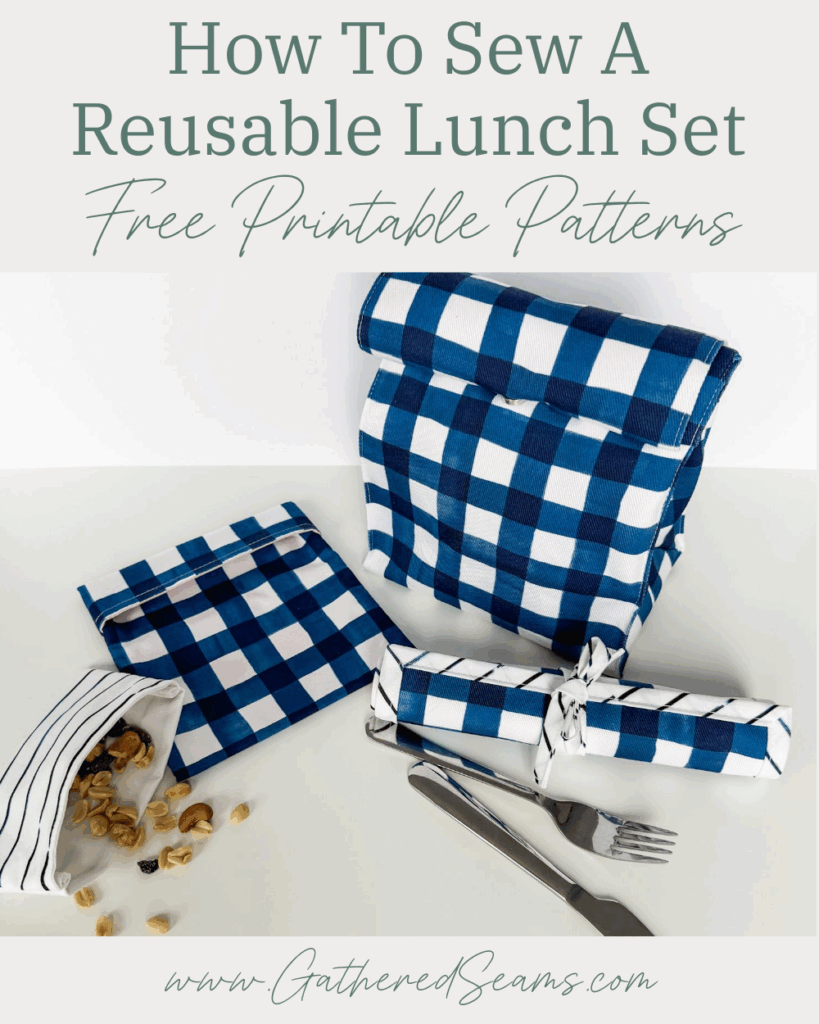
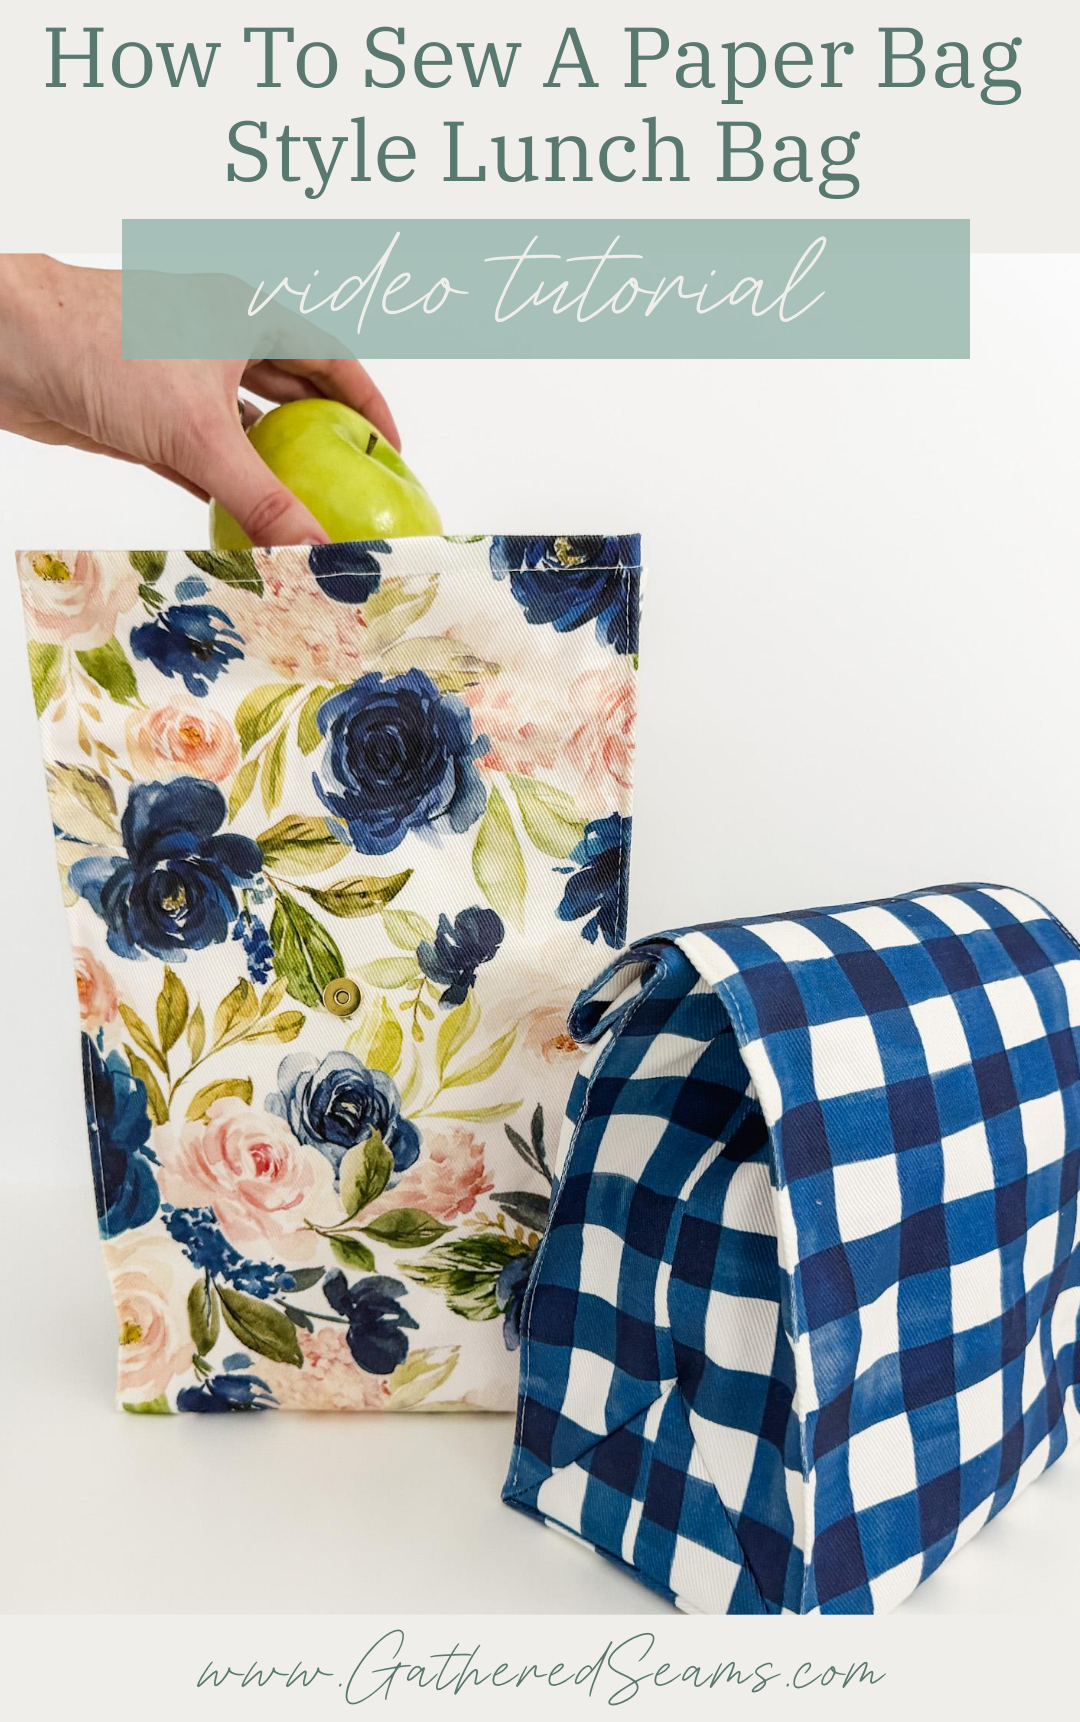
How To Sew A Paper Bag Style Lunch Bag | Free Pattern
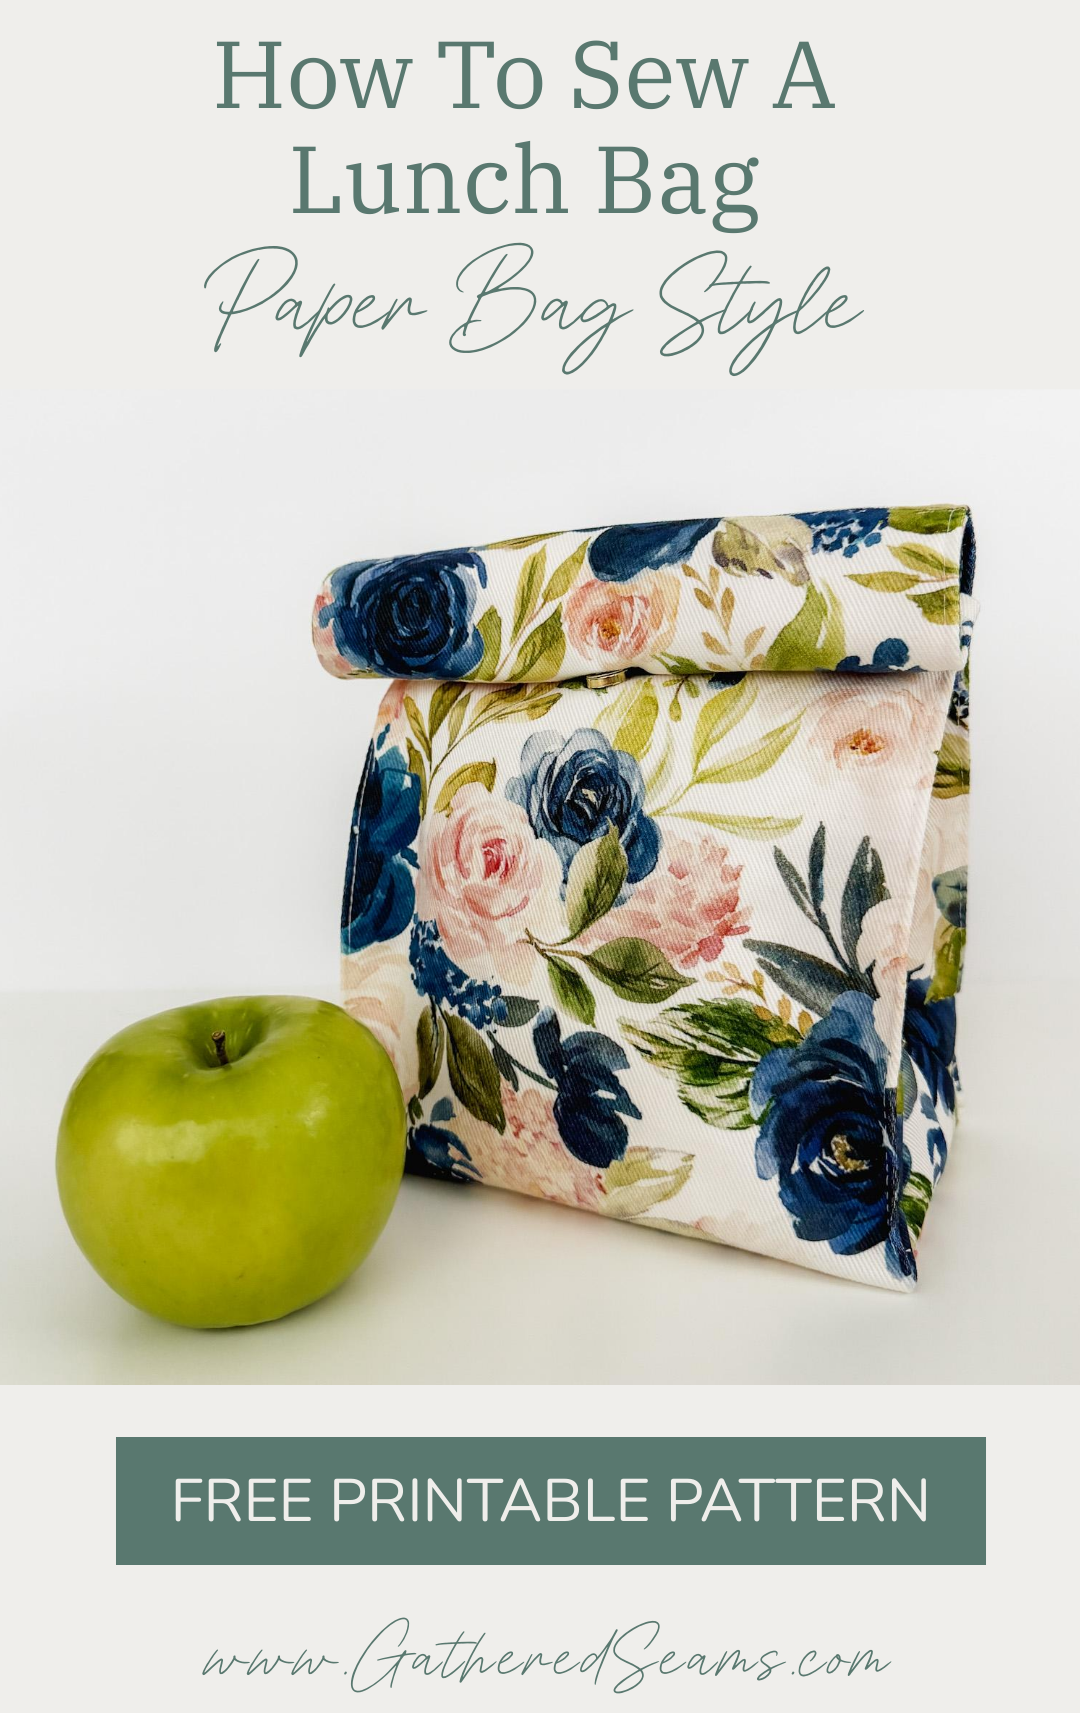
This lunch bag pattern is a brown paper lunch bag style. It’s simple to make and does the trick if you don’t need an insulated lunch bag.
It’s a great reusable item to make and swap out brown paper bags to reduce waste. If you choose the right fabric, it can be thrown in the wash.
Materials
As an Amazon Associate, I earn from qualifying purchases.
- Fabric for the outside of the bag
- Waterproof fabric for the lining
- Thread
- Magnetic snap closures. Alternatively, you could use:
- Velcro (ideal if you’re sewing kids’ lunch bags as the magnetic snap can be a little more finicky)
- A button and elastic loop
- Ribbons/ties
- Fusible interfacing (to add structure behind the magnetic snaps)
Fabric Suggestions
If you want your lunch bag to have a little structure and stand up, choose a heavier fabric such as:
-
-
-
- Dogwood denim (this is what I’ve used in the photographed bags)
- Denim
- Heavyweight cotton twill
- Canvas
- Waxed canvas
- Vinyl
- Etc.
-
-
For the lining, use something that is waterproof and wipeable for durability, easy cleaning, and to help ensure if something spills in the bag, it doesn’t leak through.
-
-
-
- Food-safe PUL (this is what I used, purchased from Fabric Design Treasures)
- Waterproof canvas
- Laminated cotton
- Vinyl
- Etc.
-
-
Tools
- Sewing machine
- Walking foot or Teflon foot (optional but it makes working with PUL/vinyl easier. Alternatively, you can add a piece of Scotch tape to the bottom of your sewing machine foot to help it glide along the fabric)
- Iron
- Clips
- Fabric scissors
- Paper scissors
- Tape
- Seam roller (optional but ideal when working with vinyl since you can’t iron it)
- Seam stick (optional but handy when ironing seams)
- Seam ripper

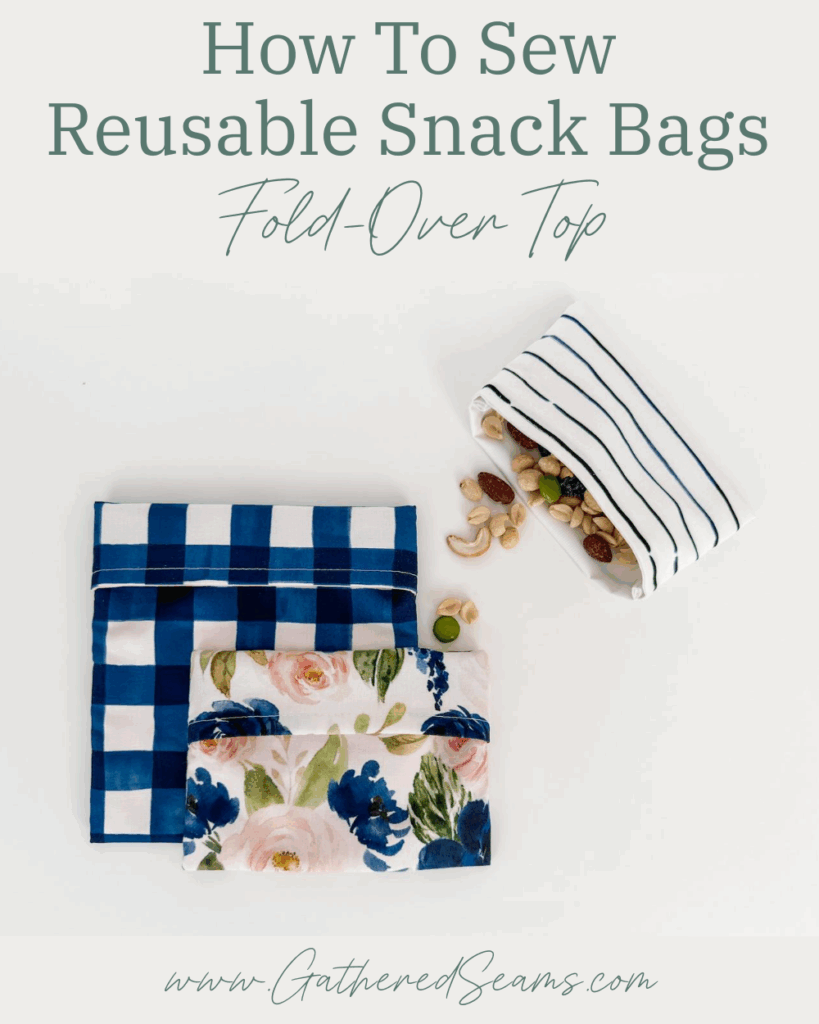
Sewing lunch bags to sell
Most people use a lunch bag, so this is a good item to sell at craft shows or online.
Other items you can add to your product line if you’re selling lunch bags are:
- Reusable sandwich bags
- Reusable snack bags
- Reusable napkins
- Cutlery rolls
- Cutlery bags
- Beeswax wraps
Depending on your target market, you may also branch into other types of products. For example, if you’re making lunch bags for students, you may also sew and sell:
- Backpacks
- Pencil cases
- Notebook covers
- Etc.
As a small handmade business, it’s important that all your products make sense together. Displaying a lunch bag next to hair accessories won’t help your sales. Build a product line full of items customers are likely to use together. That will encourage each customer to buy more than one item and keep them returning to your business.
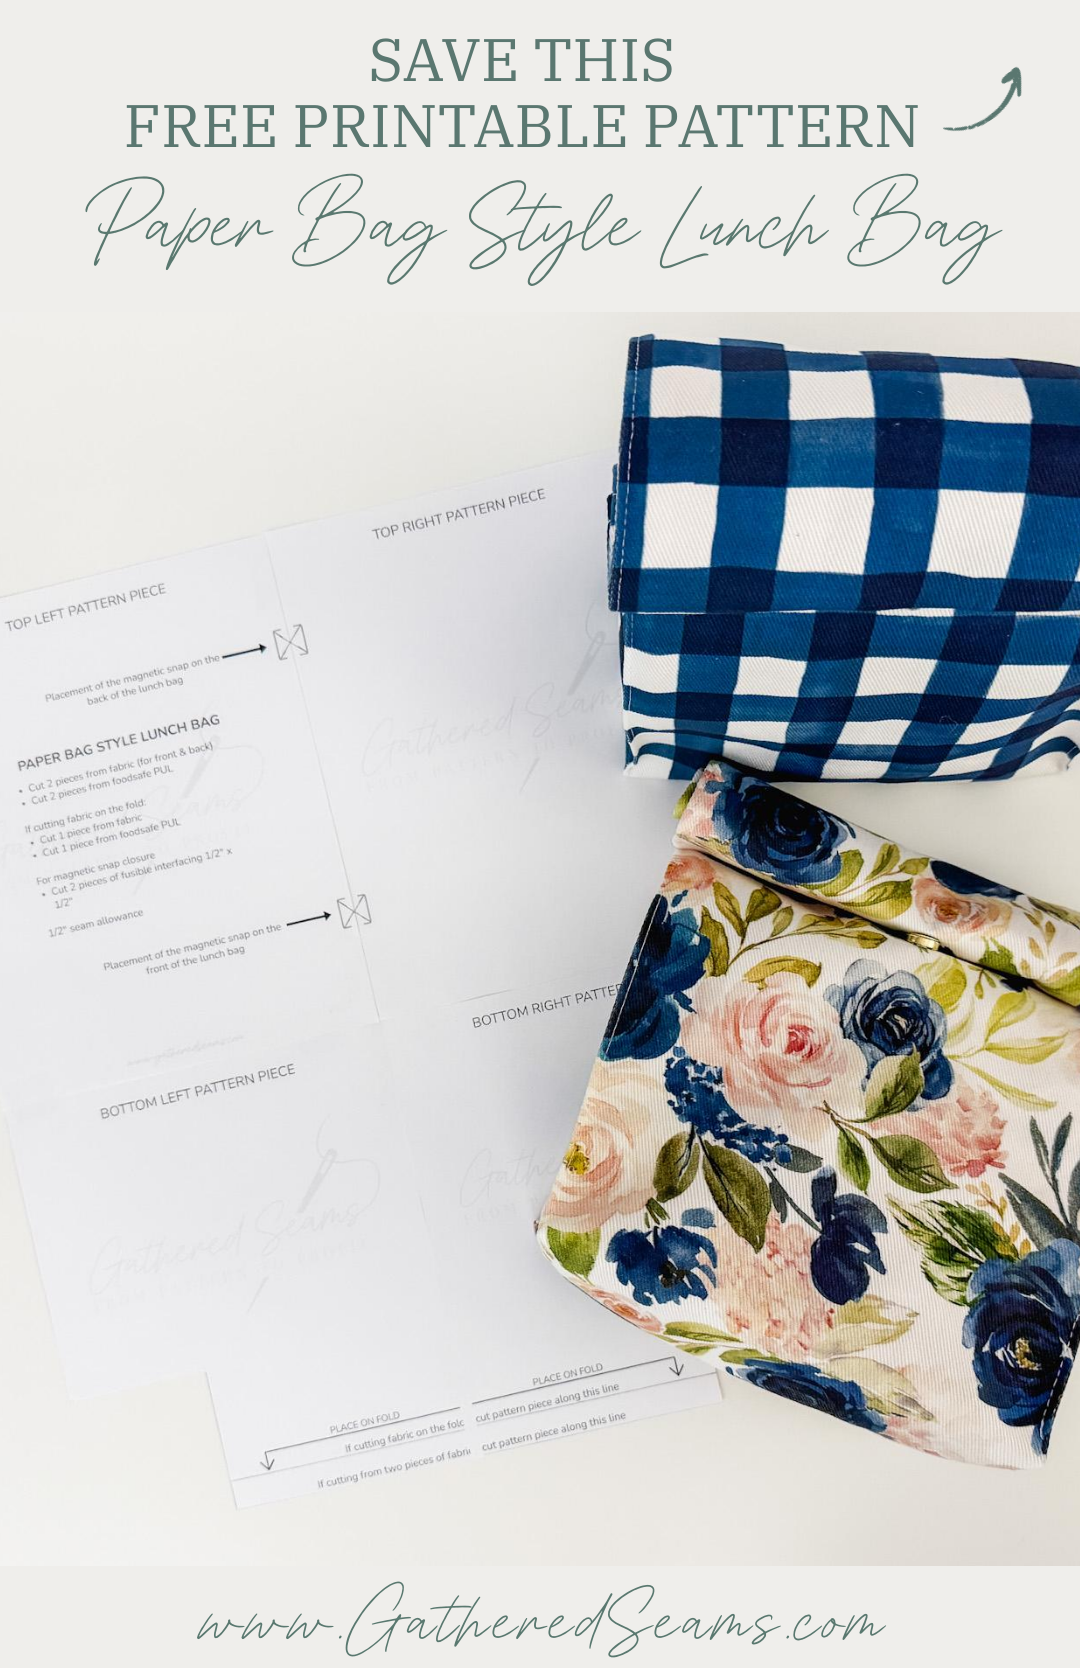
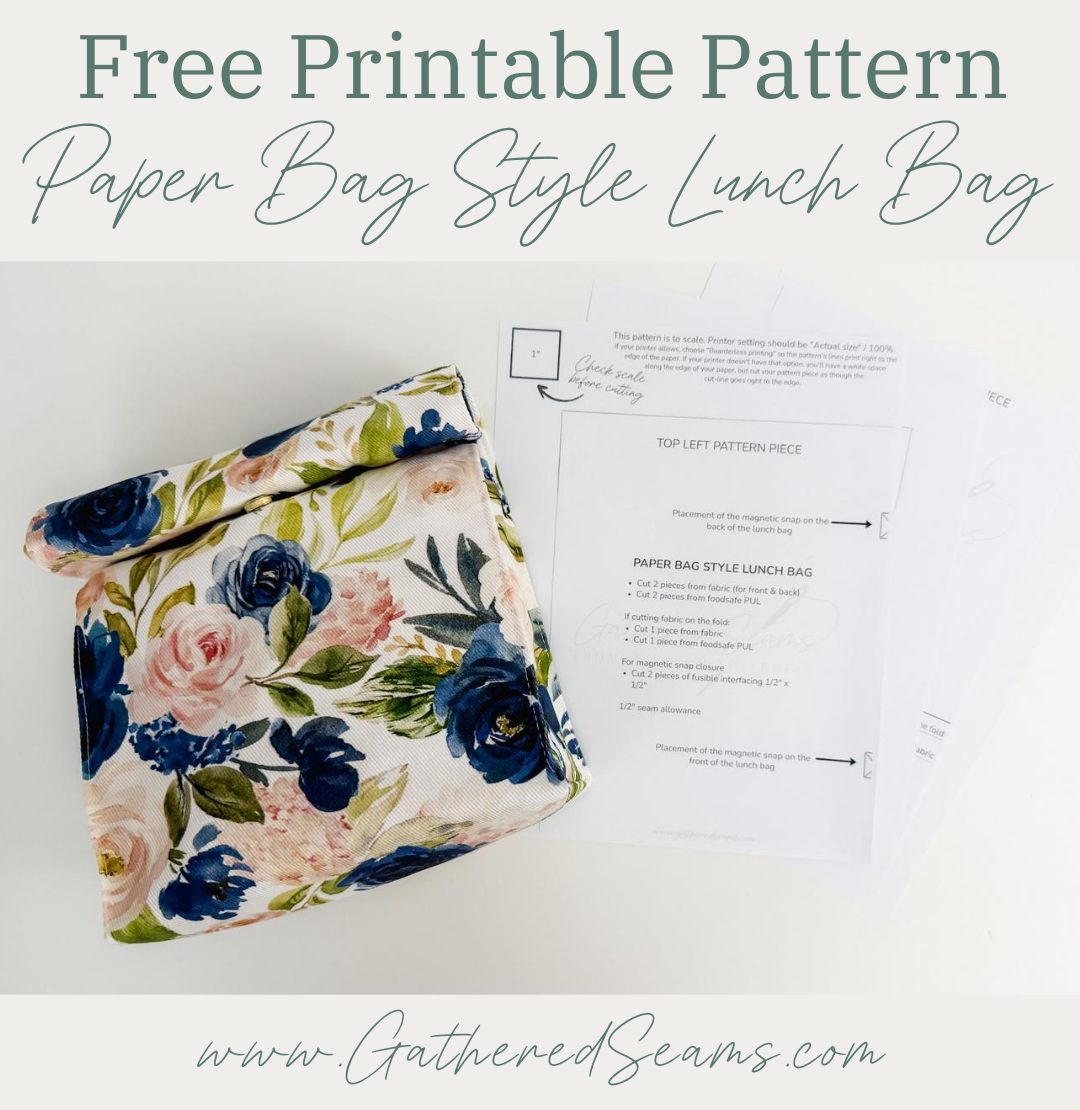
How to sew a paper bag-style lunch bag
Step 1
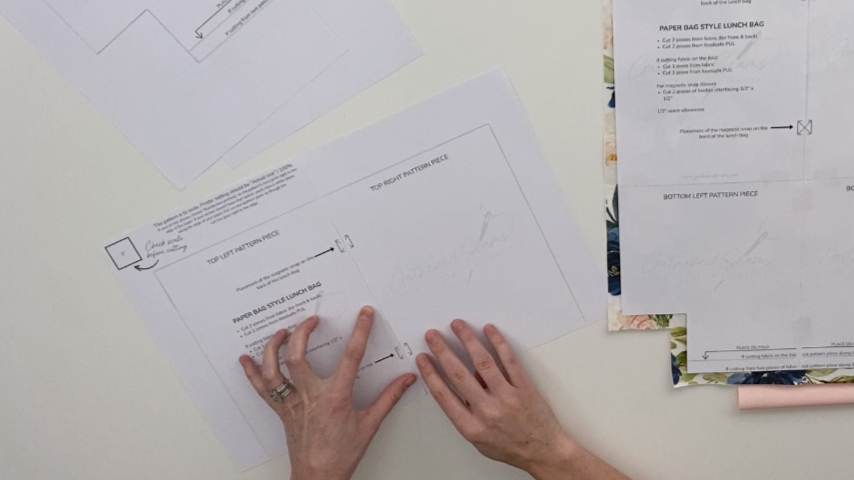
Print your free pattern and cut it out.
I’ve designed this pattern to be fat quarter-friendly, so you’ll see 2 cut lines at the bottom of the pattern.
I cut mine along the outside line and then when I have a larger piece of fabric I’m working with, I simply place the fold line along the fold of the fabric. However, if you only ever plan to cut your fabric on the fold (to save time…which is essential when sewing to sell), then you can cut the bottom of your pattern piece along the inside cut line.
Then you’ll need to tape your pattern pieces together.
Your paper should NOT overlap. Simply butt up the edges of the paper and tape.
Use a pen or pencil to connect the lines if your printer doesn’t have “borderless printing” and the lines of the pattern don’t go right to the edge of the paper.
Step 2
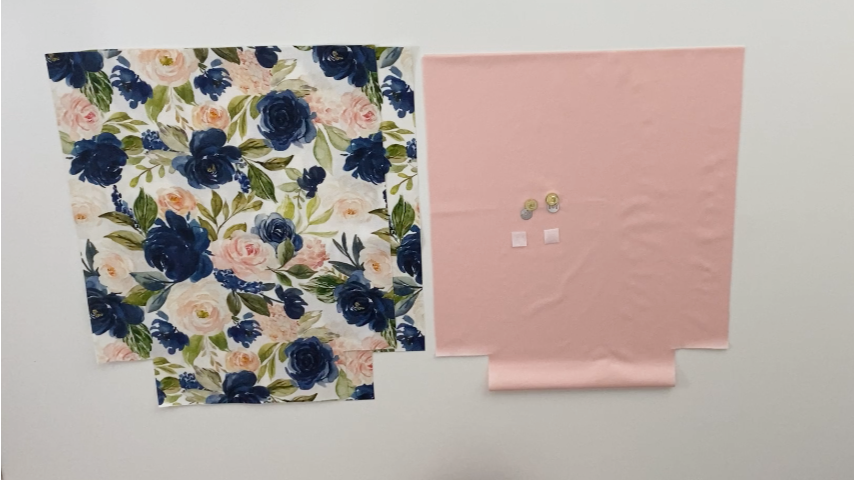
Cut out your fabric pieces.
If you’re cutting your fabric along the fold, you’ll need to cut:
- 1 piece from your outer fabric
- 1 piece from your lining fabric
- 1 squares that are 1/2″ x 1/2″ in fusible interfacing fabric
This pattern uses a 1/2″ seam allowance.
Step 3
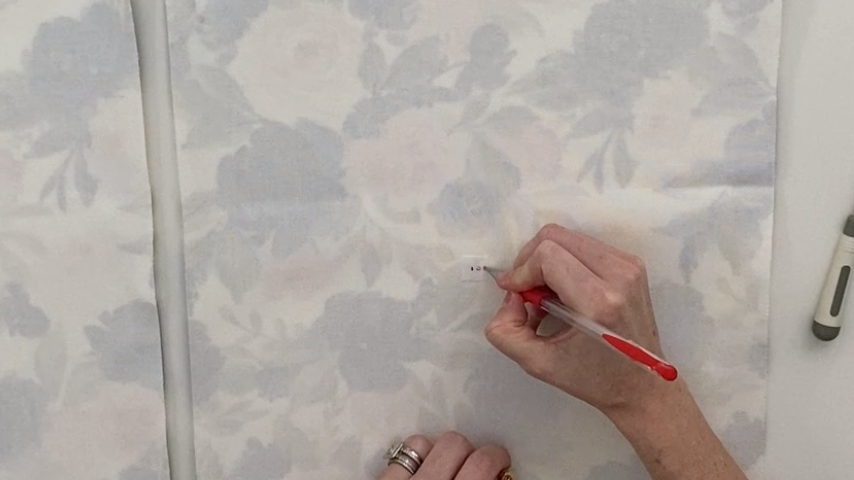
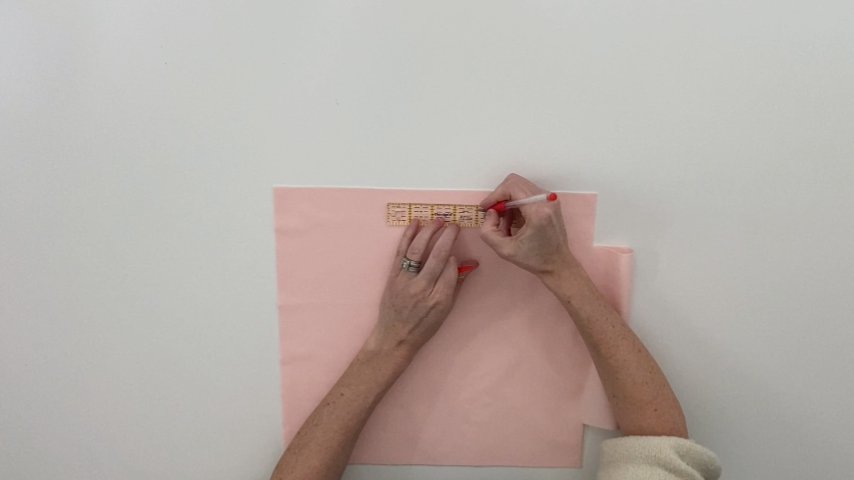
If using a magnetic snap closure, place your outer fabric piece(s) right side up and then place the pattern on top, lining up all the edges.
Use a pin to poke through the center of the magnetic snap placement marking. Then, with the pin still in place, flip the fabric and pattern over and use a temporary fabric pen to mark where the center of the magnetic snap pieces will go on both the front and back of your lunch bag.
*Please note: the magnetic snaps won’t appear as they do on the pattern (one below the other): one side of the snap will go on the back of the lunch bag and the other on the front of the lunch bag.
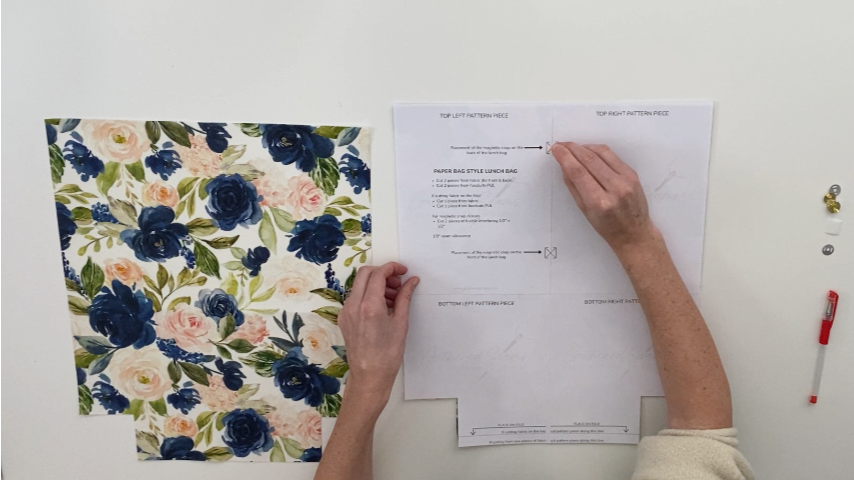
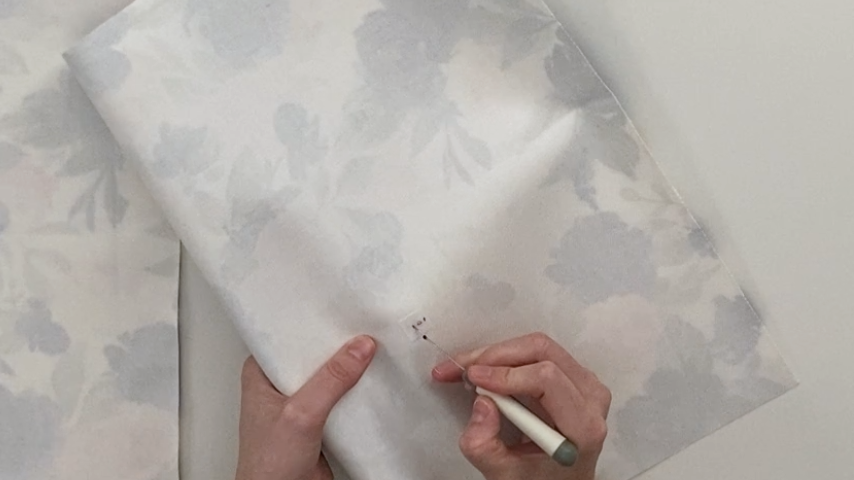
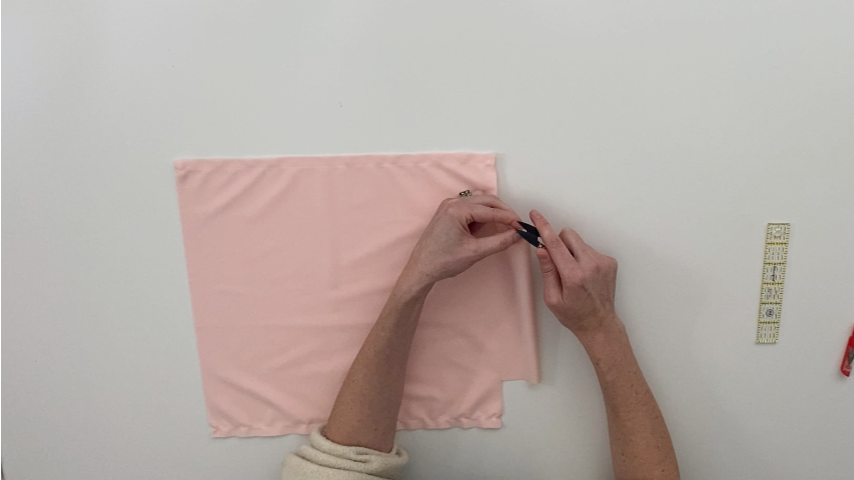
Center your 1/2″ squares of fusible over the markings and iron into place.
Repeat that step again to mark the center of your magnetic snap on top of the interfacing to be sure your placement is accurate, and they line up once the bag is finished.
Then mark two lines where the prongs of the magnetic snap will go through the fabric and interfacing.
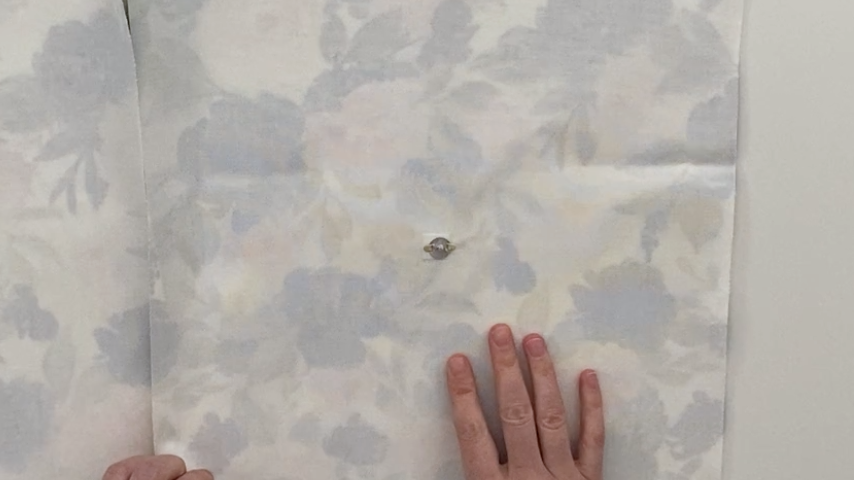
Use a seam ripper to poke through the fabric at the start of the line and rip small holes for the prongs to fit through (don’t make them too big).
Press the prongs through the holes, add the washer, then bend the prongs out or in (I prefer to bend them out).
Step 4
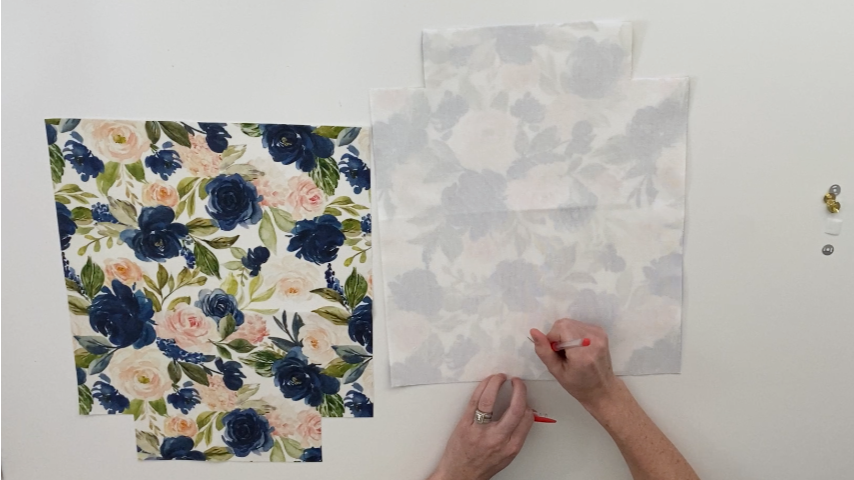
Place your two fabric pieces right sides together and sew along the sides and bottom, using a 1/2″ seam allowance.
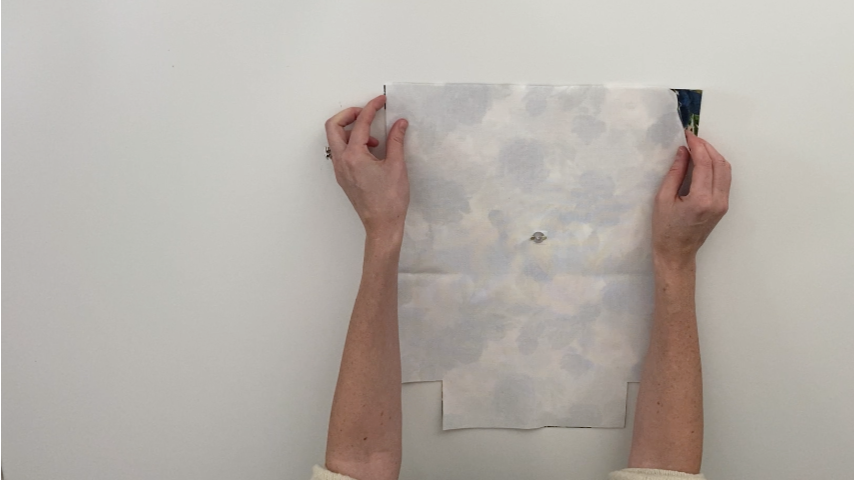
Repeat this step for your lining, but leave a 4″ opening along one edge so you can turn the bag right side out once done.
If using PUL or laminated cotton, be sure the shiny/slippery sides are together (those are your “right” sides that will be wipeable).
For the outer fabric only, press your seams open.
You can use a seam roller to press seams on plastic fabric that can’t take heat.

Step 5
Line up the bottom seam and the side seam and sew along the line to create your corner. Repeat on the other side.
If you cut your fabric on the fold, simply mark the center of your bottom and line your side seam up with that.
Repeat this step for your lining fabric as well.
Step 6
This step is only necessary for the outer fabric.
Along the side seam, mark a line that is 2.5″ up from the bottom line of stitching, on the wrong side of the fabric.
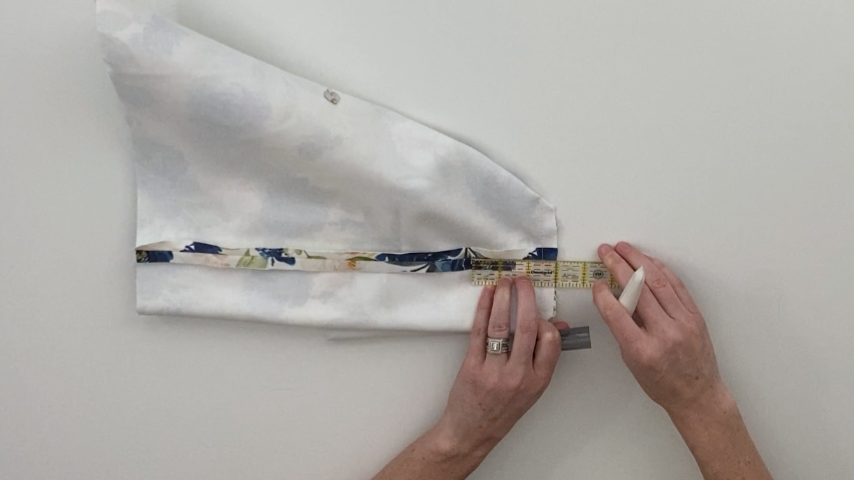
Fold your fabric from the bottom corner of one side, up to the marking and clip into place.
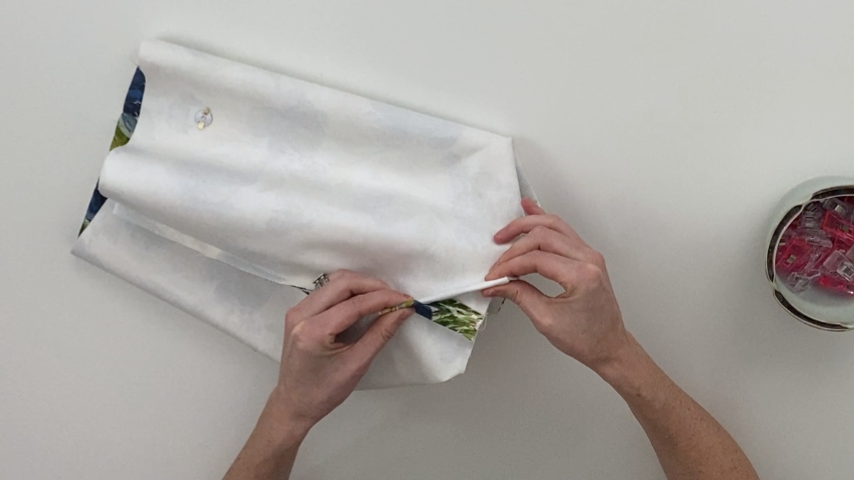
Repeat this on the other corner.

Then repeat for the other side of the bag.
You’ll sew along this fold about 1/16″ – 1/8″ away from the edge of the fold, backstitching at the start and end.

Repeat to complete all four corners.
Step 7
Turn the bag right side out, but leave the lining with the right side facing in.
Place your bag inside the lining, so right sides are together, and line up the top edge.
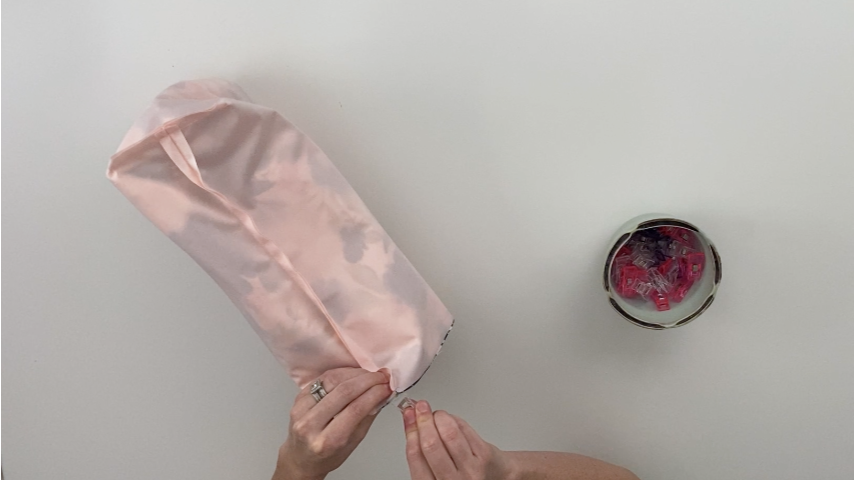
Sew around the top of the bag using a 1/2″ seam allowance.
Use the opening in the lining to turn the bag right side out, then top-stitch that opening closed.
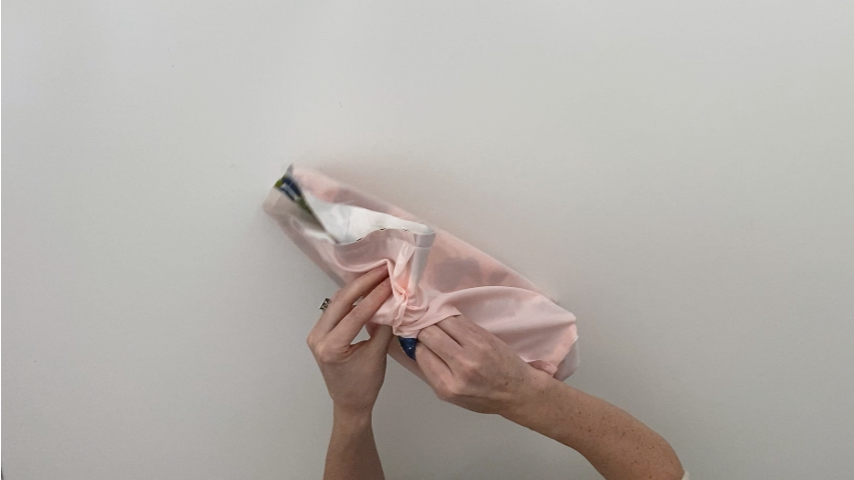
Step 8
Use a seam roller to press the top seam of your lunch bag. If you don’t have a seam roller, you may be able to use your iron on a low setting (and a press cloth), quickly ironing on the outer fabric only, so you don’t melt the lining fabric.
Top-stitch around the top of the lunch bag.

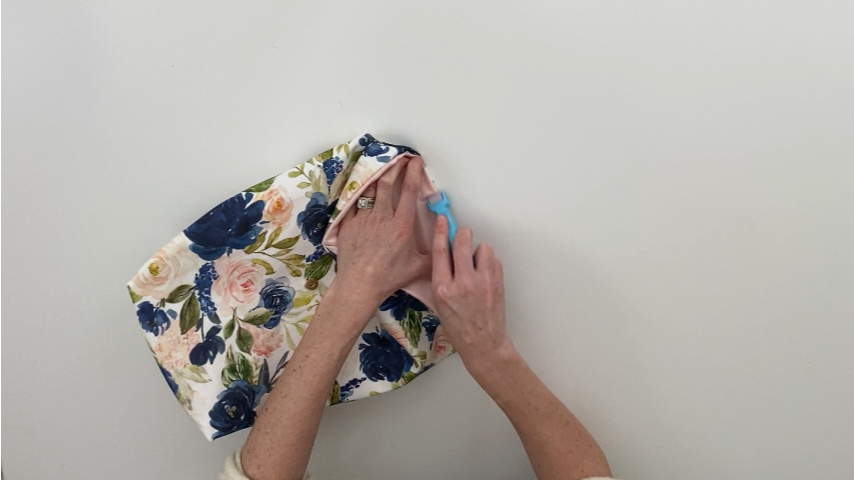
Step 9
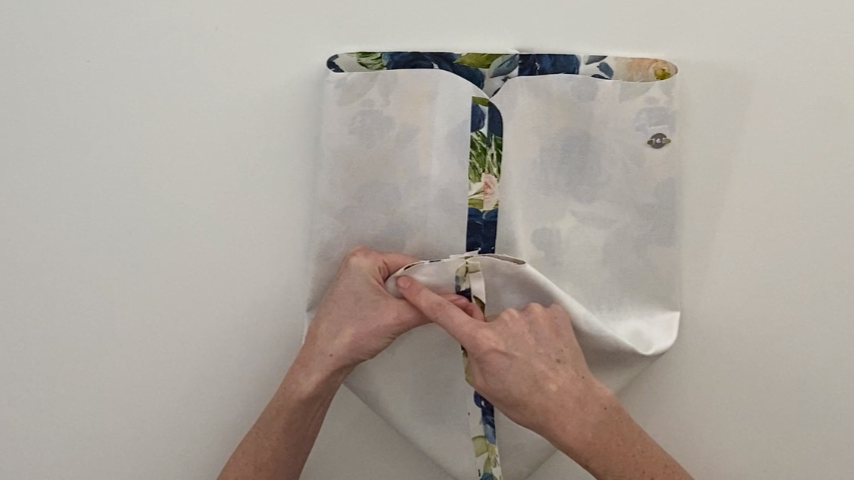
Stand your lunch bag up and use your finger to press the corner of the lining tight into the corner of the outer layer of the lunch bag.
Pinch the two fabrics together as you pull your finger out, then clip the corner into place, so the clip is holding the lining tight against the outer fabric.
Fold your fabric in a line straight up from the corner and ensure your lining is tight against the outer fabric, and clip it into place.
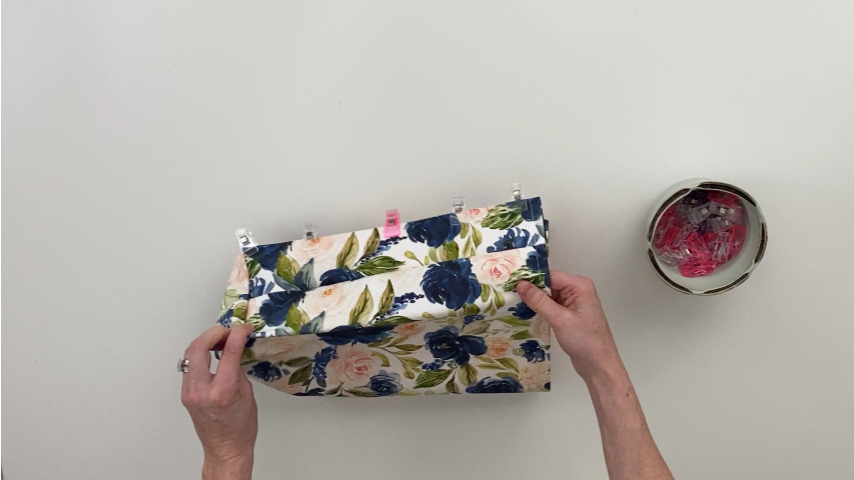
Repeat this to complete all four edges.
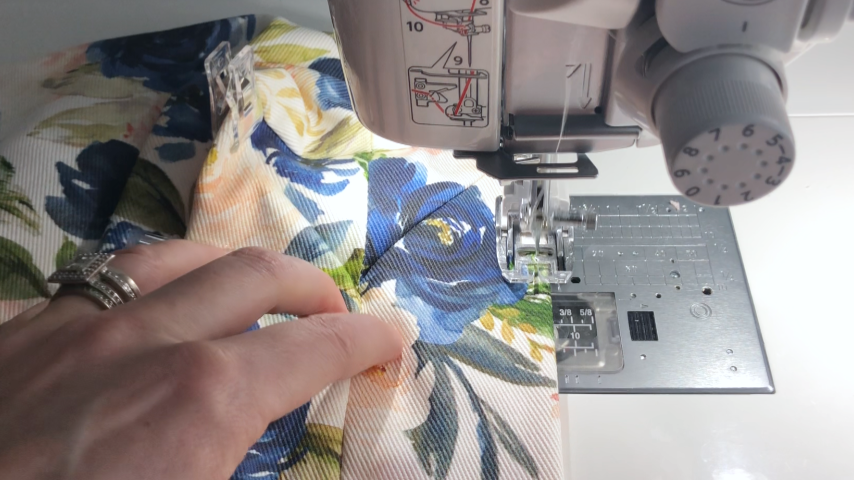
Step 10
Start sewing at the bottom corner about 1/8″ – 1/16″ in from the folded edge, and sew up to the top of the bag, backstitching at the start and end.
This line of stitching should catch your lining too.
Repeat to complete all four sides.
Step 11
Now that you’ve completed sewing your lunch bag, fold it flat to get it into the right shape.
You may want to use your seam roller to press the top of the inside fold.
While it’s folded flat, roll the top down and snap it into place.
As the bag is worked in a little bit (from being folded and rolled), it will be easier to line up the snaps.